5 Best Jewellery Shop in Bikaner

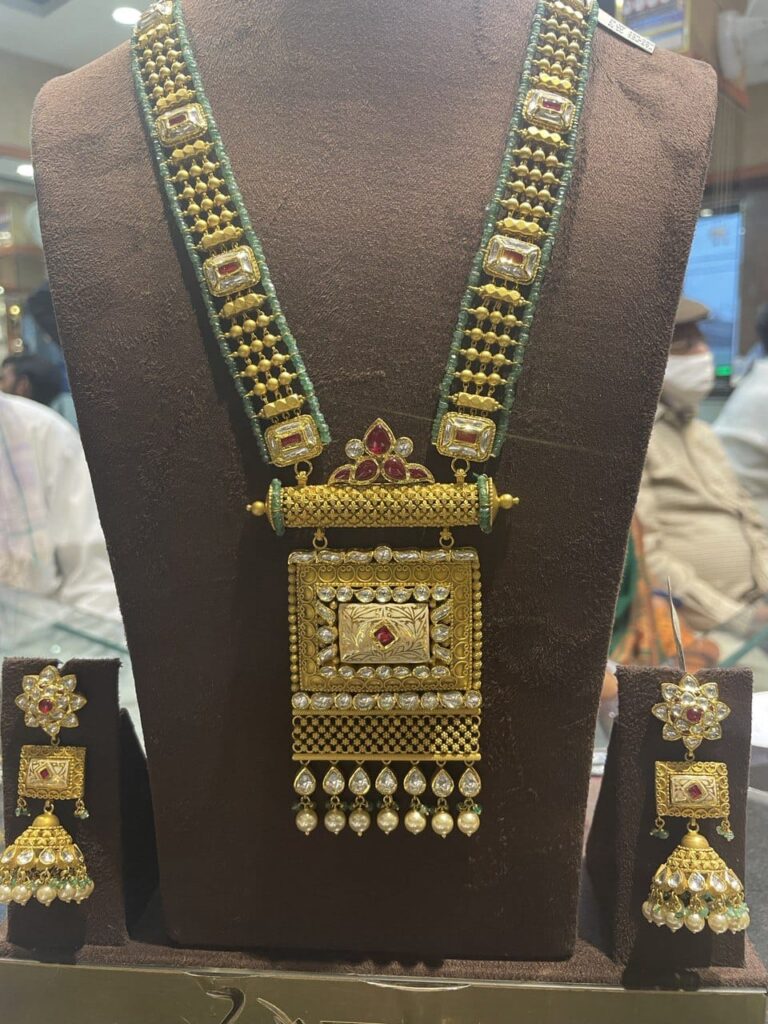
In this article we are going to discuss about 5 Best Jewellery Shop in Bikaner. Bikaner, a city in the heart of Rajasthan, is not just known for its rich cultural heritage and majestic palaces but also for its vibrant jewelry scene. The jewelry culture in Bikaner has a history as intricate as the ornaments themselves. From traditional Kundan to modern designs, Bikaner’s jewelry shops offer a diverse range of exquisite pieces that cater to various tastes and preferences.

5 Best Jewellery Shop in Bikaner

In this article, we’ll explore the five best jewelry shops in Bikaner, each offering a unique blend of tradition and contemporary elegance.
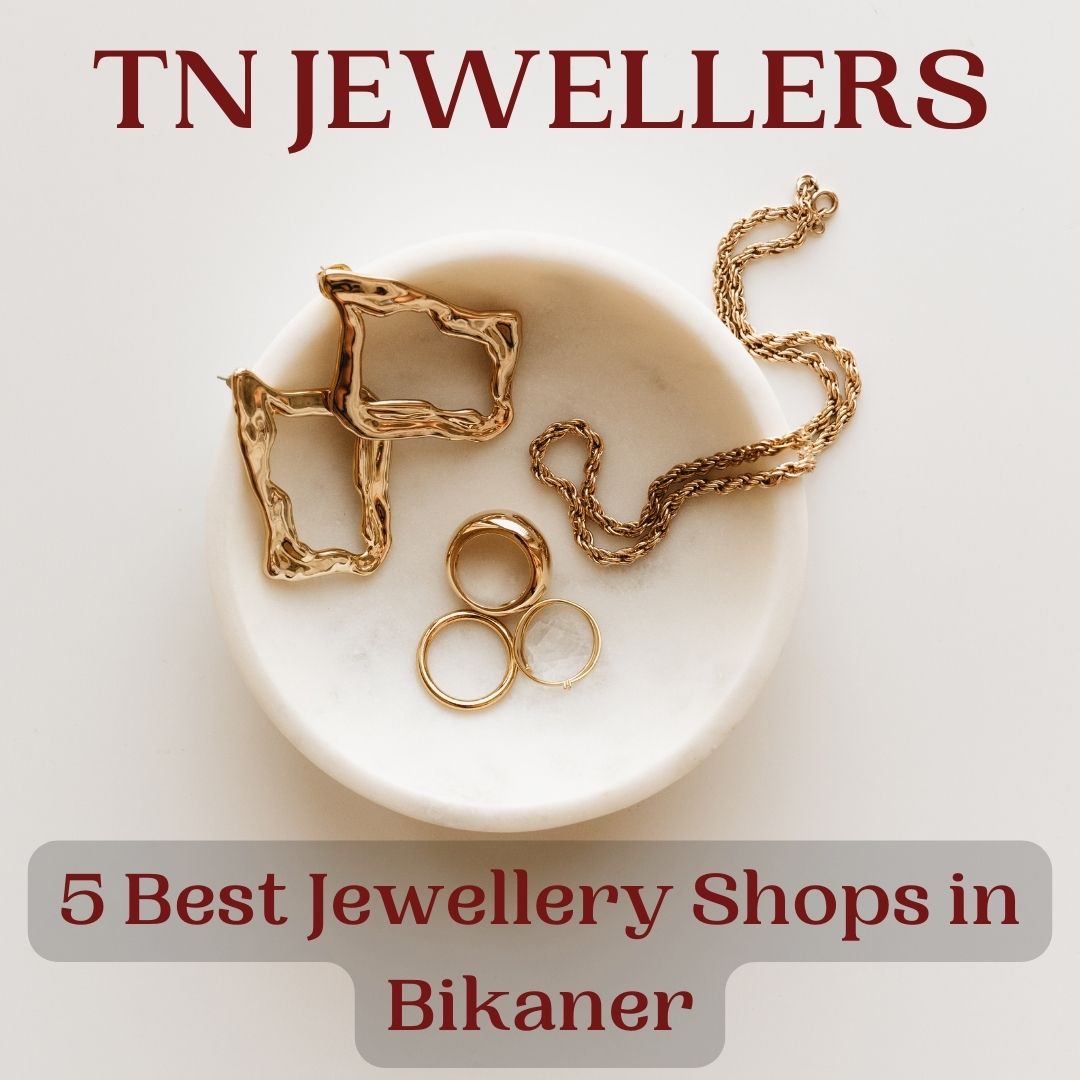
1. T N Jewellers

T N Jewellers is a renowned name in the world of jewelry in Bikaner. This family-owned business has been serving customers for generations, and their commitment to quality and craftsmanship is unmatched. The shop boasts an impressive collection of traditional Rajasthani jewelry, including Kundan, Meenakari, and Polki sets.

What sets T N Jewellers apart is their dedication to preserving the heritage of Rajasthani jewelry making. They employ skilled artisans who meticulously craft each piece by hand, ensuring the authenticity and intricate details of their creations. Whether you’re looking for bridal jewelry or something for a special occasion, this shop offers an extensive range to choose from.

Jewellery Shop in Bikaner

The shop’s welcoming atmosphere and knowledgeable staff make the shopping experience a delightful journey into the world of Rajasthan’s jewelry traditions. They also provide customization services, allowing you to create bespoke pieces that reflect your unique style.

Address: Babuji Plaza, Shop no. 230A-231, Old Jail Rd, Bikaner, Rajasthan 334001

Mobile No: +91-8003555550

Visit: Best Jewellery Showroom in Bikaner

2. Jagadamba Jewellers

Jagadamba Jewellers is another well-established jewelry store in Bikaner, known for its exquisite craftsmanship and a wide array of jewelry designs. From traditional Kundan and Meenakari to contemporary diamond and gold pieces, this shop caters to all tastes and budgets.

One of the highlights of shopping at Jagadamba Jewellers is their dedication to using high-quality materials. They source the finest gemstones, diamonds, and metals to create jewelry that not only looks stunning but also stands the test of time. Whether you’re purchasing an engagement ring, a pair of elegant earrings, or a statement necklace, you can be assured of the quality of your investment.

In addition to their jewelry offerings, Jagadamba Jewellers provides expert advice on gemstones and their properties, making it an ideal place to choose gemstone jewelry with confidence.

3. G.R. Jewellers

G.R. Jewellers, located in the bustling Rani Bazaar, is a jewelry store that beautifully blends tradition with contemporary design. The shop is known for its unique and eye-catching pieces that capture the essence of Rajasthan’s rich culture and heritage.

What sets G.R. Jewellers apart is their innovative approach to jewelry making. They are known for incorporating traditional Rajasthani techniques into modern designs, creating pieces that are both timeless and fashionable. Whether you’re looking for a classic Polki necklace or a fusion-inspired bracelet, this shop has something to offer.

G.R. Jewellers also takes pride in its customer service, ensuring that each customer feels valued and well-informed during their shopping experience. The staff is happy to explain the history and significance of different jewelry styles, making it a learning experience as well as a shopping adventure.

4. Ridhi Sidhi Vinayak Jewellers

Ridhi Sidhi Vinayak Jewellers is a hidden gem in Bikaner, known for its extensive collection of traditional Rajasthani jewelry. This shop is a favorite among locals and tourists alike for its authentic Kundan and Meenakari pieces, which are a testament to the city’s rich jewelry heritage.

What makes Ridhi Sidhi Vinayak Jewellers stand out is their commitment to preserving the traditional art of jewelry making. They work closely with skilled artisans who have honed their craft over generations, resulting in exquisite pieces that reflect the true essence of Rajasthan. From intricate necklaces to stunning bangles, their jewelry is a work of art.

Bikaner Jewellery shop

Moreover, Ridhi Sidhi Vinayak Jewellers is committed to providing transparent pricing and ensuring that customers receive genuine gemstones and metals in their purchases. This dedication to authenticity and quality has earned them a loyal customer base.

5. Shubham Jewellers

Shubham Jewellers is a contemporary jewelry store in Bikaner that offers a wide range of modern and stylish designs. If you’re looking for elegant diamond jewelry or trendy gold pieces, this is the place to visit. Shubham Jewellers caters to the evolving tastes of the younger generation while maintaining the core values of quality and trust.

One of the standout features of Shubham Jewellers is their emphasis on innovation. They are constantly introducing new designs and styles that are in tune with the latest fashion trends. Whether you’re shopping for an engagement ring, a birthday gift, or just something to treat yourself, you’ll find plenty of options here.

Read Also: 5 Best Tiles Shops in Bikaner

The store also provides customization services, allowing you to create personalized jewelry that reflects your individual style. The friendly and knowledgeable staff are always ready to assist you in making the perfect choice.

Conclusion

Bikaner’s jewelry shops offer a rich tapestry of tradition and contemporary elegance, making it a jewelry lover’s paradise. Whether you’re interested in traditional Kundan and Meenakari pieces or modern diamond and gold jewelry, these five best jewelry shops in Bikaner have something for everyone. They not only provide exquisite jewelry but also an enriching shopping experience that celebrates the city’s rich cultural heritage. So, the next time you’re in Bikaner, don’t miss the opportunity to explore these treasures of elegance. So, Now I hope you have understood about 5 Best Jewellery Shop in Bikaner.

5 Best Tiles Shop in Bikaner

In this article we are going to talk about 5 Best Tiles Shop in bikaner. Bikaner is an old city in the desert of Rajasthan, India. It has a big fort called Junagarh Fort and fancy havelis. When it comes to home decor, tiles play a crucial role in transforming spaces into statements of elegance and style. Whether you’re renovating your home or starting a new construction project, Bikaner boasts a range of exceptional tile shops.

5 Best Tiles Shop in Bikaner

In this article, we’ll delve into the five best tile shops in Bikaner, each offering a unique blend of quality, design, and customer service.

1. Rangoli Ceramics

Where Tradition Meets Modernity established decades ago, Rangoli Ceramics has stood the test of time by consistently providing a diverse range of tiles that appeal to Bikaner’s diverse clientele. From classic marble tiles that pay homage to the city’s historic architecture to contemporary porcelain tiles that exemplify modern living, this emporium effortlessly marries tradition with innovation.

Tiles shop in Bikaner

What sets Rangoli Ceramics apart is its commitment to maintaining the highest quality standards. Their tiles are sourced from reputable manufacturers, ensuring durability and aesthetic appeal. The store’s knowledgeable staff is always on hand to guide customers through the selection process, taking into account design preferences, space requirements, and budgets. Whether you’re seeking to adorn your living room with intricate patterns or add a touch of luxury to your bathroom, Rangoli Ceramics has a solution for every vision. It is among the best tiles shop in Bikaner.

Address: Kanasar Rd, near cattle feed plant, Lalgarh, Bikaner, Chak Garbi Rural, Rajasthan 334001

Mobile No: +91-6377572439

Visit: Tiles Showroom in Bikaner

2. Jm Tiles and Sanitary

Jm Tiles and Sanitary is a treasure trove of tile options that cater to a wide spectrum of design aesthetics. From the moment you step into their showroom, you’re greeted by an array of colors, textures, and patterns that reflect the city’s vibrant culture. Whether you’re in search of rustic terracotta tiles that capture the essence of Rajasthan or sleek glass mosaic tiles that add a contemporary touch, this hub has it all.

What makes Jm Tiles and Sanitary exceptional is its dedication to providing options for every budget. They understand that elegance should be accessible to all, and their range of affordable yet high-quality tiles reflects this commitment. With a team of professionals who understand the nuances of design and durability, Jm Tiles and Sanitary ensures that every customer walks away with tiles that not only enhance their spaces but also tell a unique story.

3.  Rathore Tiles

Rathore Tiles is a name synonymous with innovation and creativity in the realm of tiles. This shop prides itself on offering a plethora of designs that cater to every individual’s taste. Whether you’re a minimalist who appreciates clean lines or an aficionado of intricate patterns,  Rathore Tiles has tiles that align with your design philosophy.

The store’s collection encompasses tiles for both residential and commercial spaces, ensuring that architects, interior designers, and homeowners alike find what they’re looking for.  Rathore Tiles embraces the concept that tiles are more than just functional surfaces; they’re an extension of one’s personality and vision. With an emphasis on exploring the uncharted territories of tile design, this shop pushes the boundaries of creativity and encourages customers to experiment with their spaces.

4. Jhinjha Tiles

Jhinjha Tiles is a name that evokes the essence of Rajasthan’s heritage and opulence. This shop specializes in a range of marbles and tiles that embody the state’s rich history and cultural intricacies. Their collection includes intricate marble inlays that harken back to the era of palaces and forts, as well as polished marble tiles that infuse a sense of grandeur into contemporary spaces.

You can check ceramic tiles price here.

What sets Jhinjha Tiles apart is its dedication to showcasing the state’s cultural heritage through its offerings. Their tiles are crafted with precision and artistic flair, making them more than just building materials—they’re pieces of art that narrate the story of Rajasthan. Whether you’re adorning your home with marble medallions or seeking to create a luxurious bathroom retreat, Jhinjha Tiles has the expertise and products to turn your design dreams into reality.

5.  Rishabh Tiles

Rishabh Tiles stands out as a beacon of quality craftsmanship in Bikaner’s tile market. With a meticulous approach to selection, this shop offers a curated collection of tiles that adhere to the highest standards of design and durability. Their tiles are sourced from renowned manufacturers, ensuring that customers receive products that stand the test of time.

Bikaner Tiles Shop

What distinguishes Rishabh Tiles is its commitment to personalized service. The shop’s staff takes the time to understand each customer’s preferences and requirements, guiding them through the selection process to ensure a seamless experience. Whether you’re looking to transform your living space with elegant floor tiles or create a stunning backsplash in your kitchen,  Rishabh Tiles is dedicated to helping you make choices that enhance the beauty and functionality of your space.

Conclusion

Bikaner’s tile shops are more than just places to buy building materials; they’re hubs of design inspiration and creativity. Each shop on this list—Rangoli Ceramics, Jm Tiles and Sanitary,  Rathore Tiles, Jhinjha Tiles, and Rishabh Tiles—brings a unique perspective to the table, catering to a range of design aesthetics, budgets, and preferences.

Read Also: 5 Best Jewellery Shop in Bikaner

As you embark on your journey to transform your living spaces, remember that tiles are not merely functional elements; they’re canvases for self-expression. Whether you’re seeking to capture the spirit of Rajasthan’s heritage, infuse modern elegance, or experiment with innovative patterns, Bikaner’s tile shops have the products and expertise to turn your spaces into masterpieces that tell stories of style, culture, and creativity. So, Now I hope you have understood about the 5 Best Tiles Shop in Bikaner.

How to design a YouTube Thumbnail for free online using Canva?

In this article we are going to learn How to design a YouTube Thumbnail for free online using Canva? YouTube has revolutionized the way we consume content, and it has become one of the most popular social media platforms worldwide. Every day, millions of videos are uploaded on this platform, making it increasingly challenging to stand out from the competition. One way to make your videos stand out is by creating a visually appealing YouTube thumbnail. A thumbnail is a small image that represents your video and appears on the YouTube search page and recommended videos section. It is the first thing viewers see before they decide whether to click and watch the video or not. Therefore, creating an eye-catching thumbnail is crucial to grab the audience’s attention and increase your video’s visibility.

How to design a YouTube Thumbnail for free online using Canva?

Canva is a popular online graphic design tool that can help users create high-quality YouTube thumbnails for free. Canva offers a wide variety of pre-designed templates, fonts, images, and editing tools, making it easy for anyone to create a visually appealing thumbnail, even without any prior design experience. In this article, we will explore the steps to design a YouTube thumbnail using Canva.

Step 1: Create a Canva Account

The first step to designing a YouTube thumbnail using Canva is to create a Canva account. Canva includes both a free and a premium version. The free version is sufficient for creating YouTube thumbnails. Once you create an account, you will be taken to the Canva homepage, where you can choose a YouTube thumbnail template.

Step 2: Choose a YouTube Thumbnail Template

Canva offers a wide variety of pre-designed templates for YouTube thumbnails. To get started, click on the “Templates” option on the left-hand side of the screen and type “YouTube thumbnail” in the search bar. Canva will display a list of pre-designed templates for YouTube thumbnails. Choose a template that best represents your video’s content and the tone you want to convey.

Step 3: Choose the Right Background

The next step is to choose the right background for your thumbnail. The background of your thumbnail is crucial because it sets the tone for the video and grabs the audience’s attention. You can choose a solid color, gradient, or an image as your background. Canva offers a wide variety of background options to choose from. To choose a background, click on the “Background” option on the left-hand side of the screen. Canva offers various background options, including solid colors, gradients, and images. You can either upload an image or choose one from Canva’s library. To upload an image, click on the “Uploads” option and select the image you want to use.

How to design a YouTube Thumbnail for free?

Step 4: Add Text

The next step is to add text to your thumbnail. The text on your thumbnail should be clear and easy to read. It should also be large enough to grab the viewer’s attention. There are many different fonts available in Canva.To add text, click on the “Text” option on the left-hand side of the screen. Canva offers various font options, including serif, sans-serif, and script fonts. To add text, simply click on the “Add a heading” or “Add a subheading” option and type in the text you want to use. You can also change the font size and color to match the tone of your video.

You can also checkout this digital marketing institute to learn digital marketing course by enrolling in our course Or Contact Digital Bikana on +91-8949483728

Step 5: Add Images

Adding images to your thumbnail can help convey the video’s message and grab the audience’s attention. Canva offers a wide variety of images to choose from. To add images, click on the “Elements” option on the left-hand side of the screen. Canva offers various image options, including shapes, icons, and illustrations. To add an image, simply click on the image you want to use and drag it onto your thumbnail.

Step 6: Customize Your Thumbnail

Once you have added all the elements to your thumbnail, it’s time to customize it. Canva offers various customization options, including resizing, cropping, and adding filters. To customize your thumbnail, click on the element you want to edit, and Canva will display the editing options on the left-hand side of the screen. You can resize or crop images and adjust the opacity to make them blend with the background. You can also add filters to your images to make them stand out.

How to design a YouTube Thumbnail for free online?

Step 7: Download Your Thumbnail

After you have finished customizing your thumbnail, it’s time to download it. Canva offers various download options, including PNG and JPEG formats. To download your thumbnail, click on the “Download” button on the top right-hand side of the screen and select the format you want to use.

Read Also: How to create an intro and outro for YouTube video using canva?

Apart from following the above steps, there are some additional tips and tricks to keep in mind while designing a YouTube thumbnail using Canva. These tips can help improve the thumbnail’s quality and make it more appealing to the target audience.

  • Firstly, it’s important to keep the thumbnail simple and uncluttered. Too many elements on the thumbnail can make it look busy and overwhelming, leading to a decrease in engagement. Instead, focus on using one or two elements that best represent the video’s content and message.
  • The thumbnail should accurately represent the video’s content. Using misleading or clickbait thumbnails can lead to negative feedback from the audience, damaging the channel’s reputation in the long run. Therefore, the thumbnail should accurately convey the video’s message and tone.
  • The thumbnail should be visually appealing and high-quality. A low-quality or pixelated thumbnail can make the video look unprofessional and lower the audience’s perception of the video’s quality. Therefore, it’s important to use high-resolution images and elements while designing the thumbnail.
  • The thumbnail should be relevant to the target audience. Understanding the target audience’s preferences and interests can help design a thumbnail that resonates with them and increases engagement.
  • It’s important to test different thumbnails and analyze their performance to determine which thumbnail works best. A/B testing can help determine which thumbnail leads to higher engagement and click-through rates, allowing creators to optimize their thumbnail strategy accordingly.
  • Another crucial aspect to keep in mind while designing a YouTube thumbnail is to ensure that it’s consistent with the channel’s branding. The thumbnail should use the same colors, fonts, and overall style as the channel’s branding to create a cohesive and recognizable image. This can help build brand recognition and make the channel more memorable to the audience.
  • Additionally, creators can add text overlays to their thumbnails to provide more context and information about the video’s content. However, it’s important to keep the text brief and easy to read, as the thumbnail should grab the audience’s attention quickly. Using large and bold fonts can help make the text stand out and be easily legible on both desktop and mobile devices.
  • Another way to make the thumbnail stand out is to use contrasting colors and elements. This can help create a dynamic and visually appealing thumbnail that captures the audience’s attention. However, it’s important to use contrasting elements that are relevant to the video’s content and tone to avoid misleading the audience.
  • Lastly, creators can use Canva’s design features to create custom shapes and elements to add to their thumbnails. This can help create a unique and personalized thumbnail that sets the video apart from others in the same category. However, it’s important to ensure that the custom elements are relevant to the video’s content and overall theme.

Conclusion

In conclusion, creating a visually appealing YouTube thumbnail is crucial to grab the audience’s attention and increase your video’s visibility. Canva is an excellent tool for designing YouTube thumbnails because it offers a wide variety of pre-designed templates, background options, fonts, and images to choose from. By following the above steps, users can create a visually appealing thumbnail that accurately represents the video’s content and attracts the target audience. With Canva, designing a YouTube thumbnail has never been easier, and users can create high-quality thumbnails for free, without the need for any prior design experience. A great thumbnail can be the difference between your video being seen or ignored, so it’s essential to put effort into creating a high-quality thumbnail that accurately represents your video’s content and grabs the audience’s attention. So, now I hope you have understood how to design a YouTube Thumbnail for free online using Canva.

How to promote Facebook Page to get more Page Likes?

In this article we are going to discuss how to promote Facebook Page to get more Page Likes using facebook ads campaign. In the world of digital marketing, social media platforms like Facebook have become essential tools for businesses looking to connect with their customers and build their brand.It offers businesses the opportunity to reach a massive audience through its Pages feature. Facebook Pages are an excellent way for businesses to connect with their customers and potential customers, share information about their products or services, and build brand awareness. However, in order to make the most of a Facebook Page, businesses need to have a significant number of Page likes. Promoting a Facebook Page is essential to building a strong social media presence and engaging with customers.

One of the benefits of using Facebook Ads campaigns is that they offer a high level of targeting and customization. With Facebook’s ad targeting options, businesses can reach people who are most likely to be interested in their products or services. This helps to ensure that their ads are seen by the right people, which can increase the likelihood of getting more Page likes and engagement.

Another benefit of using Facebook Ads campaigns is that they are highly measurable. Facebook provides a range of metrics that businesses can use to track the performance of their ads, including reach, impressions, clicks, and conversions. By monitoring these metrics, businesses can optimize their ad campaigns for better results and get more out of their ad budget.

How to promote Facebook page to get more page likes using Facebook ads campaign?

To create effective Facebook Ads campaigns, businesses should focus on creating engaging ad creative that resonates with their target audience. This can include using high-quality imagery or video, creating a strong headline or copy, and including a clear call-to-action that encourages people to like their Page.In this article, we will discuss how to promote a Facebook Page to get more likes using Facebook Ads Campaign.

Step 1: Define Your Target Audience

The first step to promoting your Facebook Page is to define your target audience. Your target audience is the group of people who are most likely to be interested in your business and become fans of your Page. Facebook offers a variety of targeting options, including age, gender, location, interests, behaviors, and more. You can use these targeting options to reach people who are most likely to be interested in your business and become fans of your Page.

To define your target audience, start by thinking about who your ideal customer is. Defining your target audience involves identifying the demographics, interests, and behaviors of your ideal customer. For example, if you sell pet products, your target audience may be pet owners, and you can use Facebook’s targeting options to reach people who are interested in pets or who have recently purchased pet products. You can also use Facebook’s Audience Insights tool to gather data on your target audience, including their demographics, interests, and behaviors.

Promote facebook page

Step 2: Set Your Campaign Objectives

Once you have defined your target audience, the next step is to set your campaign objectives. This involves setting specific goals for your campaign, such as increasing Page likes, driving website traffic, or promoting a specific product or service. Facebook offers several objectives for Page like campaigns, including brand awareness, reach, engagement, and more. Each objective is designed to help you achieve a specific goal, so it’s important to choose the right one for your business.

Defining your campaign objectives will help you to create more effective ad creative and choose the right targeting options for your campaign. It will also help you to measure the success of your campaign and optimize it for better results.

To define your campaign objectives, consider what you want to achieve with your Facebook Ads campaign and how it aligns with your overall business goals. Be specific and measurable in your objectives, so that you can track your progress and adjust your campaign as needed.

If your primary goal is to get more Page likes, the “Page Likes” objective is the best choice. This objective will optimize your campaign for people who are most likely to like your Page, helping you to achieve your goal more efficiently.

Step 3: Create Your Ad Campaign

After setting your campaign objectives, the next step is to create your ad campaign. The success of your Facebook Ads campaign depends on creating engaging ad creative that resonates with your target audience. This involves choosing the right imagery, video, copy, and call-to-action for your ad.

To create effective ad creative, start by understanding your target audience and what they are looking for from your business. Use high-quality images or video that grab their attention and highlight the benefits of your products or services. Write compelling copy that speaks directly to their needs and includes a clear call-to-action that encourages them to like your Page or take another desired action.

It’s also important to test different ad creative to see what works best for your target audience. Facebook offers A/B testing tools that allow you to test different ad creative and determine which ones drive the most engagement and conversions.

To create a Facebook ad campaign, you’ll need to have a Facebook Page for your business. Once you have a Page, you can create ads using Facebook’s Ads Manager tool. To create a Page likes campaign, select the “Page Likes” objective from the list of objectives in Ads Manager. Next, choose your target audience, set your budget, and select your ad creative. Your ad creative should include a strong headline, compelling imagery or video, and a clear call-to-action (CTA) that encourages people to like your Page.

You can also checkout this digital marketing institute to learn digital marketing course by enrolling in our course Or Contact Digital Bikana on +91-8949483728

Step 4: Set Your Ad Placement

Once you’ve created your ad, the next step is to set your ad placement. Choosing the right ad placement is critical to the success of your Facebook Ads campaign. Facebook offers several placement options for ads, including desktop and mobile News Feed, Instagram, Audience Network, and more. It’s important to choose the right placement for your ad to ensure that it reaches your target audience effectively.

To choose the right ad placement for your campaign, consider your target audience and where they are most likely to see and engage with your ads. For example, if you’re targeting a younger demographic, Instagram may be a better placement option than desktop News Feed.

It’s also important to consider the ad format when choosing your placement. Some ad formats, such as video ads, may perform better on mobile devices than on desktop. Be sure to test different ad placements and formats to determine which ones drive the most engagement and conversions for your business.

If your goal is to get more Page likes, the best placement options are desktop and mobile News Feed. These placements offer the highest visibility and engagement, making them ideal for campaigns focused on driving Page likes.

How to promote Facebook page to get more page likes using facebook ads campaign

Step 5: Optimize Your Ad Campaign

After launching your ad campaign, it’s important to monitor its performance and optimize it for better results. Facebook’s Ads Manager tool provides a range of metrics that you can use to track your campaign’s performance, including reach, impressions, clicks, and more.

To optimize your campaign, start by monitoring its performance and making adjustments as needed. If you’re not getting the results you want, try changing your ad creative, targeting, or placement. You can also experiment with different ad formats, such as video or carousel ads, to see which ones perform best.

Another way to optimize your campaign is by using Facebook’s ad optimization tools. Facebook offers several optimization options, including automatic bidding, delivery optimization, and ad rotation. These tools can help you get the most out of your ad budget and improve your campaign’s performance.

In addition to optimizing your ad campaign, it’s also important to engage with your audience and build a strong community around your Page. Respond to comments and messages promptly, share engaging content, and run promotions or contests to encourage people to like your Page and engage with your brand.

Read Also: Types of Facebook Ads Campaign Objectives

Conclusion

In conclusion, promoting a Facebook Page is essential for businesses looking to connect with their customers andbuilding a strong social media presence for your business.Facebook Ads campaigns offer a powerful and efficient way to promote your Page and get more likes. By following these steps and creating a Facebook Ads campaign, you can reach a wider audience and get more Page likes, helping you tobuild your brand and engage with your customers more effectively. Remember to define your target audience, set your campaign objectives, create your ad campaign, choose your ad placement, and optimize your campaign for the best results. With a well-planned Facebook Ads campaign, you can quickly and efficiently grow your Page likes and expand your business’s reach on social media.

How to create Facebook Lead Generation Ads Campaign?

In this article we are going to understand how to create Facebook Lead Generation Ads Campaign. In the digital age, businesses are always seeking new ways to acquire leads and customers. One of the most popular social media platforms for businesses is Facebook. With over 2 billion monthly active users, Facebook provides a massive audience for businesses to target. Facebook also makes it easy for businesses to generate leads using their “Get More Leads” goal, which allows businesses to create lead ads designed to capture information from potential customers. In this article, we will discuss how to create get more lead ads on Facebook using the Get More Leads goal, and how to optimize them to get the most out of advertising efforts.

What Are Facebook Lead Ads?

Facebook Lead Ads are a type of advertising campaign available through the Facebook Ads Manager platform. These ads allow businesses to target specific audiences and collect information from potential customers. The information collected can include things like name, email address, phone number, or other specified information. The ads are designed to be straightforward, with a lead form attached to the ad. When a user clicks on the ad, they’re shown a lead form pre-populated with their Facebook information, making it easy for users to submit their contact information without much effort.

How the Get More Leads Goal Works?

The Get More Leads goal is a feature within Facebook Ads Manager that allows businesses to create lead ads. When creating an ad campaign, selecting the Get More Leads goal will give businesses access to features like the Lead Gen Form Builder, which allows users to create forms for potential customers to fill out. These forms can also be customized to include specific fields and questions specific to the business needs.

How to create Facebook Lead Generation Ads Campaign?

Now that you understand what Facebook Lead Ads are and how the Get More Leads goal works, let’s discuss how to create lead ads that generate results.

1. Know Your Target Audience

Facebook has detailed audience targeting tools that can help you narrow down your audience based on criteria like location, age, gender, interests, and behaviors. Identifying your target audience is

crucial for getting your ad in front of the right people. Consider demographics such as age, gender, and location, but also think about interests, hobbies, job titles, and behaviors that may align with your product or service.

2. Use an Eye-catching Image or Video

Your ad image is the first thing potential customers will see, so make sure it’s eye-catching and relevant to the offer. Use high-quality images or videos that are relevant to your business or product. Avoid using stock images as these can come across as inauthentic, and might not resonate with your target audience.

3. Have a Compelling Copy

Your ad’s copy should be clear, concise, and attention-grabbing. Use language that speaks directly to your target audience and highlights the benefits of your offer. Make sure to keep things brief and to the point, as users scrolling through their feeds have short attention spans.

facebook lead ads campaign

4. Create a Compelling Offer

Your offer should be valuable, attractive, and enticing to users. Think about what you can give away for free or what information you can provide that would be of value to your audience. Make sure your offer is easy to understand and communicated in your ad copy.

5. Customize Your Lead Form

Customize your lead form to the specific fields and questions that align with your business goals. Remember that users won’t want to spend much time filling out long forms, so make sure to keep things brief and only ask for the essential information needed. You can also add multiple-choice questions to help pre-qualify leads and segment potential customers.

6. Use Autofill

One of the best features of Facebook Lead Ads is the autofill option. When a user clicks on the ad, their information auto-populates into the lead form, which reduces friction and increases conversions. Autofill only works for people who have their Facebook information up-to-date, but it can significantly increase the likelihood of people submitting their information.

7. Follow Up

Once a user fills out the lead form, it’s essential to follow up quickly with them. You can use tools like Facebook’s Lead Ads CRM Integration or Zapier to integrate your leads directly into your CRM. Having a plan in place for how you will follow up with leads is critical for converting them into customers.

You can also checkout this digital marketing institute to learn digital marketing course by enrolling in our course Or Contact Digital Bikana on +91-8949483728

How to optimize facebook lead ads campaign?

Once you’ve created your Get More Leads ads, it’s essential to optimize them for maximum performance. Here are some best practices for optimizing your Get More Leads ads:

1. Set a Budget and Schedule

Facebook allows you to set a budget and schedule for your ad campaigns. It’s important to determine how much you’re willing to spend and for how long you want your ad to run. By setting a budget and schedule, you have more control over your ad spend and can ensure that you’re optimizing your ad performance within your budget.

2. Monitor and Analyze Performance

It’s important to monitor and analyze the performance of your ads regularly to ensure that you’re meeting your goals. Using Facebook’s Ad Manager or a third-party tool, you can track metrics like impressions, clicks, and conversions. Based on this data, you can make informed decisions about how to adjust your ads for better performance.

3. Experiment with Different Ads and Audiences

To optimize your Get More Leads ads, it’s important to experiment with different ad formats, images or videos, ad copy and audiences. Try testing different ad formats such as carousel ads, video ads, or instant experience ads. Test out different targeting options and demographics, or try using Facebook’s lookalike audience feature to target users who are similar to your existing customers. By experimenting with different options, you can find what works best and optimize your ad performance.

How to optimize facebook lead ads campaign

4. Integrate Lead Forms and CRM Tools

After users submit their information on a lead form, it’s important to have a plan in place for following up with them. Facebook allows you to integrate your lead forms directly into your CRM, making it easy to follow up with potential customers. Integration with CRM also helps to keep track of the leads and analyze which lead source is working for you.

5. Stay Up-to-Date with Facebook’s Best Practices

Facebook is constantly changing, and it’s important to stay up-to-date with their best practices. Facebook provides a range of resources, such as their Blueprint education platform, which provides training on how to create and optimize ads for optimal performance. By staying up-to-date with the latest changes, you can ensure that your Get More Leads ads are optimized for success.

Read Also: How to create call ads on Facebook?

Conclusion

Facebook Lead Ads is a powerful advertising tool that can help businesses generate leads and grow their customer base. By understanding the Get More Leads goal and creating effective lead ads, businesses can collect useful information from potential customers and develop relationships with them. Remember to target the right audience, use compelling images and copy, create attractive offers, customize your lead form, use Autofill, and follow up quickly. With these tips, you can create effective lead ads that deliver results for your business. So, now I hope you have understood how to create Facebook Lead Generation Ads Campaign.

Types of Facebook Ads Campaign Objectives

In this article we are going to understand what are the different types of Facebook ads campaign objectives. Facebook is a social media platform that is used by millions of people around the world and has become a powerful tool for marketers to promote their products and services. One of the most effective ways to reach a target audience on Facebook is through advertising. Facebook Ads allow businesses to create and deliver highly targeted advertisements to specific groups of users. However, to make the most of Facebook advertising, it is crucial to set clear goals and objectives for your ad campaigns. In this article, we will discuss the different types of ad campaign goals and objectives in Facebook Ads.

What are the different types of Facebook ads campaign objectives?

Before we dive into the different types of ad campaign goals and objectives, let’s define what a Facebook ad campaign is. A Facebook ad campaign is a series of ads that are designed to achieve a specific goal. Each ad campaign has its own objective, budget, schedule, and target audience.The first step in creating an effective Facebook ad campaign is to define your goals and objectives. The type of ad campaign goal you choose will depend on your business objectives and the stage of the sales funnel you are targeting. Each ad campaign has its own objective, budget, schedule, and target audience.

Facebook ad campaigns can be created and managed using the Facebook Ads Manager, which is a powerful tool that allows businesses to create, launch, and track their ads. Let us take a look at different types of ad campaign goals and objectives.

Awareness

The first type of ad campaign goal is awareness. The objective of an awareness campaign is to introduce your brand to a new audience and create interest in your products or services. Awareness campaigns are ideal for businesses that are just starting out or have a new product or service to promote. The primary goal of an awareness campaign is to increase brand awareness and generate buzz about your brand.

To achieve this goal, Facebook offers several ad formats that are designed to increase awareness. For example, the “Brand Awareness” objective is a great option for businesses that want to reach a large audience and generate brand awareness.This ad format is optimized to show your ads to people who are more likely to remember them. It is a cost-effective way to introduce your brand to new people.

Another ad format that can be used for awareness campaigns is the “Reach” objective, which is designed to maximize the number of people who see your ads.This ad format is ideal for businesses that want to reach as many people as possible with their ads. It is a great way to create buzz around your brand and increase your social media presence.

What are the different Types of Facebook Ads Campaign Objectives

Consideration

The second type of ad campaign goal is consideration. The objective of a consideration campaign is to encourage users to take action, such as visiting your website, downloading an app, or signing up for a newsletter. Consideration campaigns are ideal for businesses that want to engage with their target audience and drive traffic to their website or other online channels.

To achieve this goal, Facebook offers several ad formats that are designed to drive consideration. For example, the “Traffic” objective is a great option for businesses that want to drive traffic to their website. This ad format is optimized to show your ads to people who are more likely to click on them and visit your website. It is a great way to drive traffic to your website and increase engagement with your target audience.

Another ad format that can be used for consideration campaigns is the “App Installs” objective, which is designed to encourage users to download your app. This ad format is ideal for businesses that have a mobile app and want to encourage users to download it. It is a great way to increase app downloads and drive engagement with your target audience.

You can also checkout this digital marketing institute to learn digital marketing course by enrolling in our course Or Contact Digital Bikana on +91-8949483728

Conversion

The third type of ad campaign goal is conversion. The objective of a conversion campaign is to drive sales and generate revenue for your business. Conversion campaigns are ideal for businesses that have a clear sales funnel and want to drive users to make a purchase.

To achieve this goal, Facebook offers several ad formats that are designed to drive conversions. For example, the “Conversions” objective is a great option for businesses that want to track the number of conversions generated by their ads. This ad format is optimized to show your ads to people who are more likely to convert and make a purchase. It is a great way to increase sales and generate revenue for your business.

Another ad format that can be used for conversion campaigns is the “Catalog Sales” objective, which is designed to promote specific products and drive sales. This ad format is ideal for businesses that want to promote specific products and drive sales. It allows you to create product catalogs that can be used to target specific audiences with relevant products. This is a great way to showcase your products and drive sales for your business.

Facebook Ads Campaign Objectives

Lead Generation

The fourth type of ad campaign goal is lead generation. The objective of a lead generation campaign is to collect user information, such as email addresses or phone numbers, for future marketing efforts. Lead generation campaigns are ideal for businesses that want to build a database of potential customers and nurture them over time.

To achieve this goal, Facebook offers several ad formats that are designed to drive lead generation. For example, the “Lead Generation” objective is a great option for businesses that want to capture user information, such as email addresses. This ad format is optimized to show your ads to people who are more likely to provide their contact information. It is a great way to capture leads and build your email list.

Another ad format that can be used for lead generation campaigns is the “Messenger” objective, which is designed to encourage users to interact with your business through Facebook Messenger. This ad format is ideal for businesses that want to engage with their target audience and build relationships with their customers. It allows you to have personalized conversations with users and capture their contact information.

Read Also: How to create Facebook Lead Generation Ads Campaign?

Engagement

The fifth type of ad campaign goal is engagement. The objective of an engagement campaign is to encourage users to interact with your brand and content, such as liking, commenting, and sharing your posts. Engagement campaigns are ideal for businesses that want to build a community around their brand and increase their social media presence.

To achieve this goal, Facebook offers several ad formats that are designed to drive engagement. For example, the “Engagement” objective is a great option for businesses that want to increase the number of likes, comments, and shares on their posts. This ad format is optimized to show your ads to people who are more likely to engage with your content. It is a great way to build a community around your brand and increase your social media presence.

Another ad format that can be used for engagement campaigns is the “Video Views” objective, which is designed to encourage users to watch your videos and engage with your content. This ad format is ideal for businesses that have video content and want to increase engagement with their target audience. It allows you to showcase your videos and encourage users to engage with your content.

Read Also: How to get more likes and comments on Facebook post?

Conclusion

In conclusion, Facebook Ads offer businesses a powerful platform to reach and engage with their target audience. However, to make the most of Facebook advertising, it is crucial to set clear goals and objectives for your ad campaigns. The different types of ad campaign goals and objectives in Facebook Ads include awareness, consideration, conversion, lead generation, and engagement. By understanding these objectives and selecting the right ad formats, businesses can create effective ad campaigns that achieve their desired outcomes.

Types of Heading and Subheadings with Example

In this article we are going to discuss about the types of heading and subheadings with example (H1, H2, H3, H4, H5, H6 and p). Headings and subheadings are important elements of content formatting that help readers easily navigate through a document or a web page. They are essential tools for organizing written content. They help to break up the text, guide the reader through the content, and create a clear hierarchy of information. Also, They provide a hierarchical structure to the content, making it easier for readers to understand the organization and flow of information. In this article, we will discuss the different types of headings and subheadings, their uses, examples of each type, their importance and how they can enhance the reader’s experience.

Importance of Headings and Subheadings

  • Headings and subheadings serve several purposes in written content. Firstly, they provide a clear structure to the content, making it easier for the reader to follow and understand. A well-structured piece of content will have a logical flow, with each heading and subheading introducing a new topic or idea.
  • Secondly, headings and subheadings make it easier for readers to scan the content quickly. In today’s fast-paced world, people don’t always have the time or patience to read a piece of content from start to finish. Headings and subheadings allow readers to quickly identify the most important points or sections of the content and decide which parts they want to read in more detail.
  • Thirdly, headings and subheadings can make the content more visually appealing. A wall of text without any headings or subheadings can be overwhelming and uninviting to read. Breaking up the text with headings and subheadings can make it more appealing and encourage readers to engage with the content.

Types of Headings and Subheadings with example

There are several types of headings and subheadings that writers can use to structure their content. The most common types are:

1. H1 Heading

The H1 heading is the main heading of a document or a web page, and it is usually the largest and most prominent text on the page.It is the most important heading on the page. It is used to introduce the topic or subject of the content and to grab the reader’s attention.The H1 heading should provide a clear and concise summary of the content that follows.The H1 heading should be used only once per page or post.

Example:

H1: The Benefits of Regular Exercise

2. H2 Heading

The H2 heading is the second level heading and is used to divide the content into subtopics. It is smaller in size than the H1 heading and less prominent, but it still stands out on the page. H2 headings are used to introduce major sections of the content and to provide an overview of what will be discussed in that section.

Example:

H1: The Benefits of Regular Exercise

H2: Improved Cardiovascular Health

Types of Heading and Subheadings

3. H3 Heading

The H3 heading is the third level heading and is used to further divide the content into subtopics. It is smaller in size than the H2 heading and less prominent, but it still stands out on the page. H3 headings are used to introduce subtopics within a major section of the content.

Example:

H1: The Benefits of Regular Exercise

H2: Improved Cardiovascular Health

H3: Lower Blood Pressure

You can also checkout this digital marketing institute to learn digital marketing course by enrolling in our course Or Contact Digital Bikana on +91-8949483728

4. H4 Heading

The H4 heading is the fourth level heading and is used to divide the content into smaller subtopics. It is smaller in size than the H3 heading and less prominent, but it still stands out on the page. H4 headings are used to introduce subtopics within a subtopic.

Example:

H1: The Benefits of Regular Exercise

H2: Improved Cardiovascular Health

H3: Lower Blood Pressure

H4: Lifestyle Changes to Lower Blood Pressure

Now I hope you have understood about the types of heading and subheadings with example (H1, H2, H3, H4, H5, H6 and p)

5. H5 Heading

The H5 heading is the fifth level heading and is used to further divide the content into smaller subtopics. It is smaller in size than the H4 heading and less prominent, but it still stands out on the page. H5 headings are used to introduce subtopics within a subtopic.

Example

H1: The Benefits of Regular Exercise

H2: Improved Cardiovascular Health

H3: Lower Blood Pressure

H4: Lifestyle Changes to Lower Blood Pressure

H5: Reducing Salt Intake

6. H6 Heading

The H6 heading is the sixth level heading and is the smallest and least prominent heading. It is used to divide the content into the smallest subtopics. H6 headings are rarely used, but they can be useful when there are many subtopics within a subtopic.

Example:

H1: The Benefits of Regular Exercise

H2: Improved Cardiovascular Health

H3: Lower Blood Pressure

H4: Lifestyle Changes to Lower Blood Pressure

H5: Reducing Salt Intake

H6: Choosing Low-Sodium Foods

7. P Tag

The P tag is not a heading or subheading but rather a tag used to define a paragraph. It is used to group related sentences together and to provide context and structure to the content.

Example:

<p> Regular exercise has been shown to improve cardiovascular health, lower blood pressure, and reduce the risk of many chronic diseases. Lifestyle changes such as reducing salt intake and choosing low-sodium foods can also help to lower blood pressure. </p>

You can also checkout this digital marketing institute to learn digital marketing course by enrolling in our course Or Contact Digital Bikana on +91-8949483728

How to use headings and subheadings?

To use headings andsubheadings effectively, there are a few best practices to keep in mind:

1. Follow the Hierarchy

Start with the H1 heading, and then use the lower-level headings to break up the content into smaller and smaller sections. Following this hierarchy makes it easy for readers to understand the structure of the content and navigate through it. That’s why we have told you about types of heading and subheadings with example (H1, H2, H3, H4, H5, H6 and p).

2. Use Clear and Concise Headings

Headings should accurately reflect the content of the section and provide a clear and concise overview of what the reader can expect to find there. Avoid using vague or misleading headings that might confuse or mislead the reader.

3. Be Consistent

Use a consistent formatting style throughout the document. This means using the same font, size, and color for all headings and subheadings. Consistency helps to make the content more visually appealing and easier to navigate.

types of heading in html

4. Avoid Overusing Headings

Using too many headings can be counterproductive. It can make the content seem cluttered and confusing, and dilute the impact of the headings that are actually important. Use headings and subheadings judiciously, and only when they add value to the content.

5. Use Descriptive Headings

Make sure the headings accurately reflect the content of the section. Use descriptive headings that clearly and concisely summarize the content, making it easier for readers to understand the main points.

Read Also: What is Hyperlink in html with Example and How it is created?

Now I hope you have understood about the types of heading and subheadings with example (H1, H2, H3, H4, H5, H6 and p)

Conclusion

In conclusion, headings and subheadings are crucial elements of content formatting that help to organize and structure the content in a clear and hierarchical way. The use of headings and subheadings also makes it easier for readers to scan through the content and locate the information they need. It is important to use headings and subheadings appropriately and consistently throughout the content to maintain a clear and organized structure.

When using headings and subheadings, it is important to follow the hierarchy of headings, starting with the H1 heading and moving down to the lower-level headings. It is also important to use clear and concise headings that accurately reflect the content of each section. By using headings and subheadings effectively, writers can make their content more accessible and engaging for readers, and ensure that their message is communicated clearly and effectively. So next time you’re creating written content, remember to use headings and subheadings to make it more clear, concise, and effective. Now I hope you have understood about the types of heading and subheadings with example (H1, H2, H3, H4, H5, H6 and p).

How to check website traffic for free of any website?

In this article we are going to discuss how to check website traffic for free of any website. In today’s digital age, understanding your competitor’s online presence is critical for the success of any business. One of the most effective ways to gain insights into your competitor’s online strategy is by analyzing their website using a tool like Similarweb.com. Similarweb.com is a powerful platform that allows you to gather a wealth of information about your competitor’s website, including traffic sources, audience behavior, and search rankings. By analyzing this data, you can gain valuable insights into your competitor’s online presence and use this information to improve your own website and marketing strategy.

In this article, we’ll take a closer look at how to use Similarweb.com for competitor website analysis.We have explored various features of Similarweb.com that can help you analyze your competitor’s website. We have discussed how to use the platform to gain insights into your competitor’s traffic sources, audience behavior, and search rankings. We have also explored additional features such as referral sources, competitor analysis, and industry analysis.

How to check website traffic for free of any website?

By understanding your competitor’s online presence, you can identify areas for improvement on your own website and gain a competitive advantage. For example, if you see that your competitor is getting a lot of traffic from social media, you may want to consider investing more in your own social media marketing efforts. Similarly, if you see that your competitor’s visitors are spending a lot of time on their blog, you may want to consider ramping up your own content marketing efforts.

1. Getting Started with Similarweb.com

Before you begin analyzing your competitors’ websites with Similarweb.com, it’s important to have a clear understanding of what you want to achieve. What are your goals? What do you hope to learn? Are you interested in your competitors’ organic search traffic, paid traffic, or both? By answering these questions, you can develop a strategy for using Similarweb.com effectively.

Once you have a clear goal in mind, you can begin using Similarweb.com by simply entering the URL of your competitor’s website into the search bar. This will take you to a page that displays a wealth of information about your competitor’s online presence, including their estimated monthly traffic, top sources of traffic, and most popular pages.

2. Understanding the Overview Page

The first page you’ll see when you search for a competitor’s website on Similarweb.com is the overview page. This page provides a high-level summary of your competitor’s online presence, including their estimated monthly traffic, engagement rate, and traffic sources. You can also see a breakdown of their traffic by country, device type, and referral source.

The overview page is a great place to start when analyzing your competitor’s website because it gives you a broad understanding of their online presence. For example, if you see that your competitor’s traffic is primarily coming from social media, you may want to consider investing more in your social media marketing efforts.

How to check website traffic for free

3. Analyzing Traffic Sources

One of the most valuable features of Similarweb.com is its ability to show you where your competitor’s traffic is coming from. This can help you identify which channels are most effective for driving traffic to their website, and can give you ideas for how to improve your own traffic sources.

To see your competitor’s traffic sources, navigate to the “Traffic Sources” tab. Here, you’ll see a breakdown of your competitor’s traffic by source, including organic search, direct traffic, and referrals from other websites. You can also see which social media platforms are driving traffic to your competitor’s website, as well as which paid search campaigns are most effective.

Understanding your competitor’s traffic sources can help you make informed decisions about your own marketing strategy. For example, if you see that your competitor is driving a significant amount of traffic through paid search campaigns, you may want to consider investing more in your own paid search campaigns. So, I hope now you have understood how to check website traffic for free.

You can also checkout this digital marketing institute to learn digital marketing course by enrolling in our course Or Contact Digital Bikana on +91-8949483728

4. Analyzing Search Traffic

In addition to analyzing your competitor’s overall traffic sources, you can also use Similarweb.com to gain insights into their organic search traffic. This can help you understand which keywords your competitor is ranking for, and can give you ideas for how to improve your own search engine optimization (SEO) strategy.

To see your competitor’s organic search traffic, navigate to the “Search” tab. Here, you can see which keywords are driving traffic to your competitor’s website, as well as which pages are ranking for those keywords. You can also see which countries are generating the most organic search traffic, and how much traffic is coming from mobile vs. desktop devices.

Understanding your competitor’s organic search traffic can help you identify gaps in your own SEO strategy. For example, if you see that your competitor is ranking for a keyword that is relevant to your business but you are not, you may want to consider optimizing your website for that keyword.

5. Analyzing Audience Behavior

Another valuable feature of Similarweb.com is its ability to show you how your competitor’s audience behaves on their website. This canhelp you understand which pages are most popular, how long visitors are staying on the site, and which pages are leading to the most conversions.

To see your competitor’s audience behavior, navigate to the “Behavior” tab. Here, you can see which pages are the most popular, how long visitors are spending on each page, and which pages are leading to the most conversions. You can also see which pages visitors are exiting the website from, which can give you ideas for how to improve your own website’s user experience.

Understanding your competitor’s audience behavior can help you identify areas for improvement on your own website. For example, if you see that your competitor’s visitors are spending a significant amount of time on their blog, you may want to consider investing more in your own content marketing efforts.

Check website traffic

6. Additional Features of Similarweb.com

In addition to the features outlined above, Similarweb.com offers a number of additional features that can help you gain insights into your competitor’s online presence. These include:

Referral sources

Similarweb.com can show you which websites are driving traffic to your competitor’s website. This can help you identify potential partnership opportunities and can give you ideas for how to improve your own referral traffic.

Competitor analysis

Similarweb.com can help you identify your top competitors and can provide you with a detailed analysis of their online presence. This can help you understand how you stack up against your competitors and can give you ideas for how to improve your own website.

Industry analysis

Similarweb.com can provide you with insights into your industry as a whole, including which websites are the most popular and which channels are the most effective for driving traffic. This can help you stay up-to-date with industry trends and can inform your marketing strategy.

Read Also: What is Search Engine Optimization (SEO) in Digital Marketing?

Conclusion

In conclusion, Similarweb.com is a powerful tool that can provide you with valuable insights into your competitor’s online presence. By analyzing your competitor’s website, you can gain a better understanding of their traffic sources, audience behavior, and search rankings. This information can be used to improve your own website and marketing strategy, helping you to gain a competitive advantage in your industry. With its wide range of features and easy-to-use interface, Similarweb.com is a must-have tool for any marketer looking to improve their online performance. So, I hope now you have understood how to check website traffic for free.

How to buy Web Hosting in GoDaddy?

In this article we are going to tell you how to buy web hosting in Godaddy. In the present-day digital age, having a website is important for both individuals and businesses. But, you require web hosting in order to make your website accessible over the internet. To store the files, photographs, videos, and other information for your website, you may utilize a service called web hosting. Anyone with an internet connection can visit your website so because server is connected to the internet.

GoDaddy is one of the leading companies in the web hosting industry. GoDaddy offers a range of web hosting packages to meet various requirements and price ranges. Its hosting packages are very well by both consumers and businesses because they’re dependable, inexpensive, and simple to use.

The success of your website relies on choosing the best web hosting package. A variety of different hosting plans available with GoDaddy, including shared hosting, VPS hosting, dedicated hosting, and WordPress hosting. The most common and value choice, shared hosting is suitable for both small enterprises and individual websites. Since VPS hosting is more robust and scalable, it is ideal for expanding businesses. The most powerful choice is dedicated hosting, which is ideal for big companies with busy websites. With pre-installed plugins and themes to facilitate website management, WordPress hosting is created specifically for WordPress websites.

In this article, we will discuss how to buy web hosting using GoDaddy. We will go through the steps involved in selecting a web hosting plan, choosing a domain name, adding hosting to the cart, reviewing and confirming the order, creating an account, and making payment. By following these steps, you can buy web hosting from GoDaddy in just a few minutes

What is Web Hosting?

A web hosting service allows people and companies to make their websites available to users all over the world. In its basic form, web hosting is the act of storing website files and data on a server that is connected to the web so that users may access those files whenever they enter in a website’s domain name or URL.

You are essentially renting a portion of a server from a web hosting company when you buy web hosting. This server serves as a potent computer just for the aim of keeping the data and files for your website. The server transfers the files to the user’s browser when they enter your website’s domain name or URL, allowing them to view your website.

Numerous hosting plans with various performance, storage, and bandwidth levels are offered from web hosting providers. The most popular form of hosting is shared hosting, in which a variety of websites are kept on the same server and share its resources. Because it’s usually the most affordable option, this kind of hosting is chosen by both small businesses and individuals alike.

How to buy web hosting in Godaddy?

Everybody who wants to have a website must use web hosting as an essential service. Without it, no one on the internet would view your website. Your website’s performance, speed, and security will all be impacted by your choice of web host and package, so make sure you make the right decision. Steps to buy web hosting in Godaddy are discussed below:

1. Create a Godaddy account

Before you can make a purchase, you must first create a GoDaddy account if you don’t have one yet. You should do this by providing your name, address, and payment information in addition to your personal and billing information. Also, you must choose a username and password for your account. If you already have an account, you can complete your purchase by logging in.

2. Choose a web hosting plan

To get web hosting from GoDaddy, you must first pick a package that meets your needs. Shared hosting, VPS hosting, dedicated hosting, and WordPress hosting are just a few of the hosting options available from GoDaddy. The most popular pattern, shared hosting, is excellent for both small enterprises and individual websites. Because VPS hosting is more robust and scalable, it is perfect for expanding operations. The most powerful choice is dedicated hosting, which is ideal for big companies with busy websites. With pre-installed plugins and themes to simplify website management, WordPress hosting is designed solely for WordPress websites.

How to buy hosting in Godaddy

3. Choose a domain name

The success of your website relies on choosing the right domain name. People use your domain name as the internet address to find your website. You can search for and buy available domain names using domain name search tool offered by GoDaddy on their website. There are numerous domain different needs, including.com,.net,.org,.info, and many more.

Read Also: How to buy a Domain Name for Free using Godaddy?

4. Add hosting to cart

You can add your domain name and web hosting package to your cart once you’ve completed your selections. The exact cost of your purchase, including any applicable discounts or special offers, will then be shown to you by GoDaddy. Also, you can include any extra features or offerings, like SSL certificates or website backups.

5. Review and confirm order

Review your order carefully to make sure all the details are correct before completing your transaction. The period of your hosting plan, the billing cycle, and any add-ons you desire have to be chosen. You can select whether to want your hosting or domain name to automatically update. Also, You can go to the checkout after you’ve reviewed your order and wanted to make sure everything is right.

You can also checkout this digital marketing institute to learn digital marketing course by enrolling in our course Or Contact Digital Bikana on +91-8949483728

6. Make payment

Next, you’ll need to pay for your domain name and web hosting plan. Forms of payment accepted by GoDaddy include credit cards, debit cards, and PayPal. You’ll receive an email confirmation of your purchase along with instructions on how to activate your new web hosting plan after your money has been processed.

7. Install a CMS (Content Management System)

To create and maintain your website, you’ll need to install a content management system (CMS) after buying your web hosting plan. For installing well-known CMS platforms like WordPress, Drupal, and Joomla, GoDaddy offers a number of options. These platforms can be manually downloaded, or you can quickly and easily build a website using GoDaddy’s website builder.

Read Also: How to install WordPress using cPanel in GoDaddy?

8. Set up Email accounts

You can create email accounts with your domain name using your web hosting account. By doing this, you can manage all of your communications in one location and give your company a professional look. Microsoft 365 and G Suite, which offer cutting-edge capabilities like shared calendars, video conferencing, and document collaboration, just are two of the email hosting options that GoDaddy offers.

How to buy hosting?

9. Secure your website

To protect your data and the information of your customers, your website must be safe. GoDaddy provides a number of security features, including as malware scans, SSL certificates, and website backups. Visitors can connect safely to your website thanks to SSL certificates, that encrypt the data on it. Malware scans look for any malicious code or activity on your website, while website backups allow you to restore your website in the case that it is ever hacked or compromised.

Read Also: What is SSL Certificate and Why it is required?

10. Optimize your website for search engine

The practise of improving your website’s presence in search engine results pages is known called search engine optimisation (SEO). GoDaddy provides a variety of SEO tools, such as keyword research tools, website analytics tools, and improvement guides. You can increase website traffic, increase your presence online, and expand your business by optimising it for search engines.

By following these steps, you can buy and maximize the benefits of your web hosting plan and create a professional, secure, and optimized website that meets the needs of your business

Read Also: What is Search Engine Optimization (SEO) in Digital Marketing?

Conclusion

In conclusion, purchasing web hosting through GoDaddy is an easy process that can aid you in creating a respectable online presence for your organization. GoDaddy provides the flexibility and customization to fit the needs of businesses of all sizes with a choice of plans and features.

You may confidently navigate the process of buying web hosting by following the steps laid out here, from choosing the best plan for your company to installing a content management system, setting up email accounts, and securing your website. Furthermore, improving your website’s search engine rankings can help you expand your customer base and grow your company over time.

Overall, web hosting is an important component of every firm’s online presence, and GoDaddy offers a selection of options to suit your requirements and budget restrictions. GoDaddy’s web hosting services give you the resources and assistance you need to be effective, whether you’re just getting going or looking to grow your web site. So why not start today by establishing your business’s online presence using GoDaddy web hosting?

What is Hyperlink in html with Example and How it is created?

In this article we are going to discuss what is hyperlink in html with example and how it is created. We now access information, communicate with each other, and conduct business in completely new ways thanks to the World Wide Web. The little hyperlink, a basic yet efficient tool that enables us to travel between websites and access a broad array of online content, is at the core of this digital revolution. A hyperlink can be made, but what exactly is one? In this post, we’ll look at the basics of hyperlinks, including their composition, meaning, and tools and methods. Numerous tools and methods are available to assist you in creating hyperlinks, it is a fairly simple process. Understanding the fundamentals of hyperlinks is crucial to effective web browsing, whether you are a website owner, developer, or consumer.

What is Hyperlink in html with example?

A word, phrase, or image that, when clicked, leads the user to another place on the internet is known as a hyperlink. To make them pop out from the surrounding text, these links usually appear in a different color, underlined, or highlighted. The World Wide Web was built on hyperlinks, which allow users to effortlessly navigate between different web pages and websites.

A hyperlink’s structure is quite basic. The anchor text and the URL make up the two parts. The visible element of the link is called the anchor text, and it is often a word or phrase that summarises the data on the page that is being known to. The webpage’s HTML code includes the URL, which is the web address of the page being linked to. The URL is retrieved and the browser asks the web server for the page when the user clicks on the anchor text.

Any type of web content, including written material, pictures, videos, and audio files, can be linked to using hyperlinks. They can also be used to link to various kinds of documents, such as Word or PDF files. Additionally, connections to particular web components like headings, paragraphs, or images can be established via hyperlinks.

Links are an essential part of a website’s navigation and user experience. They aid in the organization of content on a website and let users swiftly and easily access the information they need. Furthermore, links are an essential element of search engine optimization (SEO), as they aid search engines in understanding the structure and content of a website.

Read Also: How to install theme in WordPress Website?

How to create a hyperlink in html?

The process of making a hyperlink is simple, and it can be done in a number of ways, such as through manual HTML code, a website builder, or a content management system (CMS). Here is a step-by-step tutorial on utilising HTML code to generate a hyperlink.

how to create a hyperlink in html

Steps to create a text hyperlink are listed below:

Step 1: Open a text editor

Open a plain text editor such as Notepad or TextEdit on your computer.

Step 2: Type in the anchor text

Type in the text that you want to use as your hyperlink. This is the visible part of the link that users will click on. For example, if you want to link to a website about dogs, you can type in “CONTACT US.”

Step 3:  Add the hyperlink tag

Next, you will need to add the hyperlink tag to your anchor text. The hyperlink tag consists of the opening and closing <a> tags, with the URL of the website you want to link to in between. The code will look like this:

<a href=”https://www.example.com”>CONTACT US</a>

Step 4: Add the URL

Replace the “https://www.example.com” with the URL of the website you want to link to. It is essential to ensure that the URL is correct and properly formatted.

Step 5: Save the file

Save the file with a .html extension, such as “index.html.”

Step 6: Test the hyperlink

Open the HTML file in your web browser and click on the anchor text. The browser should take you to the linked website.

Alternately, the procedure of creating a hyperlink could vary notably if you’re using a website builder or CMS, but the basic stages are the same. Normally, you must select the anchor text, select the hyperlink option, and then type the URL. The HTML code will be automatically generated by the CMS or website builder.

You can also checkout this digital marketing institute to learn digital marketing course by enrolling in our course Or Contact Digital Bikana on +91-8949483728

How to create an image hyperlink in html?

Similar steps must be followed to create an image hyperlink, however instead of utilising anchor text, you will use an image. Here is how to use HTML code to make an image hyperlink.

Step 1: Choose the image

Select the image that you want to use as your hyperlink. This could be an image from your website or an external image.

Step 2: Add the hyperlink tag

Next, you will need to add the hyperlink tag to your image. The hyperlink tag consists of the opening and closing <a> tags, with the URL of the website you want to link to in between. The code will look like this:

<a href=”https://www.example.com”><img src=”yourimage.jpg”></a>

Step 3: Add the image source

Replace “yourimage.jpg” with the file name of the image you want to use. Ensure that the image is correctly formatted (JPG, PNG, etc.) and is located in the correct directory.

Step 4: Add the URL

Replace “https://www.example.com” with the URL of the website you want to link to.

what is hyperlink in html with example and how it is created

Step 5: Add alternative text (optional)

You can add alternative text to your image using the “alt” attribute. This provides a description of the image for users who may not be able to see it. The code will look like this:

<a href=”https://www.example.com”><img src=”yourimage.jpg” alt=”Description of your image”></a>

Step 6: Save the file

Save the file with a .html extension, such as “index.html.”

Step 7: Test the hyperlink

Open the HTML file in your web browser and click on the image. The browser should take you to the linked website.

Uses of hyperlink

Links are an essential part of the internet and may be used in many ways to improve the surfing experience for users. Here are a few typical applications for hyperlinks:

Navigation

Users can easily move between web pages or various parts of the same page thanks to hyperlinks.

Linking to external resources

Hyperlinks can be used to point to other websites, articles, pictures, and videos that are located on the internet.

Internal linking

Links to other pages on the same website can be created using hyperlinks, making it simpler for visitors to access relevant information.

Call-to-action (CTA) buttons

Hyperlinks can be used to make CTA buttons that nudge users to take particular actions, such signing up for a newsletter or making a purchase.

Read Also: How to buy a Domain Name for Free using Godaddy?

Conclusion

Hyperlinks are a vital component of web design as they make it simple for visitors to move about the site and find the information they need. Links to external resources, internal links, CTA buttons, and SEO improvement are just a few of the numerous uses for them.

Effective usage of hyperlinks may enhance the browsing experience for users, making it simpler to access information and perform certain actions. Internal linking may also boost user engagement and retention by guiding users to relevant data within the same page,Because search engines employ links to crawl and index web pages, they are also essential to SEO. Web designers can raise their website’s ranking on search engine result pages (SERPs) by incorporating relevant linkages, which will increase visibility and traffic.

However, it’s crucial to use hyperlinks correctly and to avoid utilizing them excessively, which can be considered spam and have a poor impact on the user experience. By incorporating alternate text and using suitable colors and styles, web designers can ensure that hyperlinks are usable by everybody, including those with disabilities.

In the end, hyperlinks are an essential part of web design that enhance SEO and user experience. Web designers may make intriguing easily accessible websites that offer users value by using them wisely and effectively.