How can you customize a WordPress theme to match your branding?

In this article we are going to talk about How can you customize a WordPress theme to match your branding? Establishing a strong brand identity is essential for creating a successful online presence. When using WordPress to build your website, customizing the theme to align with your branding becomes crucial. By making thoughtful adjustments, you can ensure that your website reflects your brand’s personality and resonates with your target audience.

How can you customize a WordPress theme to match your branding?

In this comprehensive guide, we will provide a detailed step-by-step process on how to customize a WordPress theme to match your branding effectively, covering various aspects from colors and typography to layout and imagery.

1. Choose a Theme that Supports Customization

The first step in customizing your WordPress theme is selecting one that offers a high level of customization options. Look for themes that provide features like color customization, typography settings, and layout flexibility. This will give you the freedom to mold the theme according to your brand’s visual requirements. Browse through the vast collection of themes available in the official WordPress Theme Directory or explore premium theme marketplaces to find a suitable theme for your website.

When choosing a theme, consider the following:

a. Customization Options

Ensure that the theme offers a robust set of customization options, such as color pickers, font selection, and layout control. This will allow you to personalize the theme to match your branding.

b. Responsive Design

Select a theme that is responsive, meaning it adjusts smoothly to different screen sizes and devices. A responsive design ensures a consistent user experience across desktops, tablets, and mobile devices.

c. Reviews and Ratings

Check the reviews and ratings of the theme to gain insights into the experiences of other users. Pay attention to the overall rating, comments about customization options, and support from the theme developer.

Read Also: How can you add testimonials or reviews to a WordPress website?

2. Upload Your Brand Assets

Once you have chosen a theme, it’s time to incorporate your brand assets into the website. Start by uploading your logo and favicon. Most WordPress themes provide a user-friendly interface for uploading these elements.

a. Logo

Your logo is a central component of your brand identity. Ensure that your logo is optimized for web display and appropriately sized to fit within the header section of your chosen theme. Maintain a balance between file size and image quality to optimize website performance.

b. Favicon

A favicon is a small icon that appears in the browser tab. It helps users identify your website and reinforces your brand presence. Create a favicon that is representative of your brand, typically featuring a simplified version of your logo or a unique symbol.

Read Also: How can you backup and restore a WordPress website?

3. Customize Colors and Typography

Colors and typography play a significant role in brand recognition and creating a cohesive visual experience for your audience. Customizing these elements in your WordPress theme will help align your website with your brand’s personality.

a. Color Scheme

Modify the theme’s color palette to match your brand’s primary and secondary colors. Look for theme options that allow you to change colors easily or consider using a plugin specifically designed for color customization. Select colors that reflect your brand’s values, evoke the desired emotions, and ensure readability across your website.

b. Typography

Adjust the typography settings to reflect your brand’s chosen fonts. Many WordPress themes offer a range of font options, including integration with popular font libraries like Google Fonts. Select fonts that align with your brand’s personality, ensuring they are legible and consistent throughout your website.

Custom WordPress Theme From Scratch

4. Adjust the Layout and Templates

To create a unique and consistent look for your website, you may need to modify the layout and templates of your chosen theme. Customizing the layout will allow you to arrange content and elements in a way that best represents your brand and enhances user experience.

a. Page Builders

Many WordPress themes come with built-in page builders or visual editors that allow you to customize the layout without any coding knowledge. Utilize these tools to rearrange sections, add or remove elements, and experiment with different page structures. Drag and drop elements to create the desired layout and achieve a visually appealing design.

Read Also: What are some best practices for Organizing and Structuring content in WordPress?

b. Customizing Templates

If you have coding skills or access to a developer, you can further customize the layout by editing the theme’s templates directly. This gives you complete control over the design, allowing you to implement custom page structures or add unique elements that align with your branding. Customizing templates requires a deeper understanding of HTML, CSS, and PHP.

5. Add Custom CSS

For more precise and advanced customization, you can use custom CSS (Cascading Style Sheets) to override default styles and add your own code snippets. Custom CSS allows you to fine-tune specific elements of your WordPress theme to match your brand’s style.

a. WordPress Customizer

Many themes provide a built-in Customizer where you can add custom CSS without modifying theme files directly. This ensures that your changes are preserved even when updating the theme. Look for the Customizer section in your WordPress dashboard and locate the CSS customization option.

b. Child Theme or Custom CSS Plugin

If you plan to make extensive changes or modify multiple aspects of your theme, consider using a child theme or a custom CSS plugin. A child theme allows you to create a separate theme folder that inherits the styles and functionality of the parent theme while allowing you to add custom CSS safely. Alternatively, custom CSS plugins provide an easy-to-use interface for adding and managing your custom styles.

Read Also: What are child themes in WordPress and how can you use them for customizations?

6. Incorporate Brand Imagery

To enhance your brand’s visual identity, it is crucial to incorporate branded imagery throughout your website. Consistent use of high-quality images that align with your brand’s tone and style will reinforce your brand’s message and engage your audience.

a. Image Selection

Choose images that resonate with your brand’s values, target audience, and overall aesthetic. Ensure that the images are of high quality, properly sized, and optimized for web use. Stock photo websites and professional photography services can be valuable resources for finding suitable images.

Read Also: What are some tips for choosing and optimizing images for a wordpress website?

b. Custom Backgrounds and Graphics

Consider adding custom background images or patterns that complement your brand’s aesthetics. These can be applied to specific sections or the entire website, providing a unique visual element. Additionally, create custom graphics or icons that represent your brand’s unique features or services. These elements add a personalized touch and contribute to a cohesive brand experience.

Custom WordPress Theme Code

Conclusion:

Customizing a WordPress theme to match your branding is a vital step in creating a strong and consistent online presence. By selecting a customizable theme, uploading brand assets, customizing colors and typography, adjusting the layout and templates, adding custom CSS, and incorporating branded imagery, you can create a unique and visually appealing website that aligns with your brand’s identity. Remember, consistency in branding helps build trust and recognition among your target audience, making your website a true reflection of your brand’s values and personality. With careful customization, your WordPress theme will effectively communicate your brand’s message and contribute to the overall success of your online presence. So, Now I hope you have understood about customize a WordPress theme to match your branding.

You can also checkout this website designing institute to learn digital marketing course by enrolling in our course Or Contact Digital Bikana on +91-8949483728

What are some tips for choosing and optimizing images for a wordpress website?

In this article we are going to talk about What are some tips for choosing and optimizing images for a wordpress website? Images are essential for making your WordPress website visually appealing and improving the user experience. However, it’s important to choose and optimize images carefully to ensure they don’t negatively impact your site’s performance.

What are some tips for choosing and optimizing images for a wordpress website?

In this article, we will explore some valuable tips that will help you select and optimize images effectively for your WordPress website.

1. Relevance and Purpose

When selecting images for your website, prioritize relevance and purpose. Choose images that align with your content and convey your message effectively. Relevant and purposeful images enhance the overall visual impact of your website and help create a connection with your audience. Whether you’re running a blog, an e-commerce site, or a portfolio website, ensure that the images you choose are in line with your brand and support the content you present.

2. Image Resolution

Opt for high-quality images with the appropriate resolution. Clear and sharp images not only look professional but also contribute to a positive user experience. Higher resolution images are especially important if you have a responsive design or if users can zoom in on the images. However, it’s crucial to find a balance between image quality and file size. Large image files can significantly slow down your website’s loading speed, so make sure to optimize them without compromising their visual appeal.

Read Also: How do you add and manage images in WordPress?

3. Compression for Faster Loading

Optimizing your images through compression is essential for maintaining a fast-loading website. Large image file sizes can significantly slow down your site’s performance, leading to higher bounce rates and lower user satisfaction. Utilize image compression tools or WordPress plugins to reduce the file size without compromising the image quality. Compressed images ensure faster loading times and improve user satisfaction, especially for users on mobile devices or with slower internet connections.

tips for choosing and optimizing images for a wordpress website

4. Suitable File Formats

Choosing the right file format is crucial for optimal image display and website performance. JPEG is best suited for photographs or complex images with many colors, providing a good balance between file size and image quality. PNG is ideal for images with transparent backgrounds or simple graphics, preserving the image quality while supporting transparency. GIFs can be used for simple animations, while SVG is suitable for scalable vector graphics, retaining their quality regardless of the size. By using the appropriate file format, you can ensure that your images are displayed correctly and efficiently.

5. Image Dimensions

Resize your images to the specific dimensions required by your website.. By resizing images beforehand, you reduce the overall file size and enhance loading times, resulting in a smoother browsing experience for your visitors. Additionally, consider implementing responsive design techniques, where images automatically adjust their dimensions based on the user’s device and screen size. Responsive images ensure that your website looks great on different devices without sacrificing performance.

6. Image Naming and Alt Text

Before uploading images to WordPress, give them descriptive and relevant file names. This practice benefits search engine optimization (SEO) by providing contextual information about the image. Instead of using generic names like “IMG001.jpg,” use specific and descriptive names that reflect the content or subject of the image. Additionally, don’t forget to provide alt text (alternative text) for your images. Alt text improves accessibility for visually impaired individuals and helps search engines understand and index your images properly, improving your website’s SEO.

7. Implement Lazy Loading

Consider implementing lazy loading for your images. With lazy loading, images are loaded only when they are about to be viewed by the user, rather than all at once. This technique improves initial page load times, especially for websites with numerous images or long-scrolling pages. By deferring the loading of images that are not immediately visible, you reduce the overall page size and enhance the user experience. Various WordPress plugins are available to easily enable lazy loading functionality, allowing you to optimize your website’s performance with minimal effort.

optimizing images for a wordpress

8. Caching Plugin

Utilize a caching plugin on your WordPress site to store static versions of your web pages, including images. Caching reduces server load and improves overall website performance by serving pages more efficiently. With cached images, subsequent visits to your site will be faster, enhancing the user experience. Caching plugins generate HTML versions of your pages, which reduces the need for dynamic image processing and database queries. By implementing a caching solution, you ensure that your images and content are delivered quickly to your visitors, resulting in faster loading times and improved performance.

Read Also: How to optimize the speed and performance of a WordPress website?

9. Image SEO

Optimize your images for search engines by incorporating them into XML sitemaps. Include descriptive captions or captions with relevant keywords to enhance their SEO value. Providing contextual information around the images also improves their discoverability in search engine results. Alt text, as mentioned earlier, is essential for image SEO. By using descriptive alt text, you enable search engines to understand the content and context of your images. Additionally, ensure that your images are properly sized and compressed to improve page loading times, as website speed is a critical factor in SEO rankings.

Read Also: What is the Role of XML Sitemaps in SEO?

Conclusion

Choosing and optimizing images for your WordPress website is essential for delivering an engaging user experience and maintaining optimal site performance. By following the tips mentioned above, you can ensure that your images are relevant, visually appealing, and load quickly, resulting in a website that captivates visitors and leaves a lasting impression. Remember, a well-optimized image can speak a thousand words and significantly contribute to the success of your WordPress website. Take the time to select high-quality images, optimize them for fast loading, and implement best practices to enhance the overall visual appeal and performance of your website. So, Now I hope you have understood about some tips for choosing and optimizing images for a wordpress website.

You can also checkout this website designing institute to learn digital marketing course by enrolling in our course Or Contact Digital Bikana on +91-8949483728

How can you backup and restore a WordPress website?

In this article we are going to talk about How can you backup and restore a WordPress website? Regularly backing up your WordPress website is crucial to protect your valuable data and ensure that you have a restore point in case of any unexpected issues. A backup allows you to easily recover your website and minimize downtime.

How can you backup and restore a WordPress website?

In this article, we will provide you with a step-by-step guide on how to backup and restore a WordPress website, covering both manual and plugin-based methods.

1. Manual Backup Methods:

i. Backup via File Transfer Protocol (FTP)

One method to manually backup your WordPress website is by using File Transfer Protocol (FTP) to download your site’s files and the WordPress database. Here’s how:

a) Connect to your website via an FTP client (e.g., FileZilla).

b) Locate the WordPress installation directory on your server.

c) Download all the files and folders within the WordPress directory to your local computer.

d) Access your website’s database using a tool like phpMyAdmin provided by your web hosting control panel.

e) Export the WordPress database as a. sql file and save it on your computer.

By following these steps, you have created a manual backup of your website’s files and database, providing a comprehensive restore point.

backup and restore wordpress site

ii. Backup via cPanel

Another manual backup method is using cPanel, a popular web hosting control panel. Here is a step-by-step guide on how to backup your WordPress website using cPanel:

a) Sign in to your cPanel account, which is given to you by your web hosting provider.

b) Locate the “Backup” or “Backup Wizard” section.

c) Click on the “Backup” or “Generate Full Backup” option.

d) Select a destination for your backup file (e.g., “Home Directory” or an external storage option).

e) Initiate the backup process, and wait for it to complete.

f) Download the backup file to your local computer.

Using cPanel, you can create a comprehensive backup of your WordPress website, including files, databases, and other essential components.

2. Plugin-Based Backup Methods

i. UpdraftPlus

UpdraftPlus is a popular and user-friendly WordPress backup plugin. Here’s how to use UpdraftPlus to backup and restore your WordPress website:

a) Install and activate the UpdraftPlus plugin from the WordPress plugin repository.

b) Go to the UpdraftPlus settings in your WordPress dashboard and click on “Backup/Restore.”

c) Click the “Backup Now” button to create a full backup of your website or customize the backup options according to your preferences.

d) Choose a remote storage destination (e.g., Google Drive, Dropbox, or an FTP server) or save the backup files locally.

Read Also: How can you add testimonials or reviews to a WordPress website?

e) Initiate the backup process, and wait for it to complete.

f) To restore your website, navigate to the UpdraftPlus settings, click on the “Restore” tab, and select the backup files you want to restore from the available list.

g) Follow the on-screen instructions to restore your website.

UpdraftPlus simplifies the backup and restore process, offering scheduled backups, remote storage options, and easy restoration of your WordPress website.

how to restore wordpress website

ii. VaultPress

VaultPress, now known as Jetpack Backup, is a backup solution developed by Automattic, the company behind WordPress. Here’s how to use VaultPress to backup and restore your WordPress website:

a) Install and activate the Jetpack plugin, which includes VaultPress functionality.

b) Connect your website to a WordPress.com account and subscribe to a suitable Jetpack plan.

c) Once connected, go to the Jetpack settings in your WordPress dashboard and enable the “Backup” feature.

d) Configure the backup settings according to your requirements.

e) VaultPress will automatically create backups of your website in real-time or at scheduled intervals.

Read Also: What are the essential plugins for a WordPress website design?

f) To restore your website, visit the Jetpack settings, navigate to the “Backup” section, and select the backup you want to restore.

g) Follow the prompts to initiate the restoration process.

VaultPress offers seamless integration with WordPress, automated backups, and a reliable infrastructure, making it a popular choice for many WordPress users.

Conclusion

Regularly backing up and being able to restore your WordPress website is essential for safeguarding your data and ensuring business continuity. In this article, we explored both manual methods, such as using FTP and cPanel, and plugin-based solutions like UpdraftPlus and VaultPress. By following these backup and restore methods, you can have peace of mind knowing that your WordPress website is protected, and you have the means to recover it swiftly if the need arises. Remember to establish a backup schedule that suits your website’s needs and verify the integrity of your backups periodically. So, Now I hope you have understood about backup and restore a WordPress website.

You can also checkout this website designing institute to learn digital marketing course by enrolling in our course Or Contact Digital Bikana on +91-8949483728
How can you add testimonials or reviews to a WordPress website?

In this article we are going to talk about How can you add testimonials or reviews to a WordPress website? Testimonials and reviews play a crucial role in building credibility, trust, and social proof for businesses. By showcasing positive feedback from satisfied customers on your WordPress website, you can enhance your brand reputation and influence potential customers.

How can you add testimonials or reviews to a WordPress website?

In this comprehensive guide, we will explore the process of adding testimonials or reviews to a WordPress website, covering different methods, popular plugins, and best practices.

1. Benefits of Testimonials and Reviews

Testimonials and reviews offer several advantages for businesses, including:

a. Building Trust

Positive testimonials and reviews provide social proof, demonstrating that others have had a positive experience with your products or services. This helps build trust and confidence with potential customers.

b. Influencing Purchase Decisions

Testimonials and reviews can significantly impact purchase decisions by providing insights into the quality, reliability, and value of your offerings. Positive feedback acts as persuasive content that encourages others to choose your business.

c. Search Engine Optimization (SEO)

Testimonials and reviews often include relevant keywords and phrases that can improve your website’s SEO. This helps attract organic traffic and increases your visibility in search engine results.

2. Adding Testimonials or Reviews Manually

a. Collect Testimonials

Reach out to satisfied customers and request their feedback. Ask for written testimonials or reviews that highlight specific experiences, outcomes, or benefits they received from your products or services.

b. Create Testimonial Pages

Create dedicated pages on your WordPress website to display testimonials. Use the Gutenberg block editor or a page builder plugin to design visually appealing layouts. Include the testimonial content, customer names, and relevant details.

Read Also: What is the Gutenberg editor in WordPress and how can you use it?

c. Incorporate Visuals

Enhance the visual impact of testimonials by adding customer photos or company logos alongside their feedback. Visual elements can add authenticity and credibility to the testimonials.

d. Update Regularly

Continuously gather new testimonials and update your testimonial pages to keep the content fresh and relevant. Highlight recent testimonials to showcase ongoing customer satisfaction.

3. Using Testimonial Plugins

a. Install and Activate Testimonial Plugins

WordPress offers various testimonial plugins that simplify the process of adding and managing testimonials. Some popular options include Strong Testimonials, Testimonials Widget, and WPForms. Install and activate the plugin of your choice from the WordPress plugin directory.

b. Configure Plugin Settings

After activating the plugin, access the settings page to configure the plugin according to your preferences. Set options such as testimonial display styles, transitions, filters, and integration with other plugins or form builders.

c. Add Testimonials

Use the plugin’s interface to add testimonials manually. Provide customer names, testimonial content, ratings (if applicable), and any additional details required by the plugin.

Read Also: What are the essential plugins for a WordPress website design?

d. Display Testimonials

Once testimonials are added, determine how you want them to be displayed on your website. Testimonial plugins typically offer multiple display options, including widget areas, testimonial sliders, grid layouts, or short code integration. Select the appropriate method based on your website’s design and layout.

e. Customize Testimonial Appearance

Most testimonial plugins allow customization options to match your website’s branding. Modify font styles, colors, background, and transitions to create a cohesive and visually appealing testimonial section.

How Can You Add Reviews To A WordPress Website

4. Integrating Review Platforms and Third-Party Services

a. Utilize Review Platform Integrations

If your business has profiles on popular review platforms like Google My Business, Yelp, or Trustpilot, consider integrating them into your WordPress website. Review platform integrations allow you to display reviews from these platforms directly on your website.

b. Third-Party Review Services

Several third-party review services specialize in collecting and managing customer reviews. Platforms like Trustpilot, Feefo, or Yotpo provide plugins or tools that enable you to display reviews on your WordPress website. These services often offer customizable widgets or integration options to showcase reviews.

c. API Integration

For more advanced users, you can utilize APIs provided by review platforms or third-party services to fetch and display reviews dynamically on your WordPress website. This approach requires technical knowledge or assistance from a developer.

Read Also: How can you add Google Analytics tracking code to a WordPress website?

5. Best Practices for Testimonials and Reviews

a. Seek Permission

Always obtain permission from customers before using their testimonials or reviews on your website. This ensures compliance with privacy regulations and ethical practices.

b. Include Relevant Information

When adding testimonials, include customer names, job titles, company names, and any other relevant details that add credibility to the testimonial.

c. Diversify Testimonials

Display testimonials from a variety of customers, industries, or use cases to provide a well-rounded representation of customer experiences.

d. Add Visual Elements

Incorporate visuals such as customer photos or company logos alongside testimonials to enhance authenticity and trustworthiness.

e. Monitor and Respond

Regularly monitor and respond to customer reviews and feedback. Engaging with customers demonstrates your commitment to customer satisfaction and can help mitigate any negative feedback.

How Can You Add Testimonials To A WordPress Website

Conclusion 

 Adding testimonials or reviews to your WordPress website can significantly impact your business’s credibility and influence potential customers. Whether you choose to add testimonials manually, utilize testimonial plugins, integrate review platforms, or third-party services, it’s essential to highlight positive feedback and provide social proof. Follow best practices such as seeking permission, including relevant information, diversifying testimonials, and engaging with customers. By incorporating testimonials or reviews effectively, you can build trust, influence purchase decisions, and improve your website’s overall user experience. Testimonials and reviews act as powerful marketing tools that showcase customer satisfaction and contribute to the growth and success of your WordPress website. So, Now I hope you have understood testimonials or reviews to a WordPress website.

You can also checkout this website designing institute to learn digital marketing course by enrolling in our course Or Contact Digital Bikana on +91-8949483728
How can you add Google Analytics tracking code to a WordPress website?

In this article we are going to talk about How can you add Google Analytics tracking code to a WordPress website? Google Analytics is a powerful tool that helps you understand how your website is performing, how visitors behave on your site, and how your marketing efforts are paying off. By integrating Google Analytics into your WordPress website, you can gain a deeper understanding of your audience and make data-driven decisions to improve your site’s effectiveness.

How can you add Google Analytics tracking code to a WordPress website?

In this article, we will walk you through the process of adding the Google Analytics tracking code to your WordPress website.

Step 1: Sign up for a Google Analytics Account

To start, you’ll need to create a Google Analytics account. If you don’t already have one, visit the Google Analytics website (analytics.google.com) and sign in with your Google account or create a new one if necessary. Once signed in, click on the “Sign up” button to start the account creation process. Google will guide you through the necessary steps to set up your website’s tracking property.

Step 2: Obtain the Tracking Code

After creating your Google Analytics account, you’ll need to obtain the tracking code. From the Google Analytics dashboard, navigate to the Admin section by clicking on the gear icon in the bottom left corner. In the Property column, click on “Tracking Info” and select “Tracking Code.” On this page, you will find the tracking code snippet that you need to add to your WordPress website. The code snippet consists of two parts: the script tag that loads the Google Analytics library and the configuration code that initializes the tracking.

add google analytics tracking code to wordpress

Step 3: Install and Activate a Google Analytics Plugin

To simplify the process of adding the tracking code to your WordPress website, we recommend using a Google Analytics plugin. There are several plugins available that can help you with this task. For the purposes of this guide, we will use the popular “MonsterInsights” plugin as an example.

To install the plugin, log in to your WordPress dashboard, navigate to the “Plugins” section, and click on “Add New.” In the search bar, type “MonsterInsights” and press Enter. Look for the “MonsterInsights” plugin in the search results and click on the “Install Now” button. Once the installation is finished, simply click the “Activate” button to activate the plugin.

Read Also: What is a theme in WordPress and how can you choose the right one?

Step 4: Configure the MonsterInsights Plugin

After activating the MonsterInsights plugin, you need to configure it with your Google Analytics account. This step allows the plugin to establish a connection and retrieve the necessary information from your Google Analytics account.

To begin the configuration process, go to the “Insights” section in your WordPress dashboard and click on “Settings.” On the settings page, you will find an option to authenticate your Google account with the plugin. Click on the “Authenticate with your Google account” button, and follow the instructions to grant the necessary permissions. This will connect your Google Analytics account to the plugin.

Once the authentication process is complete, you will see a list of websites associated with your Google Analytics account. Select the website you want to track from the drop-down menu. This will ensure that the plugin fetches the correct tracking code for your website.

Read Also: What are the essential plugins for a WordPress website design?

Step 5: Add the Tracking Code

With the MonsterInsights plugin properly configured, you can now add the Google Analytics tracking code to your WordPress website.

From your WordPress dashboard, navigate to the “Insights” section and click on “Tracking.” In the “Tracking Code” tab, you will see a toggle switch labeled “Manually enter your UA code.” Enable this switch, as it allows you to manually add the tracking code snippet.

Next, copy the tracking code snippet obtained in Step 2 and paste it into the text box labeled “UA Code.” Ensure that you copy the entire code snippet, including both the script tag and the configuration code. Once you’ve pasted the code, click on the “Save Changes” button to apply the settings.

How to add Google Analytics code in WordPress with plugin

Step 6: Verify Tracking

To ensure that the tracking code is properly installed and functioning, it’s essential to verify the tracking on your website.

Open your website in a new browser tab and visit a few pages. Then, return to your Google Analytics account. In the “Reporting” section, navigate to “Realtime” and click on “Overview.” If your website is receiving traffic, you should see your own visit(s) listed under the “Realtime” section. This confirms that the tracking code is working correctly.

Conclusion:

Adding Google Analytics tracking code to your WordPress website is a straightforward process that can provide you with valuable insights into your site’s performance. By following the step-by-step guide outlined in this article, you can seamlessly integrate Google Analytics and start tracking visitor behavior, traffic sources, and other important metrics. Remember to regularly analyze the data and use it to optimize your website, make informed marketing decisions, and ultimately improve the user experience. By leveraging the power of Google Analytics, you can unlock valuable insights and drive the success of your WordPress website. So, Now I hope you have understood about how can we add Google Analytics tracking code to a WordPress website.

You can also checkout this website designing institute to learn digital marketing course by enrolling in our course Or Contact Digital Bikana on +91-8949483728

What are the essential plugins for a WordPress website design?

In this article we are going to talk about What are the essential plugins for a WordPress website design? Plugins play a crucial role in extending the functionality and enhancing the design of a WordPress website. With thousands of plugins available, it can be overwhelming to determine which ones are essential for an effective website design.

What are the essential plugins for a WordPress website design?

In this comprehensive guide, we will explore a range of essential plugins that can elevate your WordPress website’s design, user experience, security, and performance. Whether you are a beginner or an experienced WordPress user, understanding these plugins will help you create a visually appealing, functional, and successful website.

1. Page Builder Plugins

Page builder plugins provide a visual interface for creating and customizing web pages without the need for coding skills. These plugins offer a range of drag-and-drop tools, pre-designed templates, and elements that enable you to design stunning layouts and structures.

a. Elementor

Elementor is one of the most popular page builder plugins, offering a wide range of pre-designed templates, widgets, and customization options. It provides an intuitive interface and real-time editing, allowing you to design visually captivating pages.

b. Divi Builder

Divi Builder is another powerful page builder plugin with a comprehensive set of features. It offers a vast library of modules, layout options, and responsive editing capabilities, making it easy to create unique and dynamic page designs.

2. SEO Plugins

Search Engine Optimization (SEO) plugins help optimize your website’s content, meta tags, and overall structure to improve visibility in search engine results. These plugins offer tools and guidance to enhance your website’s SEO performance.

a. Yoast SEO

Yoast SEO is a widely used SEO plugin that provides comprehensive features for optimizing your website. It offers readability analysis, keyword optimization, XML sitemap generation, and social media integration, ensuring your content is optimized for search engines and user-friendly.

b. All in One SEO Pack

All in One SEO Pack is another popular SEO plugin that simplifies the optimization process. It offers XML sitemap support, meta tag optimization, social media integration, and advanced features for developers, allowing you to improve your website’s search engine rankings.

Read Also: What is the Role of XML Sitemaps in SEO? 

3. Security Plugins

Ensuring the security of your WordPress website is crucial to protect against malicious attacks, data breaches, and unauthorized access. Security plugins provide features to strengthen your website’s security and protect it from potential threats.

a. Wordfence

Wordfence is a comprehensive security plugin that offers real-time threat detection, firewall protection, malware scanning, and login security features. It helps safeguard your website from hacking attempts and provides detailed security reports.

Read Also: What are some best practices for website security in WordPress?

b. Sucuri

Sucuri is another powerful security plugin that offers website monitoring, malware scanning, and incident response services. It provides a Web Application Firewall (WAF) and helps mitigate various security risks, ensuring your website remains secure.

Essentail Plugins For A WordPress Website Design From Scratch

4. Caching and Performance Plugins

Caching and performance optimization plugins improve your website’s loading speed, resulting in better user experience and search engine rankings. These plugins optimize code, reduce file sizes, and enable browser caching to enhance website performance.

a. WP Rocket

WP Rocket is a popular caching plugin that offers a user-friendly interface and a wide range of performance optimization features. It provides page caching, file minification, lazy loading, and database optimization, resulting in faster page load times.

b. W3 Total Cache

W3 Total Cache is a robust caching plugin that enhances website performance by enabling page caching, browser caching, and minification of CSS and JavaScript files. It also integrates with content delivery networks (CDNs) for further performance improvements.

5. Contact Form Plugins

Contact form plugins enable easy creation and management of contact forms on your website. These plugins allow visitors to reach out to you, improving user engagement and communication.

a. Contact Form 7

Contact Form 7 is a widely used contact form plugin that offers flexibility and customization options. It allows you to create multiple forms, customize form fields, and manage form submissions effectively.

Read Also: How can you create a contact form on a WordPress website?

b. WPForms

WPForms is a user-friendly contact form plugin that offers a drag-and-drop form builder and pre-built templates. It provides features like conditional logic, spam protection, and integration with email marketing services, making it easy to create professional and functional contact forms.

Plugins For WordPress Website Design

Conclusion:

Choosing the right plugins is essential for creating a well-designed and highly functional WordPress website. The plugins mentioned in this guide – page builders, SEO plugins, security plugins, caching and performance plugins, and contact form plugins – are essential for improving the design, user experience, security, and performance of your website. However, it’s important to note that the selection of plugins should align with your specific website requirements and goals. Install only the necessary plugins to maintain a lightweight and efficient website. Regularly update your plugins and ensure compatibility with your WordPress version for optimal performance. With the right combination of essential plugins, you can create a visually appealing, user-friendly, and successful WordPress website. So, Now I hope you have understood about the essential plugins for a WordPress website design.

You can also checkout this website designing institute to learn digital marketing course by enrolling in our course Or Contact Digital Bikana on +91-8949483728

What is a theme in WordPress and how can you choose the right one?

In this article we are going to talk about What is a theme in WordPress and how can you choose the right one for your Website? When it comes to building a website with WordPress, one of the key elements that determines its design and functionality is the theme. A theme in WordPress is a collection of files that control the appearance and layout of your website. It defines the overall look, style, and features available to you.

What is a theme in WordPress and how can you choose the right one for your website?

In this article, we’ll explore what a theme is in WordPress and provide you with essential tips to help you choose the right theme for your website.

What is a WordPress Theme?

A WordPress theme acts as a template for your website, providing a framework for its visual design and layout. It includes various components such as style sheets, templates, images, and code files that work together to create the desired look and feel of your site. Themes allow you to customize your website’s appearance without affecting its underlying content, making them an essential aspect of WordPress’s flexibility and user-friendliness.

WordPress offers a variety of themes, both free and paid, for different industries, purposes, and design preferences. These themes can be easily installed and activated from the WordPress dashboard, making it convenient for users to change the look of their website whenever desired.

Read Also: How can you implement Parallax scrolling in a WordPress Website?

Importance of Choosing the Right Theme

Selecting the appropriate theme for your website is crucial as it directly impacts your site’s aesthetics, user experience, and functionality. A well-designed theme enhances your brand image, engages visitors, and improves overall usability. Conversely, a poorly chosen theme can lead to a confusing or unappealing website, causing visitors to navigate away quickly. Therefore, careful consideration should be given to finding a theme that aligns with your website’s purpose and audience.

Firstly, think about the purpose of your website and its target audience. Whether you’re creating a blog, portfolio, e-commerce store, or corporate site, choose a theme that reflects your specific niche and aligns with your content. This ensures that your website resonates with your intended audience and creates a visually cohesive experience.

Secondly, evaluate the visual appeal of the theme. Look for clean, modern designs that are visually appealing and user-friendly. Consider the layout options, color schemes, typography, and overall aesthetics that match your branding and content presentation. A visually pleasing and well-structured theme contributes to a positive user experience, keeping visitors engaged and encouraging them to explore your site further.

Theme In WordPress For Business

Things to Keep in Mind When Choosing a Theme:

a. Responsiveness and Mobile-Friendliness

In today’s mobile-driven world, it is essential to choose a theme that is responsive and mobile-friendly. With the growing number of users accessing websites on various devices, a responsive theme ensures your site looks and functions well across different screen sizes. Mobile-friendly designs adapt to different resolutions and maintain usability, providing a seamless browsing experience for visitors on smartphones and tablets. Additionally, mobile-friendly websites tend to have better search engine rankings, as search engines prioritize mobile-friendly sites in their results.

Read Also: How can you create a responsive design for a WordPress website?

b. Customization Options

Consider the level of customization options provided by the theme. Look for themes that offer flexibility in terms of layout, color customization, and font choices. This allows you to personalize your site and make it unique to your brand. The ability to customize various aspects of the theme ensures that your website stands out and aligns with your branding guidelines. Themes with built-in customization options or compatibility with popular WordPress page builders provide more control over the design and layout of your site.

Read Also: How to install theme in WordPress Website?

c. Compatibility and Support

Verify that the theme is compatible with the latest version of WordPress and popular plugins. Outdated or incompatible themes may lead to security vulnerabilities or conflicts with essential plugins, impacting the functionality of your website. Additionally, check if the theme has a reliable support system or a dedicated community to address any issues or provide assistance when needed. Responsive and active theme developers often release updates and provide support, ensuring that your website remains secure, up-to-date, and functional.

d. Performance and Loading Speed

Opt for themes that are optimized for performance and fast loading times. A slow-loading website can lead to a higher bounce rate, negatively affecting user experience and search engine rankings. Themes that are lightweight, well-coded, and follow best practices for optimization contribute to a faster website. Consider checking theme reviews or running performance tests to gauge the loading speed and performance impact of a theme before making a decision.

Read Also: How to optimize the speed and performance of a WordPress website?

e. User Reviews and Ratings

Take advantage of user reviews and ratings to gather insights from other WordPress users who have used the theme. Reviews can provide valuable information about the theme’s quality, ease of use, support, and any potential drawbacks. While individual experiences may vary, user feedback can give you an indication of the theme’s overall reputation and reliability.

Where to Find Themes?

WordPress offers an extensive collection of free themes in the official WordPress Theme Directory. You can browse through various categories and filter results based on your requirements. These themes undergo a review process to ensure compliance with WordPress standards. Additionally, there are premium themes available on third-party marketplaces that offer more advanced features, support, and customization options. When choosing premium themes, it’s important to research the reputation of the marketplace and the theme developer to ensure reliability and quality.

Right One For Your WordPress Review

Conclusion:

Choosing the right theme for your WordPress website is a crucial step in creating a visually appealing, user-friendly, and functional online presence. Consider the purpose, design, responsiveness, customization options, compatibility, and performance when evaluating different themes. Remember, your website’s theme sets the tone for your brand and influences visitors’ perception, so invest time in finding the perfect theme that aligns with your goals and captivates your audience. With careful consideration and exploration, you’ll find a theme that enhances your website’s overall appearance and user experience, contributing to its success. So, Now I hope you have understood about theme in WordPress and how can you choose the right one for your website.

You can also checkout this website designing institute to learn digital marketing course by enrolling in our course Or Contact Digital Bikana on +91-8949483728

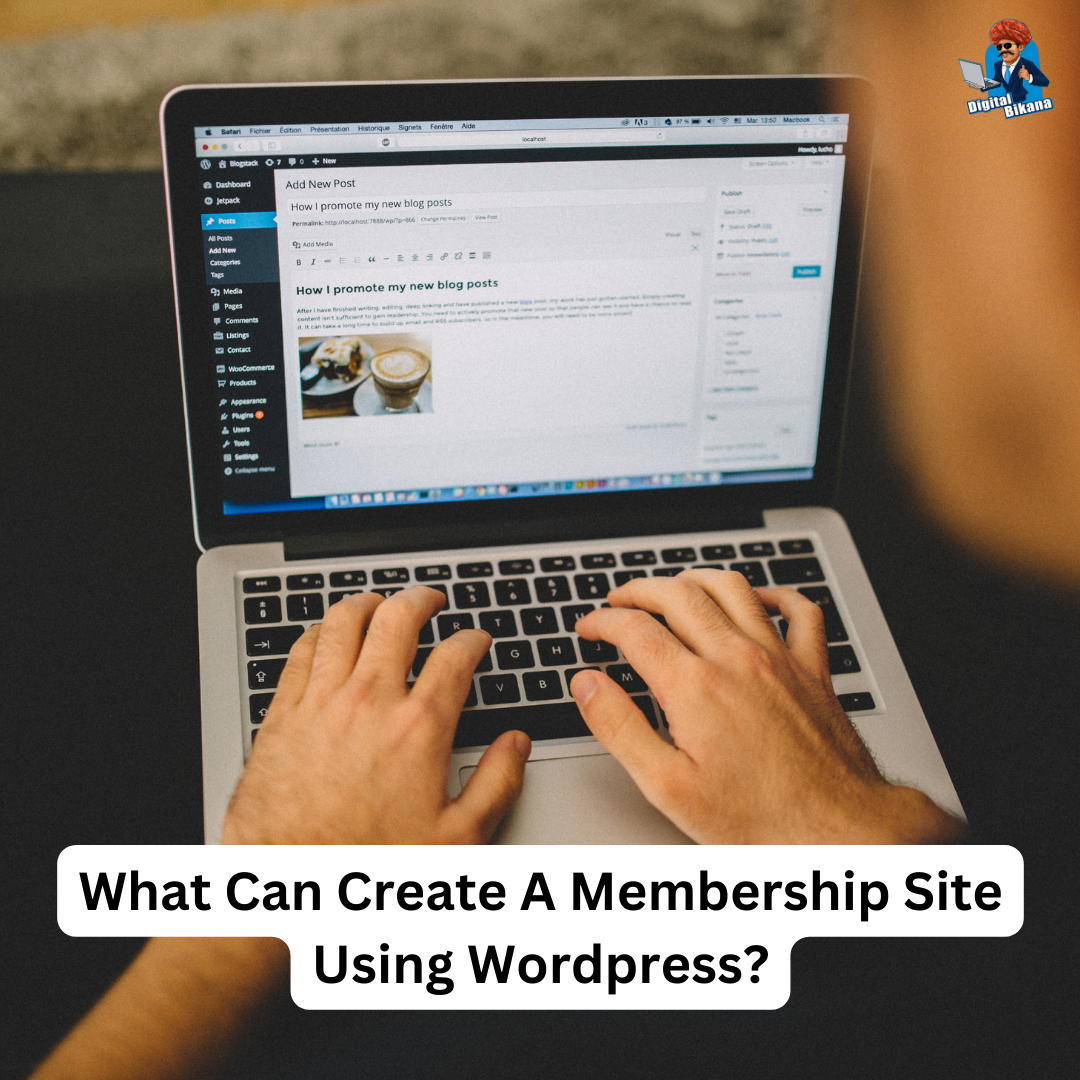
How can you create a membership site using wordpress?

In this article we are going to talk about How can you create a membership site using WordPress? Membership sites have gained immense popularity in recent years, allowing content creators to monetize their expertise and build a loyal community. WordPress, the leading content management system (CMS), offers a robust platform to create and manage membership sites with ease.

How can you create a membership site using wordpress?

In this article, we will walk you through the step-by-step process of creating a membership site using WordPress.

Step 1: Plan and Define Your Membership Site

Before diving into the technical aspects, it’s crucial to plan and define the purpose and structure of your membership site. Consider the type of content you’ll provide, the membership levels or tiers, and any additional features or benefits you want to offer your members. This planning phase will help you align your goals and create a clear roadmap for building your membership site.

Read Also: How do you add and manage images in WordPress?

Step 2: Choose a WordPress Membership Plugin

To create a membership site, you’ll need a reliable WordPress membership plugin. There are several excellent options available, such as MemberPress, LearnDash, and Restrict Content Pro. Research and compare the features and pricing of different plugins to find the one that best suits your needs. Consider factors like content protection, payment integration, member management, and customization options. It’s also essential to choose a plugin that is regularly updated and well-supported by the developer community.

create membership site with wordpress

Step 3: Install and Set Up Your WordPress Membership Plugin

Once you have selected a membership plugin, install and activate it on your WordPress site. Most plugins provide a setup wizard that guides you through the initial configuration. Set up essential settings like payment gateways, email notifications, and member registration options according to your site’s requirements. Configure your plugin to align with your desired membership levels, pricing options, and content access rules.

Read Also: How can you implement Parallax scrolling in a WordPress Website?

Step 4: Create Membership Levels and Subscription Plans

Membership sites typically offer different levels or tiers of access to content. Using your chosen membership plugin, create membership levels and subscription plans based on your site’s structure. For each level, define the access permissions, content restrictions, and pricing options. You can offer free trials, recurring payments, or one-time fees based on your preferences. Ensure that the pricing structure aligns with the value you provide and appeals to your target audience.

Step 5: Design and Customize Your Membership Pages

WordPress provides a range of themes and customization options to create a visually appealing and user-friendly membership site. Select a theme that aligns with your brand and customize it to match your site’s aesthetics. Create dedicated membership pages, including a registration page, login page, account dashboard, and content access pages. Ensure these pages are easy to navigate and provide a seamless user experience. Customize the colors, fonts, and layout to create a cohesive and professional look.

Step 6: Protect and Restrict Your Content

One of the primary functions of a membership site is to restrict access to premium content. Utilize the features provided by your membership plugin to protect your exclusive content. You can define access rules based on membership levels, restrict certain pages or posts, and even drip-feed content to release it gradually over time. This helps keep your members engaged and encourages ongoing subscriptions. Regularly review and update your content access rules to ensure that your membership site remains valuable and relevant.

Read Also: What are some best practices for website security in WordPress?

Step 7: Set Up Payment Gateways

To monetize your membership site, you need to integrate payment gateways. WordPress membership plugins often support popular payment processors like PayPal, Stripe, and Authorize.net. Configure your preferred payment gateway and ensure it is secure and reliable. Test the payment process thoroughly to ensure a seamless experience for your members. Offer multiple payment options, including credit cards and online wallets, to cater to a broader audience.

Read Also: What is the Role of User Engagement Metrics in SEO?

Step 8: Implement Member Engagement Tools

Engaging your members is crucial for the success of your membership site. Consider incorporating features like forums, discussion boards, private messaging, and community groups to foster interaction among your members. Utilize plugins or built-in features to enhance member engagement and encourage networking and collaboration within your community. Regularly create and share valuable content, host webinars or live sessions, and encourage member participation. The more you can create a sense of community and provide value to your members, the more likely they are to remain active and loyal.

create membership site with wordpress plugin

Step 9: Test and Launch Your Membership Site

Before launching your membership site, thoroughly test all the features, payment processes, and content access to ensure everything works as intended. Involve a few beta testers to provide feedback and identify any areas that need improvement. Once you are confident in your site’s functionality and user experience, officially launch your membership site and start promoting it to your target audience. Monitor user feedback and analytics regularly to make data-driven improvements and continuously enhance your membership site.

Conclusion :

Creating a membership site using WordPress is an effective way to monetize your content and build a thriving community. By following these step-by-step guidelines, you can set up a membership site that offers exclusive content, engages your members, and provides a seamless user experience. With the right WordPress membership plugin and careful planning, you can turn your expertise into a sustainable online business. So, Now I hope you have understood about create a membership site using wordpress.

You can also checkout this website designing institute to learn digital marketing course by enrolling in our course Or Contact Digital Bikana on +91-8949483728

How can you implement Parallax scrolling in a WordPress Website?

In this article we are going to talk about How can you implement Parallax scrolling in a WordPress Website? Parallax scrolling is a popular web design technique that adds depth and interactivity to your WordPress website. By creating an illusion of foreground and background movement at different speeds, parallax scrolling can enhance the visual appeal and engagement of your website.

How can you implement parallax scrolling in a wordpress website?

In this article, we will provide you with a step-by-step guide on how to implement parallax scrolling in your WordPress website, enabling you to create immersive and captivating user experiences.

Step 1: Choose a Parallax Scrolling Plugin

WordPress offers a variety of parallax scrolling plugins that simplify the implementation process. Explore options like “Parallax Scroll” by Themify, “Parallax and Video Backgrounds for Visual Composer” by GambitTech, or “Parallax Backgrounds for Elementor” by PowerPack Elements. These plugins provide user-friendly interfaces, customizable settings, and compatibility with popular WordPress themes.

Step 2: Install and Activate the Plugin

To begin, log in to you. Navigate to “Plugins” > “Add New” and search for your chosen parallax scrolling plugin. Once you find it, click on the “Install Now” button, followed by the “Activate” button to activate the plugin on your WordPress website.

Read Also: How can you create a custom navigation menu in WordPress?

Step 3: Configure Plugin Settings

After activating the plugin, locate its settings or options within your WordPress dashboard. Look for sections that allow you to configure the parallax scrolling effect. These settings may include background image selection, animation speed adjustment, and scrolling behavior customization.

Depending on the plugin, you may also have the option to add parallax effects to specific sections or elements of your website, such as headers, banners, or individual content blocks. Explore the plugin’s documentation or support resources to understand the available configuration options and experiment with different settings to achieve the desired parallax scrolling effect.

How Can You Implement Parallax Scrolling In A WordPress

Step 4: Customize Parallax Elements

To create an engaging parallax scrolling experience, select the elements or sections of your website where you want to apply the effect. This can include background images, text blocks, call-to-action sections, or any other visual elements that can benefit from the parallax scrolling effect.

Within your chosen parallax scrolling plugin, you should find options to customize the specific elements you want to animate. Adjust the speed, direction, and intensity of the parallax effect for each element to create a visually appealing and cohesive scrolling experience.

Step 5: Preview and Fine-Tune

Before making your parallax scrolling live, it’s crucial to preview and fine-tune the effect. Save or update your page or post, then preview it to see the parallax scrolling in action. Pay attention to the scroll speed, animation smoothness, and overall visual appeal. Make adjustments as needed to achieve the desired effect and ensure a seamless scrolling experience for your visitors.

Read Also: How do you add and manage images in WordPress?

Step 6: Publish and Test

Once you are satisfied with the final parallax scrolling effect, publish or update your page or post to make it live on your WordPress website. Test the parallax scrolling on different devices and screen sizes to ensure it functions correctly and maintains a visually pleasing experience across various platforms.

Scrolling Effects In WordPress Website

Conclusion

Implementing parallax scrolling in your WordPress website can significantly enhance its visual impact and user engagement. By following the step-by-step guide outlined in this article, you can easily integrate a parallax scrolling plugin, configure the settings, customize parallax elements, and achieve a captivating scrolling experience. Experiment with different settings and fine-tune the effect until you achieve the desired results. With the right implementation of parallax scrolling, you can create an immersive and visually stunning website that leaves a lasting impression on your visitors. So, Now I hope you have understood about how can we implement Parallax scrolling in a WordPress Website.

You can also checkout this website designing institute to learn digital marketing course by enrolling in our course Or Contact Digital Bikana on +91-8949483728
How do you add and manage images in WordPress?

In this article we are going to talk about How do you add and manage images in WordPress. WordPress is a user-friendly and widely used content management system (CMS) that enables effortless website creation and management for users of all levels of expertise.

One of the essential elements of any website is images. They enhance the visual appeal of your content and make it more engaging for visitors.

How do you add and manage images in WordPress?

In this article, we will guide you through the process of adding and managing images in WordPress.

1. Adding Images to the Media Library

The first step in managing images on your WordPress website is to upload them to the Media Library. To do this, log in to your WordPress dashboard and navigate to the “Media” tab. Simply click on “Add New” to easily upload new images from your computer.

You can either drag and drop the images or select them from your files manually. Once the upload is complete, the images will appear in your Media Library.

2. Inserting Images into Posts or Pages

Now that your images are in the Media Library, you can easily insert them into your posts or pages. While creating or editing a post or page, place your cursor where you want the image to appear and click on the “Add Media” button located above the editor. This will open the Media Library, where you can select the desired image. After selecting the image, you can customize its settings, such as alignment, size, and caption. Once you’re satisfied with the settings, click on the “Insert into post” button to add the image to your content.

Read Also: How can you create different types of content in WordPress?

3. Editing Images in WordPress

WordPress provides basic image editing capabilities to enhance your images without the need for external software. When you insert an image into a post or page, you can click on it to reveal the editing options. These options include rotating, cropping, scaling, and flipping the image. You can also adjust the image’s alignment and add alternative text (alt text) for accessibility purposes. WordPress saves the edited image as a separate file, ensuring that your original image remains intact.

canonical tags in digital marketing

4. Organizing Images with Media Library

As your website grows, you’ll accumulate a significant number of images. To keep them organized, WordPress offers several features within the Media Library. You can add tags, titles, and descriptions to each image, making it easier to search for specific images later. Additionally, you can create folders, called “Media Categories” or “Media Tags,” to categorize your images further. These features help you maintain a well-structured media library, saving you time when searching for images in the future.

5. Optimizing Images for Web

Images that are not optimized for the web can significantly impact your website’s performance. Large image file sizes can slow down your site’s loading speed, leading to a poor user experience. To optimize your images, WordPress provides a feature called “Image Compression.” It automatically reduces the file size of your images without compromising their quality. Alternatively, you can use third-party plugins like “Smush” or “EWWW Image Optimizer” to optimize images in bulk.

Read Also: How to improve your website’s loading speed for better SEO?

6. Displaying Images in Galleries

If you have multiple images that you want to showcase in an organized manner, WordPress offers built-in gallery functionality. When adding or editing a post or page, click on the “Add Media” button, select the images you want to include, and click on the “Create Gallery” option. You can arrange the images, set the number of columns, and choose between a thumbnail grid or a slideshow format. This feature allows you to create visually appealing galleries without any coding knowledge.

7. Using Featured Images

Another powerful feature in WordPress is the ability to set a featured image for each post or page. The featured image represents the content and is often displayed prominently, such as in a blog post’s header or on the homepage. To set a featured image, edit the post or page, locate the “Featured Image” panel on the right-hand side, and click on the “Set featured image” link. You can either select an image from your Media Library or upload a new one, then simply click on the “Set featured image” button.

Read Also: What is a Featured Image in WordPress and how can you set it for your posts?

9. Enhancing Images with Plugins

WordPress offers a vast repository of plugins that extend its functionality. Several plugins are specifically designed to enhance the image management experience. For example, the “Envira Gallery” plugin allows you to create stunning image galleries with advanced features. The “Regenerate Thumbnails” plugin helps you regenerate thumbnail sizes for existing images after changing your theme or thumbnail settings. Explore the plugin directory to find image-related plugins that suit your needs.

Manage Images In WordPress Website

Conclusion:

WordPress provides a user-friendly interface for adding and managing images on your website. By following the steps outlined in this article, you can efficiently upload, insert, edit, organize, optimize, and display images in your WordPress posts and pages. Utilize the features offered by WordPress and consider using plugins to enhance your image management capabilities, ensuring that your website stands out visually and engages your audience effectively. So, Now I Hope you have understood about add and manage images in WordPress.

You can also checkout this website designing institute to learn digital marketing course by enrolling in our course Or Contact Digital Bikana on +91-8949483728