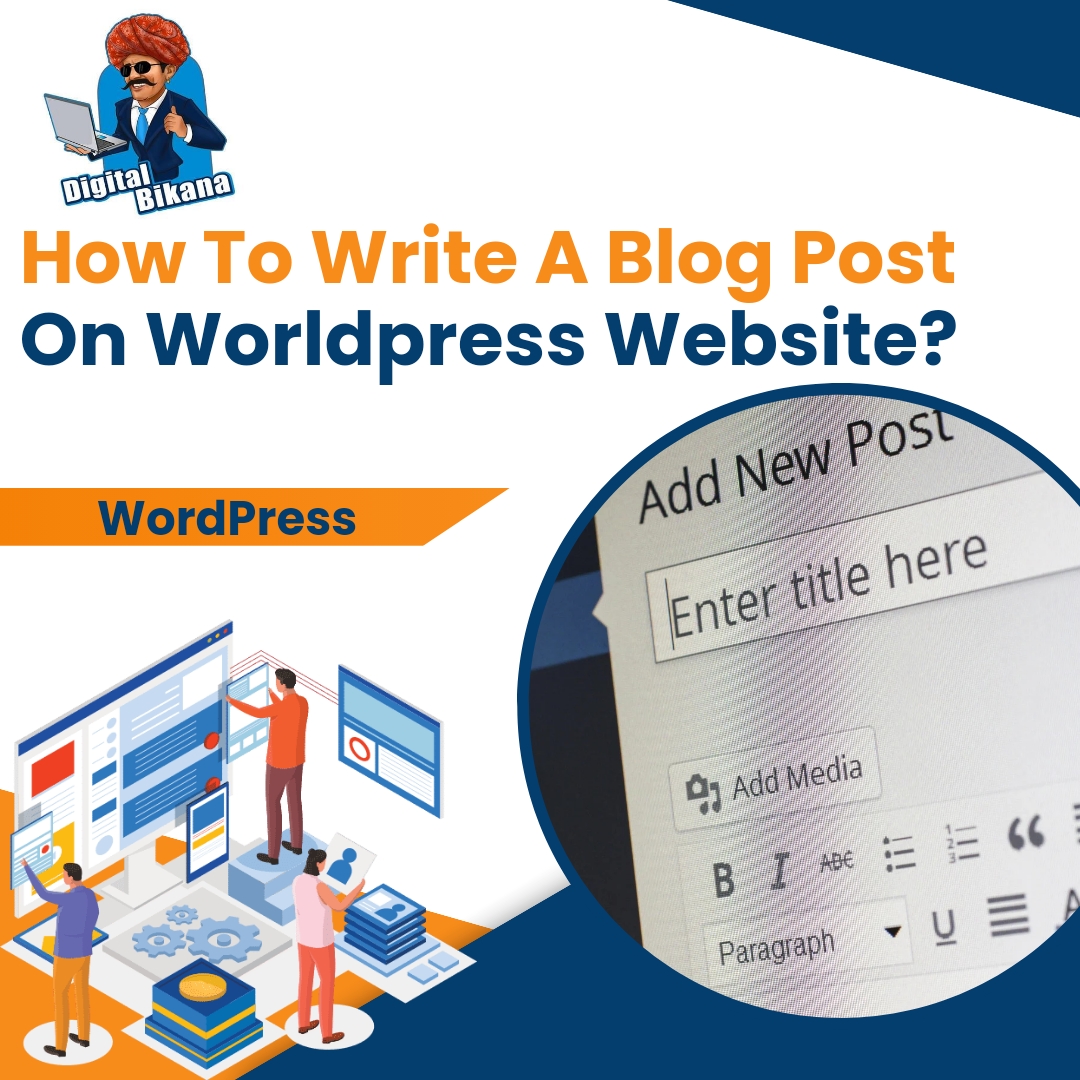
How to write a Blog post on WordPress website step by step?

In this article we are going to discuss how to write a blog post on wordpress website step by step. One of the best ways to create an engaging, informative, and valuable online presence for your brand is through blogging. And WordPress makes it easier than ever to get started with a blog on your website.

However, writing quality content that resonates with your audience and performs well in search engines requires a bit of skill and strategy. In this article, we’ve outlined the step-by-step process for how to write a blog post on a WordPress website.

How to write a blog post on wordpress website step by step?

From planning your content to optimizing it for search engines to promoting your post, we’ve covered everything you need to know to create quality blog content that engages your audience and drives traffic to your website.

1. Plan your content

Plan your content It is essential to plan your blog posts first before straight away diving into writing. Planning creates a framework, assists in writing a piece that addresses the reader’s needs and challenges, and optimizes search engine rankings.

Define your target audience

Before putting pen to paper, ensure that you identify who your target audience is. Understanding your audience’s demographics and interests will help you write blog posts that will resonate with them. Use analytical tools like Google Analytics to identify the pain points and interests of your audience.

Read Also: How to install theme in WordPress Website?

Choose a relevant topic

Choose a topic that is relevant to your industry and complements your brand. It is essential to ensure your readership will find the topic engaging and valuable. To help select a topic, consider what you have posted in the past, industry trends that tie into your business goals, and trending topics.

Create an outline for your blog post

Creating an outline is an essential part of planning your content. It helps to organize the post, give structure to the piece, and aid in having a coherent piece. This includes having a clear introduction, points that align and flow coherently, and a summary/round-up in the conclusion.

How to write a blog post on wordpress?

2. Write your blog post

Once you have a plan for your blog post, it’s time to start writing. Begin with a catchy headline that will capture your readers’ attention and make them want to read more. Keep your sentences and paragraphs concise and to the point, and break up your text with headings and subheadings to make it easy to read.

Use keywords naturally throughout your post, without overstuffing them. Make use of bullet points, numbered lists, and images to make your content more engaging, easy to read, and visually appealing.

Above all, focus on providing value to your readers. Your content should be informative, well-researched, and provide practical advice or solutions to the challenges your readers may face.

Lastly, always proofread your work to ensure that it’s free of spelling and grammatical errors.

Click Here: WordPress Website Designing

3. Optimize your blog post for search engines

Optimize your blog post for search engines Search Engine Optimization (SEO) refers to optimizing content for search engines so they can understand the context and help to place it within the correct rankings. Here’s how to optimize your blog post for search engines:

Use keywords

Use the right keywords in your blog post to optimize it for search engines. These are the words that people would use to search for content that is similar to your blog post. Ensure that they look natural and do not feel like they’re unnecessarily used.

Add Internal and External Links

Incorporate internal and external links to your blog post that redirect to relevant pages. Internal links point to pages within your website, while external links point to high-quality content outside your website. Incorporating relevant links positively affects search engine ranking.

Read Also: What is Search Engine Optimization (SEO) in Digital Marketing?

Use meta descriptions and tags

Include well-written meta descriptions and tags for your post that give more insight into the content, without giving the full details. This offers context and valuable information to the reader. Use specific tags for every post, ensuring that relevant keywords are targeted.

Use the Yoast SEO plugin to optimize your blog post

Yoast SEO a plugin is an excellent tool for ensuring that your content is optimized for search engines. The plugin analyses the content and offers recommendations on how to improve it further. For instance, it analyses the readability score, metadata, and keyword optimization.

How to write a blog post?

Proper formatting for search engine optimization

When formatting your post, ensure that the meta titles and descriptions of the post-match the content inside the blog post. Proper formatting includes the use of H1, H2, and H3 headings and subheadings, proper keyword usage, alt tags for images, and careful formatting of URLs.

Read Also: Types of Heading and Subheadings with Example

4. Publish your blog post

Once your blog post is written and optimized for search engines, it’s time to publish it on your WordPress website. Double-check that everything looks good and is error-free, then hit the publish button.

After your blog post is published, promote it on your social media channels or via email marketing to get more exposure and drive traffic to your website.

You can also checkout this digital marketing institute to learn digital marketing course by enrolling in our course Or Contact Digital Bikana on +91-8949483728

Conclusion

Writing blog posts on a WordPress website requires planning, creativity, and attention to detail. By following the steps outlined in this article, you can create quality content that engages your readers, drives traffic to your website, and builds your brand’s authority in your industry or niche.

To recap, it all starts with planning your content, choosing topics that are interesting and relevant to your readers, and creating a clear outline. Then, it’s all about writing content that is concise, informative, and well-structured.

Once you have a draft of your blog post, it’s important to optimize it for search engines by including the right keywords, metadata, and formatting. And finally, don’t forget to promote your blog post across different channels to get more visibility and increase traffic to your website.

With the right approach and effort, your blog on WordPress can become a valuable source of information and connection with your target audience and a great way to build your brand online. Now, I hope you have understood how to write a blog post on wordpress website.

Types of Heading and Subheadings with Example

In this article we are going to discuss about the types of heading and subheadings with example (H1, H2, H3, H4, H5, H6 and p). Headings and subheadings are important elements of content formatting that help readers easily navigate through a document or a web page. They are essential tools for organizing written content. They help to break up the text, guide the reader through the content, and create a clear hierarchy of information. Also, They provide a hierarchical structure to the content, making it easier for readers to understand the organization and flow of information. In this article, we will discuss the different types of headings and subheadings, their uses, examples of each type, their importance and how they can enhance the reader’s experience.

Importance of Headings and Subheadings

  • Headings and subheadings serve several purposes in written content. Firstly, they provide a clear structure to the content, making it easier for the reader to follow and understand. A well-structured piece of content will have a logical flow, with each heading and subheading introducing a new topic or idea.
  • Secondly, headings and subheadings make it easier for readers to scan the content quickly. In today’s fast-paced world, people don’t always have the time or patience to read a piece of content from start to finish. Headings and subheadings allow readers to quickly identify the most important points or sections of the content and decide which parts they want to read in more detail.
  • Thirdly, headings and subheadings can make the content more visually appealing. A wall of text without any headings or subheadings can be overwhelming and uninviting to read. Breaking up the text with headings and subheadings can make it more appealing and encourage readers to engage with the content.

Types of Headings and Subheadings with example

There are several types of headings and subheadings that writers can use to structure their content. The most common types are:

1. H1 Heading

The H1 heading is the main heading of a document or a web page, and it is usually the largest and most prominent text on the page.It is the most important heading on the page. It is used to introduce the topic or subject of the content and to grab the reader’s attention.The H1 heading should provide a clear and concise summary of the content that follows.The H1 heading should be used only once per page or post.

Example:

H1: The Benefits of Regular Exercise

2. H2 Heading

The H2 heading is the second level heading and is used to divide the content into subtopics. It is smaller in size than the H1 heading and less prominent, but it still stands out on the page. H2 headings are used to introduce major sections of the content and to provide an overview of what will be discussed in that section.

Example:

H1: The Benefits of Regular Exercise

H2: Improved Cardiovascular Health

Types of Heading and Subheadings

3. H3 Heading

The H3 heading is the third level heading and is used to further divide the content into subtopics. It is smaller in size than the H2 heading and less prominent, but it still stands out on the page. H3 headings are used to introduce subtopics within a major section of the content.

Example:

H1: The Benefits of Regular Exercise

H2: Improved Cardiovascular Health

H3: Lower Blood Pressure

You can also checkout this digital marketing institute to learn digital marketing course by enrolling in our course Or Contact Digital Bikana on +91-8949483728

4. H4 Heading

The H4 heading is the fourth level heading and is used to divide the content into smaller subtopics. It is smaller in size than the H3 heading and less prominent, but it still stands out on the page. H4 headings are used to introduce subtopics within a subtopic.

Example:

H1: The Benefits of Regular Exercise

H2: Improved Cardiovascular Health

H3: Lower Blood Pressure

H4: Lifestyle Changes to Lower Blood Pressure

Now I hope you have understood about the types of heading and subheadings with example (H1, H2, H3, H4, H5, H6 and p)

5. H5 Heading

The H5 heading is the fifth level heading and is used to further divide the content into smaller subtopics. It is smaller in size than the H4 heading and less prominent, but it still stands out on the page. H5 headings are used to introduce subtopics within a subtopic.

Example

H1: The Benefits of Regular Exercise

H2: Improved Cardiovascular Health

H3: Lower Blood Pressure

H4: Lifestyle Changes to Lower Blood Pressure

H5: Reducing Salt Intake

6. H6 Heading

The H6 heading is the sixth level heading and is the smallest and least prominent heading. It is used to divide the content into the smallest subtopics. H6 headings are rarely used, but they can be useful when there are many subtopics within a subtopic.

Example:

H1: The Benefits of Regular Exercise

H2: Improved Cardiovascular Health

H3: Lower Blood Pressure

H4: Lifestyle Changes to Lower Blood Pressure

H5: Reducing Salt Intake

H6: Choosing Low-Sodium Foods

7. P Tag

The P tag is not a heading or subheading but rather a tag used to define a paragraph. It is used to group related sentences together and to provide context and structure to the content.

Example:

<p> Regular exercise has been shown to improve cardiovascular health, lower blood pressure, and reduce the risk of many chronic diseases. Lifestyle changes such as reducing salt intake and choosing low-sodium foods can also help to lower blood pressure. </p>

You can also checkout this digital marketing institute to learn digital marketing course by enrolling in our course Or Contact Digital Bikana on +91-8949483728

How to use headings and subheadings?

To use headings andsubheadings effectively, there are a few best practices to keep in mind:

1. Follow the Hierarchy

Start with the H1 heading, and then use the lower-level headings to break up the content into smaller and smaller sections. Following this hierarchy makes it easy for readers to understand the structure of the content and navigate through it. That’s why we have told you about types of heading and subheadings with example (H1, H2, H3, H4, H5, H6 and p).

2. Use Clear and Concise Headings

Headings should accurately reflect the content of the section and provide a clear and concise overview of what the reader can expect to find there. Avoid using vague or misleading headings that might confuse or mislead the reader.

3. Be Consistent

Use a consistent formatting style throughout the document. This means using the same font, size, and color for all headings and subheadings. Consistency helps to make the content more visually appealing and easier to navigate.

types of heading in html

4. Avoid Overusing Headings

Using too many headings can be counterproductive. It can make the content seem cluttered and confusing, and dilute the impact of the headings that are actually important. Use headings and subheadings judiciously, and only when they add value to the content.

5. Use Descriptive Headings

Make sure the headings accurately reflect the content of the section. Use descriptive headings that clearly and concisely summarize the content, making it easier for readers to understand the main points.

Read Also: What is Hyperlink in html with Example and How it is created?

Now I hope you have understood about the types of heading and subheadings with example (H1, H2, H3, H4, H5, H6 and p)

Conclusion

In conclusion, headings and subheadings are crucial elements of content formatting that help to organize and structure the content in a clear and hierarchical way. The use of headings and subheadings also makes it easier for readers to scan through the content and locate the information they need. It is important to use headings and subheadings appropriately and consistently throughout the content to maintain a clear and organized structure.

When using headings and subheadings, it is important to follow the hierarchy of headings, starting with the H1 heading and moving down to the lower-level headings. It is also important to use clear and concise headings that accurately reflect the content of each section. By using headings and subheadings effectively, writers can make their content more accessible and engaging for readers, and ensure that their message is communicated clearly and effectively. So next time you’re creating written content, remember to use headings and subheadings to make it more clear, concise, and effective. Now I hope you have understood about the types of heading and subheadings with example (H1, H2, H3, H4, H5, H6 and p).

How to buy Web Hosting in GoDaddy?

In this article we are going to tell you how to buy web hosting in Godaddy. In the present-day digital age, having a website is important for both individuals and businesses. But, you require web hosting in order to make your website accessible over the internet. To store the files, photographs, videos, and other information for your website, you may utilize a service called web hosting. Anyone with an internet connection can visit your website so because server is connected to the internet.

GoDaddy is one of the leading companies in the web hosting industry. GoDaddy offers a range of web hosting packages to meet various requirements and price ranges. Its hosting packages are very well by both consumers and businesses because they’re dependable, inexpensive, and simple to use.

The success of your website relies on choosing the best web hosting package. A variety of different hosting plans available with GoDaddy, including shared hosting, VPS hosting, dedicated hosting, and WordPress hosting. The most common and value choice, shared hosting is suitable for both small enterprises and individual websites. Since VPS hosting is more robust and scalable, it is ideal for expanding businesses. The most powerful choice is dedicated hosting, which is ideal for big companies with busy websites. With pre-installed plugins and themes to facilitate website management, WordPress hosting is created specifically for WordPress websites.

In this article, we will discuss how to buy web hosting using GoDaddy. We will go through the steps involved in selecting a web hosting plan, choosing a domain name, adding hosting to the cart, reviewing and confirming the order, creating an account, and making payment. By following these steps, you can buy web hosting from GoDaddy in just a few minutes

What is Web Hosting?

A web hosting service allows people and companies to make their websites available to users all over the world. In its basic form, web hosting is the act of storing website files and data on a server that is connected to the web so that users may access those files whenever they enter in a website’s domain name or URL.

You are essentially renting a portion of a server from a web hosting company when you buy web hosting. This server serves as a potent computer just for the aim of keeping the data and files for your website. The server transfers the files to the user’s browser when they enter your website’s domain name or URL, allowing them to view your website.

Numerous hosting plans with various performance, storage, and bandwidth levels are offered from web hosting providers. The most popular form of hosting is shared hosting, in which a variety of websites are kept on the same server and share its resources. Because it’s usually the most affordable option, this kind of hosting is chosen by both small businesses and individuals alike.

How to buy web hosting in Godaddy?

Everybody who wants to have a website must use web hosting as an essential service. Without it, no one on the internet would view your website. Your website’s performance, speed, and security will all be impacted by your choice of web host and package, so make sure you make the right decision. Steps to buy web hosting in Godaddy are discussed below:

1. Create a Godaddy account

Before you can make a purchase, you must first create a GoDaddy account if you don’t have one yet. You should do this by providing your name, address, and payment information in addition to your personal and billing information. Also, you must choose a username and password for your account. If you already have an account, you can complete your purchase by logging in.

2. Choose a web hosting plan

To get web hosting from GoDaddy, you must first pick a package that meets your needs. Shared hosting, VPS hosting, dedicated hosting, and WordPress hosting are just a few of the hosting options available from GoDaddy. The most popular pattern, shared hosting, is excellent for both small enterprises and individual websites. Because VPS hosting is more robust and scalable, it is perfect for expanding operations. The most powerful choice is dedicated hosting, which is ideal for big companies with busy websites. With pre-installed plugins and themes to simplify website management, WordPress hosting is designed solely for WordPress websites.

How to buy hosting in Godaddy

3. Choose a domain name

The success of your website relies on choosing the right domain name. People use your domain name as the internet address to find your website. You can search for and buy available domain names using domain name search tool offered by GoDaddy on their website. There are numerous domain different needs, including.com,.net,.org,.info, and many more.

Read Also: How to buy a Domain Name for Free using Godaddy?

4. Add hosting to cart

You can add your domain name and web hosting package to your cart once you’ve completed your selections. The exact cost of your purchase, including any applicable discounts or special offers, will then be shown to you by GoDaddy. Also, you can include any extra features or offerings, like SSL certificates or website backups.

5. Review and confirm order

Review your order carefully to make sure all the details are correct before completing your transaction. The period of your hosting plan, the billing cycle, and any add-ons you desire have to be chosen. You can select whether to want your hosting or domain name to automatically update. Also, You can go to the checkout after you’ve reviewed your order and wanted to make sure everything is right.

You can also checkout this digital marketing institute to learn digital marketing course by enrolling in our course Or Contact Digital Bikana on +91-8949483728

6. Make payment

Next, you’ll need to pay for your domain name and web hosting plan. Forms of payment accepted by GoDaddy include credit cards, debit cards, and PayPal. You’ll receive an email confirmation of your purchase along with instructions on how to activate your new web hosting plan after your money has been processed.

7. Install a CMS (Content Management System)

To create and maintain your website, you’ll need to install a content management system (CMS) after buying your web hosting plan. For installing well-known CMS platforms like WordPress, Drupal, and Joomla, GoDaddy offers a number of options. These platforms can be manually downloaded, or you can quickly and easily build a website using GoDaddy’s website builder.

Read Also: How to install WordPress using cPanel in GoDaddy?

8. Set up Email accounts

You can create email accounts with your domain name using your web hosting account. By doing this, you can manage all of your communications in one location and give your company a professional look. Microsoft 365 and G Suite, which offer cutting-edge capabilities like shared calendars, video conferencing, and document collaboration, just are two of the email hosting options that GoDaddy offers.

How to buy hosting?

9. Secure your website

To protect your data and the information of your customers, your website must be safe. GoDaddy provides a number of security features, including as malware scans, SSL certificates, and website backups. Visitors can connect safely to your website thanks to SSL certificates, that encrypt the data on it. Malware scans look for any malicious code or activity on your website, while website backups allow you to restore your website in the case that it is ever hacked or compromised.

Read Also: What is SSL Certificate and Why it is required?

10. Optimize your website for search engine

The practise of improving your website’s presence in search engine results pages is known called search engine optimisation (SEO). GoDaddy provides a variety of SEO tools, such as keyword research tools, website analytics tools, and improvement guides. You can increase website traffic, increase your presence online, and expand your business by optimising it for search engines.

By following these steps, you can buy and maximize the benefits of your web hosting plan and create a professional, secure, and optimized website that meets the needs of your business

Read Also: What is Search Engine Optimization (SEO) in Digital Marketing?

Conclusion

In conclusion, purchasing web hosting through GoDaddy is an easy process that can aid you in creating a respectable online presence for your organization. GoDaddy provides the flexibility and customization to fit the needs of businesses of all sizes with a choice of plans and features.

You may confidently navigate the process of buying web hosting by following the steps laid out here, from choosing the best plan for your company to installing a content management system, setting up email accounts, and securing your website. Furthermore, improving your website’s search engine rankings can help you expand your customer base and grow your company over time.

Overall, web hosting is an important component of every firm’s online presence, and GoDaddy offers a selection of options to suit your requirements and budget restrictions. GoDaddy’s web hosting services give you the resources and assistance you need to be effective, whether you’re just getting going or looking to grow your web site. So why not start today by establishing your business’s online presence using GoDaddy web hosting?

What is Hyperlink in html with Example and How it is created?

In this article we are going to discuss what is hyperlink in html with example and how it is created. We now access information, communicate with each other, and conduct business in completely new ways thanks to the World Wide Web. The little hyperlink, a basic yet efficient tool that enables us to travel between websites and access a broad array of online content, is at the core of this digital revolution. A hyperlink can be made, but what exactly is one? In this post, we’ll look at the basics of hyperlinks, including their composition, meaning, and tools and methods. Numerous tools and methods are available to assist you in creating hyperlinks, it is a fairly simple process. Understanding the fundamentals of hyperlinks is crucial to effective web browsing, whether you are a website owner, developer, or consumer.

What is Hyperlink in html with example?

A word, phrase, or image that, when clicked, leads the user to another place on the internet is known as a hyperlink. To make them pop out from the surrounding text, these links usually appear in a different color, underlined, or highlighted. The World Wide Web was built on hyperlinks, which allow users to effortlessly navigate between different web pages and websites.

A hyperlink’s structure is quite basic. The anchor text and the URL make up the two parts. The visible element of the link is called the anchor text, and it is often a word or phrase that summarises the data on the page that is being known to. The webpage’s HTML code includes the URL, which is the web address of the page being linked to. The URL is retrieved and the browser asks the web server for the page when the user clicks on the anchor text.

Any type of web content, including written material, pictures, videos, and audio files, can be linked to using hyperlinks. They can also be used to link to various kinds of documents, such as Word or PDF files. Additionally, connections to particular web components like headings, paragraphs, or images can be established via hyperlinks.

Links are an essential part of a website’s navigation and user experience. They aid in the organization of content on a website and let users swiftly and easily access the information they need. Furthermore, links are an essential element of search engine optimization (SEO), as they aid search engines in understanding the structure and content of a website.

Read Also: How to install theme in WordPress Website?

How to create a hyperlink in html?

The process of making a hyperlink is simple, and it can be done in a number of ways, such as through manual HTML code, a website builder, or a content management system (CMS). Here is a step-by-step tutorial on utilising HTML code to generate a hyperlink.

how to create a hyperlink in html

Steps to create a text hyperlink are listed below:

Step 1: Open a text editor

Open a plain text editor such as Notepad or TextEdit on your computer.

Step 2: Type in the anchor text

Type in the text that you want to use as your hyperlink. This is the visible part of the link that users will click on. For example, if you want to link to a website about dogs, you can type in “CONTACT US.”

Step 3:  Add the hyperlink tag

Next, you will need to add the hyperlink tag to your anchor text. The hyperlink tag consists of the opening and closing <a> tags, with the URL of the website you want to link to in between. The code will look like this:

<a href=”https://www.example.com”>CONTACT US</a>

Step 4: Add the URL

Replace the “https://www.example.com” with the URL of the website you want to link to. It is essential to ensure that the URL is correct and properly formatted.

Step 5: Save the file

Save the file with a .html extension, such as “index.html.”

Step 6: Test the hyperlink

Open the HTML file in your web browser and click on the anchor text. The browser should take you to the linked website.

Alternately, the procedure of creating a hyperlink could vary notably if you’re using a website builder or CMS, but the basic stages are the same. Normally, you must select the anchor text, select the hyperlink option, and then type the URL. The HTML code will be automatically generated by the CMS or website builder.

You can also checkout this digital marketing institute to learn digital marketing course by enrolling in our course Or Contact Digital Bikana on +91-8949483728

How to create an image hyperlink in html?

Similar steps must be followed to create an image hyperlink, however instead of utilising anchor text, you will use an image. Here is how to use HTML code to make an image hyperlink.

Step 1: Choose the image

Select the image that you want to use as your hyperlink. This could be an image from your website or an external image.

Step 2: Add the hyperlink tag

Next, you will need to add the hyperlink tag to your image. The hyperlink tag consists of the opening and closing <a> tags, with the URL of the website you want to link to in between. The code will look like this:

<a href=”https://www.example.com”><img src=”yourimage.jpg”></a>

Step 3: Add the image source

Replace “yourimage.jpg” with the file name of the image you want to use. Ensure that the image is correctly formatted (JPG, PNG, etc.) and is located in the correct directory.

Step 4: Add the URL

Replace “https://www.example.com” with the URL of the website you want to link to.

what is hyperlink in html with example and how it is created

Step 5: Add alternative text (optional)

You can add alternative text to your image using the “alt” attribute. This provides a description of the image for users who may not be able to see it. The code will look like this:

<a href=”https://www.example.com”><img src=”yourimage.jpg” alt=”Description of your image”></a>

Step 6: Save the file

Save the file with a .html extension, such as “index.html.”

Step 7: Test the hyperlink

Open the HTML file in your web browser and click on the image. The browser should take you to the linked website.

Uses of hyperlink

Links are an essential part of the internet and may be used in many ways to improve the surfing experience for users. Here are a few typical applications for hyperlinks:

Navigation

Users can easily move between web pages or various parts of the same page thanks to hyperlinks.

Linking to external resources

Hyperlinks can be used to point to other websites, articles, pictures, and videos that are located on the internet.

Internal linking

Links to other pages on the same website can be created using hyperlinks, making it simpler for visitors to access relevant information.

Call-to-action (CTA) buttons

Hyperlinks can be used to make CTA buttons that nudge users to take particular actions, such signing up for a newsletter or making a purchase.

Read Also: How to buy a Domain Name for Free using Godaddy?

Conclusion

Hyperlinks are a vital component of web design as they make it simple for visitors to move about the site and find the information they need. Links to external resources, internal links, CTA buttons, and SEO improvement are just a few of the numerous uses for them.

Effective usage of hyperlinks may enhance the browsing experience for users, making it simpler to access information and perform certain actions. Internal linking may also boost user engagement and retention by guiding users to relevant data within the same page,Because search engines employ links to crawl and index web pages, they are also essential to SEO. Web designers can raise their website’s ranking on search engine result pages (SERPs) by incorporating relevant linkages, which will increase visibility and traffic.

However, it’s crucial to use hyperlinks correctly and to avoid utilizing them excessively, which can be considered spam and have a poor impact on the user experience. By incorporating alternate text and using suitable colors and styles, web designers can ensure that hyperlinks are usable by everybody, including those with disabilities.

In the end, hyperlinks are an essential part of web design that enhance SEO and user experience. Web designers may make intriguing easily accessible websites that offer users value by using them wisely and effectively.

How to install WordPress using cPanel in GoDaddy?

In this article we are going to understand how to install wordpress on domain name using Cpanel in Godaddy. WordPress is one of the most popular and powerful platforms for creating websites and blogs. It offers a lot of features, flexibility, and customization options for users of all levels. If you want to use WordPress for your website, you need to install it on your domain name using your hosting account.

How to install WordPress on Domain Name using cPanel in GoDaddy?

There are two ways to install WordPress on your domain name using cPanel in GoDaddy: the automatic way and the manual way. The automatic way is easier and faster, but the manual way gives you more control and customization options. In this article, we will show you both methods and help you choose the best one for your needs.

How to install WordPress on Domain Name using installer of cPanel in GoDaddy?

Most hosting services, including GoDaddy, make the WordPress installer available through your cPanel dashboard. These are the steps to an easy install:

1. Log in to cPanel

You can access cPanel directly from your GoDaddy account by clicking on the Manage button next to your hosting plan. Alternatively, you can go to your browser and type in https://yourdomain.com/cpanel (replace yourdomain.com with your actual domain name) and enter your cPanel username and password.

2. Launch the installer

In the cPanel dashboard, scroll down to the Websites section and click on Install Application. You will see a list of applications that you can install on your website. Find a WordPress blog and click on and install this application.

Read Also: How to buy a Domain Name for Free using Godaddy?

3. Confirm the installation

You will see a form with some details about the installation. You can leave most of them as default, but make sure to check the following fields:

Location

Choose the domain name where you want to install WordPress. If you want to install it on a subdomain or a subdirectory, you can specify that here as well.

Version

Choose the latest version of WordPress available.

Administrator Username

Choose a username for your WordPress admin account. Do not use admin as it is too easy to guess and hack.

Administrator Password

Choose a strong password for your WordPress admin account. You can use the password generator tool to create a secure password.

Administrator Email

Enter a valid email address where you can receive notifications and updates from WordPress.

Website Title

Enter a title for your website. You can change it later in WordPress settings.

Website Tagline

Enter a short description or slogan for your website. You can change it later in WordPress settings.

How to install WordPress on Domain Name using cPanel in GoDaddy

4. Adjust default settings

You can also customize some advanced settings for your WordPress installation, such as database name, table prefix, automatic updates, backups, etc. You can find these settings by clicking on Show advanced settings at the bottom of the form. If you are not sure what to do with these settings, you can leave them as default or consult with an expert.

5. Complete the installation

Once you are done with all the settings, click on Install at the bottom of the form. The installer will start installing WordPress on your domain name and show you a progress bar. When the installation is complete, you will see a confirmation message with a link to your WordPress dashboard and website.

You can also checkout this digital marketing institute to learn digital marketing course by enrolling in our course Or Contact Digital Bikana on +91-8949483728

How to install wordpress manually on any web hosting?

The manual way: using FTP and MySQL

If you prefer to have more control over your WordPress installation or if you encounter any issues with the automatic installer, you can also install WordPress manually using FTP and MySQL. These are the steps to follow:

1. Download WordPress

Go to https://wordpress.org/download/ and download the latest version of WordPress as a zip file to your computer.

2. Unzip WordPress

Extract the contents of the zip file to a folder on your computer. You will see a folder called WordPress with several files and subfolders inside it.

3. Create a database

Log in to cPanel and go to the Databases section. Click on MySQL Database Wizard and follow the steps to create a new database and a new user for it. Make sure to note down the database name, username, and password as you will need them later.

4. Upload WordPress files

Log in to cPanel and go to the Files section. Click on File Manager and navigate to the folder where you want to install WordPress (usually public HTML). Click on Upload and select all the files and folders from the WordPress folder on your computer. Wait until all the files are uploaded successfully.

Read Also: How to add a Subdomain name in Godaddy using cPanel?

5. Run the installation script

Go to your browser and type in https://yourdomain.com/wp-admin/install.php (replace yourdomain.com with your actual domain name). You will see a welcome screen asking you to select your language and confirm that you have a database ready. Click on Let’s Go to proceed.

How to install wordpress manually on any web hosting

6. Enter database information

On the next screen, you will see a form where you need to enter the database name, username, password, host, and prefix that you created in Step 3. Make sure to enter them correctly and click on Submit.

7. Run the installation

If your database information is correct, you will see a message saying that WordPress can communicate with your database. Click on Run the installation to continue.

8. Fill in the site information

On the final screen, you will see a form where you need to enter some details about your site and your admin account. These are similar to the ones you entered in the automatic installation, but with some differences:

Site Title

Enter a title for your website. You can change it later in WordPress settings.

Username

Choose a username for your WordPress admin account. Do not use admin as it is too easy to guess and hack.

Password

Choose a strong password for your WordPress admin account. You can use the password generator tool to create a secure password.

Your Email

Enter a valid email address where you can receive notifications and updates from WordPress.

Search Engine Visibility

Check this box if you want to discourage search engines from indexing your site. This is useful if you are still working on your site and don’t want it to be public yet. You can change this later in WordPress settings.

9. Install WordPress

Once you are done with all the details, click on Install WordPress at the bottom of the form. WordPress will start installing on your domain name and show you a success message with a link to your WordPress dashboard and website.

Congratulations! You have successfully installed WordPress on your domain name using cPanel in GoDaddy.

How to install theme in WordPress Website?

In this article we are going to discuss how to install theme in WordPress website. WordPress is a popular content management system (CMS) that powers over 40% of the web. It is user-friendly and makes website building accessible to people of all technical levels. One of the best things about WordPress is the ability to customize your website with themes. Themes are templates that give your site a specific look and feel. Themes can add great value to your website as they offer a visually appealing design, which can make it more attractive to visitors. They can also improve the user experience and navigation of your website.There are thousands of themes available for WordPress, both free and paid.

How to install theme in WordPress website?

In this article, we will explore in-depth the process of installing a theme on your WordPress website. We’ll cover choosing the right theme, installing the theme, customizing the theme, and testing the theme to ensure its functioning correctly. Here is the step to step guide to install theme in wordpress website.

Step 1: Choose a Theme

The first step is to choose a theme that you want to use on your website. You can browse through the official WordPress theme directory, which offers thousands of free themes, or you can choose a premium theme from a third-party theme marketplace. Premium themes usually offer more advanced features, better support, and a more unique design.

When choosing a theme, it is essential to consider several factors. The first factor to consider is the design of the theme. It is important to choose a theme that aligns with the niche of your website and the design aesthetic you want to portray. Look for a theme that has the right color scheme, typography, layout, and other design elements that are important to your website. You want a design that complements your content and helps to improve the overall user experience.

The next factor to consider is the features that come with the theme. Different themes have different features that can range from basic to advanced. Consider the features that are most important to you and choose a theme that offers those features. Some themes may have customizable headers, menus, and widgets, while others may have built-in SEO features or compatibility with different plugins.

Another important factor to consider is the ratings and reviews of the theme. Check to see what other users are saying about the theme to see if it has any issues or bugs. You can also check to see if the theme is compatible with the latest version of WordPress.

Finally, it is important to choose a theme that is easy to use and offers good support. Some themes can be difficult to use or require advanced technical skills. Make sure you choose a theme that has clear documentation and tutorials and offers good customer support.

how to install theme in wordpress

Things to consider before installing a theme on wordpress website

When choosing a theme, consider the following:

  • Design: Look for a design that matches your website’s niche and aesthetic. Consider the color scheme, typography, layout, and other design elements.
  • Features: Consider the features you need, such as customizable headers, menus, and widgets.
  • Reviews and ratings: Check the ratings and reviews of the theme to see if other users are satisfied with it.
  • Compatibility: Verify that the theme is compatible with the most recent release of WordPress.

Step 2: Install the Theme

Once you’ve chosen a theme that is right for your website, you can install it on your WordPress website. There are two ways to install a theme on your WordPress website: through the WordPress theme directory or by uploading a theme file.

Steps to install theme on wordpress website

Follow these steps to install a theme from the WordPress theme directory:

  • Login to your WordPress dashboard.
  • Click on Appearance > Themes.
  • • At the top of the page, click the “Add New” button.
  • Look up the desired theme using the search bar.You can also use the filters to search for themes by color, layout, features, etc.
  • Once you’ve found the theme you want, click the “Install” button next to it.
  • Wait for the theme to install. Once the installation is complete, click the “Activate” button to activate the theme.

How to install theme in WordPress website manually by uploading a theme file?

If you want to upload a theme file instead, follow these steps:

  • Download the theme file from a third-party theme marketplace or developer.
  • Login to your WordPress dashboard.
  • Click on Appearance > Themes.
  • At the top of the page, click the “Add New” button.
  • Click the “Upload Theme” button.
  • Choose the theme file from your computer and click “Install Now.”
  • Wait for the theme to install. Once the installation is complete, click the “Activate” button to activate the theme.

Step 3: Customize the Theme

Once you’ve installed and activated the theme, you can customize it to match your brand and website’s needs. The customization options vary depending on the theme you have chosen. However, some customization options are generally available, such as custom logos, headers, menus, widgets, colors, and fonts.Depending on the theme, customization options may include:

  • Custom logo: Upload your own logo or use the default one.
  • Custom header: Customize the header image or choose from pre-made headers.
  • Custom menu: Create a custom menu with your website’s pages and categories.
  • Custom widgets: Add custom widgets to your website, such as a search bar, social media icons, and more.
  • Custom colors and fonts: Customize the color scheme and typography of your website.

You can also checkout this digital marketing institute to learn digital marketing course by enrolling in our course Or Contact Digital Bikana on +91-8949483728

How to customize theme on wordpress website?

To customize the theme, follow these steps:

  • Login to your WordPress dashboard
  • Click on Appearance > Customize.
  • Use the customization options on the left-hand side to make changes to your website’s design and layout.
  • Preview the changes in real-time on the right-hand side of the screen.
  • Once you are satisfied with the changes, click the “Save & Publish” button to make the changes live on your website.

Depending on the theme, you may have additional customization options, such as editing the theme’s code. However, it is essential to be cautious when editing code, as it can break your website or cause issues with future updates.

Read Also: How to buy a Domain Name for Free using Godaddy?

Step 4: Install Recommended Plugins

Some themes may require or recommend certain plugins to function properly or to add additional features. It is essential to check the theme documentation to see if any recommended plugins are necessary for the theme to function correctly. Installing these plugins is generally a straightforward process and can be done from the WordPress plugin directory.

To install recommended plugins, follow these steps:

  • Login to your WordPress dashboard.
  • Click on Plugins > Add New.
  • Use the search bar to find the plugin you need.
  • Click the “Install” button next to the plugin.
  • Wait for the plugin to install. After the installation is finished, activate the plugin by clicking the “Activate” button.
how to install theme in wordpress manually

Step 5: Test the Theme

Once you have installed and customized the theme, it is important to test it to ensure that everything works correctly. Testing the theme involves checking the website’s design and layout, functionality, loading speed, and compatibility with different browsers.

To test the theme, follow these steps:

  • Check the website’s design and layout on desktop and mobile devices. Ensure that the design is consistent across different devices and that it looks visually appealing.
  • Check the website’s functionality, such as the navigation menu, forms, and widgets. Ensure that everything works correctly and that there are no broken links or pages.
  • Test the website’s loading speed and performance using tools like GTmetrix or Google Page Speed Insights. Ensure that the website loads quickly and has good performance scores.
  • Check if the website is compatible with different browsers, such as Chrome, Firefox, Safari, and Internet Explorer. Ensure that the website looks and functions correctly on different browsers.
  • If you encounter any issues during testing, check the theme documentation or contact the theme developer for support. Some themes may have a support forum or a dedicated support team that can help you with any issues you encounter.

Conclusion

Installing a theme on your WordPress website is a simple process that can enhance your website’s appearance and functionality. Choosing the right theme is essential, and you should consider factors like design, features, ratings, and support. Installing a theme is a straightforward process that can be done through the WordPress theme directory or by uploading a theme file. Customizing the theme is also easy and can be done through the WordPress customizer. Testing the theme is important to ensure that everything works correctly, and you can use tools like GTmetrix or Google Page Speed Insights to check the website’s performance.

You can also checkout this digital marketing institute to learn digital marketing course by enrolling in our course Or Contact Digital Bikana on +91-8949483728

By following these steps, you can choose and install a theme, customize it to match your brand, and test it to ensure it works correctly. Remember to choose a theme that matches your website’s niche and aesthetic, and to check the theme documentation for recommended plugins and support. With a well-designed and functional theme, you can make your website stand out and improve the user experience for your visitors.

How to add a Subdomain name in Godaddy using cPanel?

In this article we are going to understand how to add a Subdomain name in Godaddy using cPanel. Subdomains are a powerful tool for organizing website content and enhancing the user experience. By creating subdomains, website owners can group related content, make it easier for users to navigate to specific pages or sections, and create a more intuitive and user-friendly website structure.

In addition to improving website organization, subdomains can also have SEO benefits. By creating subdomains with relevant keywords, website owners can improve their search engine rankings for those specific keywords, and drive more targeted traffic to their sites.

Subdomains are useful for organizing website content because they can be used to create separate sections for different purposes, such as a blog, an online store, or a members-only area. This helps visitors easily find the content they’re looking for and improves the user experience.

How to add a Subdomain name in Godaddy using cPannel?

Now, let’s dive into the steps for adding a subdomain in GoDaddy using cPanel. Here is the Step-by-Step Guide to Adding a Subdomain in GoDaddy using cPanel:

1. Logging into cPanel

To add a subdomain in GoDaddy using cPanel, the first step is to log in to the cPanel account associated with the domain name. The login details are usually provided by the hosting provider, and they can be found in the welcome email or the hosting account dashboard. Once you have the login credentials, follow these steps:

  1. Open your web browser and go to the cPanel login page. The URL should be something like https://yourdomain.com/cpanel, where “yourdomain.com” is your website domain name.
  2. Enter your cPanel username and password in the login fields.
  3. Click on the “Log In” button to access the cPanel dashboard.

Once you are logged in to cPanel, you can proceed to add a subdomain to your website.

2. Navigating to the Subdomains section

Once you have logged in to your cPanel, the next step is to navigate to the subdomains section. In cPanel, you can easily find the subdomains section by using the search bar located in the top left corner of the screen. Simply type in “subdomains,” and the search results will display the subdomains section.

Alternatively, you can navigate to the subdomains section by scrolling down the cPanel dashboard until you find the “Domains” section. Click on the “Subdomains” icon to open the subdomains section.

Once you are in the subdomains section, you will see a form that allows you to create a new subdomain. The form will ask for information such as the subdomain name and the document root, which is the location on the server where the subdomain’s files will be stored.

Read Also: How to buy a Domain Name for Free using Godaddy?

3. Creating a new subdomain

Once you have logged into cPanel and are on the home page, navigate to the “Domains” section and click on the “Subdomains” icon. This will take you to the Subdomains page where you can enter the desired subdomain name in the “Subdomain” field and select the domain name you want to add the subdomain to from the drop-down menu. The Subdomains page provides a clear and concise interface for adding subdomains, making it easy for website owners to manage their website’s content.

How to add a Subdomain name in Godaddy

4. Specifying the subdomain document root

In the “Document Root” field, you need to specify the directory where the subdomain files will be stored. It is important to note that this should be a new directory separate from the main domain files. By doing so, you can easily manage the files of your subdomain separately from your main domain files. If you do not specify a separate directory for your subdomain files, the files of your subdomain may get mixed up with your main domain files, making it difficult for you to manage them.

5. Configuring DNS settings and testing the new subdomain

After creating a new subdomain and configuring DNS settings, it’s essential to test the subdomain to ensure that it’s working correctly. Testing your subdomain is a crucial step that helps to identify and resolve any issues before the subdomain is made live to the public. To test the subdomain, enter the subdomain URL in your web browser and press enter. If the subdomain has been correctly set up, it should load and display the content that you’ve added to it.

In some cases, you may encounter issues such as a “404 not found” error message, indicating that the subdomain’s files or DNS settings are incorrect. If this occurs, double-check that the subdomain’s document root is specified correctly and that the DNS records for the subdomain have been created and propagated. You may also need to clear your browser’s cache and cookies before testing the subdomain again.

By following these steps, you can successfully create and test a new subdomain in GoDaddy using cPanel. Remember to take the time to plan out the structure of your website and how subdomains can help you organize and categorize your content effectively. Properly utilizing subdomains can enhance the user experience for your visitors and make it easier for search engines to index and rank your website content.

You can also checkout this digital marketing institute to learn digital marketing course by enrolling in our course Or Contact Digital Bikana on +91-8949483728

How to add a Subdomain

Troubleshooting Common Issues

Some common issues that you may encounter when adding a subdomain in GoDaddy using cPanel, along with their solutions:

  • Subdomain not working or displaying an error message:
    • Check that you entered the correct subdomain name and document root directory during the setup process.
    • Ensure that the DNS settings are configured correctly, and allow time for the changes to propagate.
    • Verify that the subdomain is not blocked by your website’s security settings or firewall.
  • DNS propagation issues:
    • Wait for the DNS changes to propagate fully, which can take up to 24-48 hours.
    • Check the DNS records in your GoDaddy account to ensure that they match the settings for your subdomain.
    • Try clearing your browser’s cache and restarting your computer or network devices.
  • Other possible issues and their solutions:
    • Make sure that the subdomain is not already in use by another website or service.
    • Check that your web hosting account has enough disk space and resources to support the new subdomain.
    • Verify that you have the necessary permissions to add a subdomain to your hosting account.

Conclusion

Subdomains can be an essential tool for website owners to organize their website content and enhance the user experience for visitors. By adding a subdomain, website owners can separate content into distinct sections, making it easier for visitors to navigate and find what they’re looking for.

The process of adding a subdomain in GoDaddy using cPanel is straightforward and can be completed in just a few steps. Website owners can follow the step-by-step guide provided in this article to create a new subdomain in GoDaddy. In addition to providing step-by-step instructions for adding a subdomain in GoDaddy using cPanel, this article also addressed common issues that website owners may encounter, including DNS propagation issues and errors.

By troubleshooting these common issues, website owners can ensure that their subdomain is functioning correctly and accessible to visitors. Overall, adding a subdomain in GoDaddy using cPanel can be a valuable addition to any website, improving the user experience and making it easier for visitors to find the content they need.

How to buy a Domain Name for Free using Godaddy?

In this article we are going to discuss how to buy a domain name for free using Godaddy. Establishing an online presence is a crucial aspect of modern-day business. A domain name is the first step towards creating an online presence for your business or personal website, and GoDaddy is a trusted and popular domain registrar that can help you secure your domain name.

How to buy a Domain Name for Free Using Godaddy?

In this article, we will delve deeper into the process of buying a domain name using GoDaddy, exploring the steps involved and discussing the various options you can choose to optimize your domain name purchase.

Steps to buy a domain name using GoDaddy are listed below:

Step 1: Search for Available Domain Names

The first step in buying a domain name with GoDaddy is to search for available domain names. You can use the search bar on GoDaddy’s homepage to search for the domain name you want to purchase.Enter the domain name you want to purchase and click on the search button.If the domain name is available, you can add it to your cart and proceed to the next step.If it’s not available, GoDaddy will suggest other available domain names that are similar to your original choice.

It is essential to take the time to research and choose the right domain name. A domain name is an essential part of your brand identity, and it is crucial to select a name that reflects your brand and is easy for your customers to remember and type. Your domain name should be unique, catchy, and easy to spell.

Step 2: Add the Domain Name to Your Cart

Once you’ve found an available domain name, click the “Add to Cart” button next to the domain name. This will add the domain name to your shopping cart. GoDaddy provides an easy-to-use interface that allows you to add your domain name. You can continue shopping for additional domain names, or you can proceed to checkout.

It is important to note that GoDaddy often runs promotions and discounts that can save you money on your domain name purchase. Keep an eye out for such promotions and discounts to take advantage of these opportunities to save money.

Read Also: What is the difference between Website and Webpage?

Step 3: Choose Your Domain Name Options

After you’ve added your domain name to your cart, you’ll be taken to a page where you can choose your domain name options.

Domain Name Extension

GoDaddy provides a variety of domain name extensions, such as .com, .net, .org, .info, and more. Choose the extension that’s most appropriate for your business or personal website.

Domain Privacy

You will also need to decide whether you want to add domain privacy to your order. Your personal information is hidden from the public WHOIS database using this service. It is optional. If you want to keep your personal information private, you can choose to add domain privacy to your order.

Domain Length

Another crucial option to consider is the length of your domain name. A domain name may contain up to 63 characters. Shorter domain names, however, are typically simpler to type and remember. Pick an easy to remember domain name that is simple to type.

Domain Renewal

Lastly, you need to choose the registration length for your domain name. Domain names need to be renewed annually or every few years, depending on the registration length you choose. Make sure you choose a registration length that you’re comfortable with.

How to buy a domain name

Step 4: Review Your Order

Before you proceed to checkout, review your order to make sure that everything is correct. Make sure that you have the right domain name and that you’ve chosen the appropriate options.

Step 5: Checkout and Pay for Your Order

Once you’ve reviewed your order, you can proceed to checkout. You’ll need to create a GoDaddy account if you don’t already have one. GoDaddy accepts a variety of payment options, including credit cards, PayPal, and Apple Pay.

It is important to ensure that your payment information is accurate and up-to-date to avoid any payment issues or delays in processing your order.

You can also checkout this digital marketing institute to learn digital marketing course by enrolling in our course Or Contact us on +91-8949483728

Step 6: Verify Your Email Address

After you’ve completed your purchase, GoDaddy will send you an email to verify your email address. Click the verification link in the email to verify your email address. This step is important, as it ensures that you receive important account and domain-related notifications from GoDaddy.

How to buy a domain name for free

Step 7: Link Your Domain Name to Your Website

Once you’ve purchased your domain name, you’ll need to link it to your website or online platform.This process involves configuring the domain name settings and pointing the domain name to your website hosting provider.

GoDaddy provides an easy-to-use interface that allows you to manage your domain name settings, including changing the domain name servers, adding or modifying DNS records, and configuring domain forwarding.

If you’re using a website builder like Wix or Squarespace, you can follow their instructions for linking your domain name to your website. If you’re using a custom website, you’ll need to configure your DNS settings to point your domain name to your website’s IP address.

Read also: What is SSL Certificate and Why it is required?

If you plan to use GoDaddy as your website hosting provider, you can link your domain name to your website using the GoDaddy website builder or the cPanel hosting control panel. GoDaddy also offers a variety of other website hosting options, including WordPress hosting, VPS hosting, and dedicated hosting.

If you plan to use a different website hosting provider, you will need to configure your domain name settings to point to your website hosting provider’s nameservers. This process involves updating the domain name servers for your domain name, which can be done through the GoDaddy domain management interface.

It is essential to ensure that your domain name is correctly linked to your website or online platform. Otherwise, your website may not be accessible to your customers and visitors, which can negatively impact your online presence and reputation.

You can also checkout this digital marketing institute to learn digital marketing course by enrolling in our course Or Contact Digital Bikana on +91-8949483728

Conclusion

Buying a domain name using GoDaddy is a simple and straightforward process that can help you establish your online presence quickly and efficiently. You’ll need to search for available domain names, add your domain name to your cart, choose your domain name options, review your order, and checkout and pay for your order. After you’ve purchased your domain name, you’ll need to verify your email address and link your domain name to the website or online platform where you plan to host your website. By following the steps outlined above, you can purchase a domain name that aligns with your brand and start building your website.

One important thing to keep in mind when buying a domain name is to choose a name that is unique, memorable, and easy to spell. Your domain name is a critical part of your brand, and it will be the address where customers and visitors will find you online. You should also consider registering multiple domain extensions and variations of your domain name to protect your brand and prevent others from using a similar domain name.

GoDaddy offers a variety of additional services to enhance your online presence, including website hosting, email hosting, and website builders. You can explore these options on the GoDaddy website or seek the assistance of their customer support team if you have any questions or concerns.With a reliable domain registrar like GoDaddy, you can rest assured that your domain name is secure, and you can focus on creating a compelling online presence for your business or personal website. So, now I hope you have understood how to buy a domain name for free using Godaddy.

What is SSL Certificate and Why it is required?

In this article we are going to understand what is SSL Certificate and why it is required ? As the internet becomes an increasingly integral part of our lives, the need for secure online transactions has become more important than ever. Online shopping, banking, and other activities require users to enter personal information such as credit card numbers and addresses, making it necessary to ensure that this information is transmitted securely. An SSL certificate plays a vital role in ensuring that sensitive information is protected from prying eyes.

An SSL certificate is a cryptographic protocol that encrypts data exchanged between a web server and a user’s browser. It creates a secure connection between the two so that any data transmitted is protected from interception or tampering. Without an SSL certificate, any data transmitted between a user and a website can be easily intercepted and read by hackers. This is especially concerning for websites that handle sensitive information such as login credentials, financial information, or medical records.

Why do SSL Certificate is required

What is SSL Certificate?

SSL certificate is a digital certificate that encrypts data exchanged between a website and its visitors. It is a standard security protocol used to establish a secure connection between a web server and a browser. SSL certificates ensure that the information exchanged between a website and its visitors is private, secure, and protected from unauthorized access.

In simpler terms, an SSL certificate is a security measure that ensures that the information transferred between a website and its visitors is safe from interception by unauthorized third parties. When a website has an SSL certificate, visitors can feel confident that their personal and financial information is secure when they enter it into the website. Without an SSL certificate, sensitive information such as credit card numbers and passwords can be intercepted and stolen by hackers, leaving website owners and users vulnerable to identity theft and fraud.

Read Also: What is the difference between Website and Webpage?

What is SSL Certificate in Hindi?

To understand what is SSL Certificate in Hindi, Kindly check below video:

Why do SSL Certificate is Required?

Some of the reasons why SSL certificate is required are listed below:

1. Security

One of the primary reasons why an SSL certificate is required is security. In today’s digital landscape, cyberattacks are more common than ever before. Hackers are constantly looking for ways to intercept and steal sensitive information such as login credentials, credit card numbers, and other personal data. An SSL certificate provides an added layer of security by encrypting this information as it travels between a user’s browser and the website’s server. This means that even if a hacker manages to intercept the data, they won’t be able to read it.

Moreover, many industries have specific regulations that require websites to have an SSL certificate. For instance, if a website is collecting or transmitting personal or financial data, it is required to comply with the Payment Card Industry Data Security Standard (PCI DSS). This standard outline strict security requirements for merchants who accept credit card payments online. Without an SSL certificate, a website won’t be able to meet these requirements, which could result in legal and financial consequences.

2. Trust

Another reason why an SSL certificate is required is trust. When a user visits a website with an SSL certificate, they will see a padlock icon in the browser’s address bar, along with the “https” prefix instead of “http”. This indicates that the website has been verified as legitimate by a trusted third-party certificate authority. It also shows that any data transmitted between the user’s browser and the website’s server is encrypted and secure.

Having an SSL certificate is especially important for websites that handle sensitive information. Users are more likely to trust a website that has an SSL certificate, as they know their personal and financial information is being protected. This, in turn, can lead to increased customer loyalty and higher conversion rates. In addition, some browsers, such as Google Chrome, will display a warning message for websites that don’t have an SSL certificate, which can harm a website’s credibility and reputation.

3. SEO

Another reason why an SSL certificate is required is for search engine optimization (SEO). In 2014, Google announced that it would consider SSL encryption as a ranking factor in its search algorithm. This means that websites with SSL certificates are more likely to rank higher in search engine results pages (SERPs) than those without. This is because Google sees SSL encryption as a sign of a secure and trustworthy website. In addition, having an SSL certificate can help to increase click-through rates (CTR) on search results, as users are more likely to click on a result that displays the padlock icon.

You can also checkout this digital marketing institute to learn digital marketing course by enrolling in our course Or Contact us on +91-8949483728

4. Compatibility with newer technologies

Finally, another reason why an SSL certificate is required is compatibility with newer technologies. For example, modern web browsers such as Google Chrome, Mozilla Firefox, and Microsoft Edge have begun to phase out support for websites without SSL certificates. This means that websites without an SSL certificate may not work correctly or may display warning messages to users who try to access them. In addition, some newer web technologies such as HTTP/2, which can improve website speed and performance, require SSL encryption to work correctly. By having an SSL certificate, websites can ensure that they are compatible with these newer technologies, which can lead to a better user experience and increased engagement.

Click Here: WordPress Website Designing Course

Types of SSL Certificates

DV (Domain Validated) SSL certificates are the most basic type of SSL certificate. They are the easiest and quickest to obtain because they only require proof of domain ownership. This is done by sending an email to the domain owner or by adding a specific DNS record to the domain’s DNS configuration. Once the validation process is complete, the certificate authority (CA) will issue the SSL certificate, which can then be installed on the website’s server.

While DV SSL certificates provide encryption for website traffic, they do not provide any additional information about the website owner’s identity or legitimacy. As a result, they are generally not recommended for websites that handle sensitive or confidential information, such as e-commerce sites. However, they can be a good option for personal websites or small businesses that do not handle sensitive data.

DV SSL certificates are also typically the most affordable option, making them a popular choice for websites on a tight budget. However, it’s important to note that they may not provide the same level of trust and security as other types of SSL certificates.

what is ssl certificate used for

Conclusion

SSL certificate is an essential tool for securing website traffic and protecting sensitive information from malicious attacks. It provides website visitors with the confidence and assurance that their data is being transmitted securely and that the website is legitimate and trustworthy. With the rise of online threats and data breaches, having an SSL certificate has become a necessity for businesses and individuals alike.

While there are different types of SSL certificates available, website owners need to choose the one that best fits their needs and budget. Ultimately, the level of security and validation required will depend on the type of website and the type of data being transmitted. Website owners need to do their research and consult with a reputable SSL provider to ensure they are getting the right level of protection for their websites. By investing in an SSL certificate, website owners can not only protect their visitors’ data but also gain a competitive edge in the digital marketplace.

What is the difference between Website and Webpage?

In this article we are going to understand what is the difference between Website and Webpage with example? In the digital age, it is imperative to have a strong online presence. Whether you are a small business owner or an individual, having a website or a webpage can be essential for promoting your brand, showcasing your products, or sharing your ideas with the world. However, before you start creating your online platform, it is important to understand the difference between a website and a webpage.

At a basic level, a website is a collection of web pages that are interlinked and share a common domain name. In other words, a website is a group of related web pages that can be accessed through a single URL (Uniform Resource Locator). A webpage, on the other hand, is a single document or file that is displayed in a web browser. In simple terms, a webpage is a single element of a website.

To understand the difference between a website and a webpage better, it is important to look at each of these terms in more detail.

What is a Website?

A website is a collection of web pages that are interconnected and share a common domain name. Websites can range from simple, single-page sites to complex, multi-page sites with hundreds or even thousands of pages. The Websites are typically used to promote a business, organization, or individual and can contain a variety of content, such as text, images, videos, and animations.

Websites can be created for a variety of purposes, such as e-commerce, blogging, news, social networking, entertainment, and more. They are hosted on a server and can be accessed through a web browser like Google Chrome, Mozilla Firefox, or Safari.

Click Here: What is Search Engine Optimization (SEO) in Digital Marketing?

What is a Webpage?

A webpage, on the other hand, is a single document or file that is displayed in a web browser. A webpage can contain a variety of content, such as text, images, videos, and links, and is typically designed to provide information to the user or allow the user to take a specific action.

Webpages can be created using a variety of programming languages, such as HTML (Hypertext Markup Language), CSS (Cascading Style Sheets), and JavaScript. They can be accessed through a web browser by entering the URL of the page in the address bar or by clicking on a link that points to the page.

What is the difference between Website and Webpage

What is the difference between Website and Webpage?

The Main Differences between Website and Webpage are listed below:

1. Structure and content

  • A website is a collection of related web pages that are organized in a hierarchical structure. The homepage is usually the starting point of a website, and from there, the user can navigate to other pages on the site. A website can contain a variety of content, such as text, images, videos, and animations.
  • On the other hand, a webpage is a single document or file that is displayed in a web browser. It is usually designed to provide specific information or allow the user to take a specific action.

2. Purpose

  • Websites are typically created for a specific purpose, such as promoting a business, organization, or individual, providing e-commerce services, or sharing news and information. Websites can have a variety of goals, such as increasing brand awareness, generating leads, and driving sales.
  • Webpages, on the other hand, are designed to provide information to the user or allow the user to take a specific action, such as filling out a form, making a purchase, or signing up for a newsletter.

3. URL

  • A website has a unique domain name that is used to access all of the web pages within the site. For example, the domain name for Google is www.google.com, and all of the pages within the site can be accessed by appending a specific path to the domain name.
  • A webpage, on the other hand, has a unique URL that is used to access that specific page. The URL of a webpage can be found in the address bar of the web browser.
What is the difference between Website and Webpage with example in Hindi

4. Navigation

  • Websites typically have a navigation menu or bar that allows users to easily move from one page to another within the site. This menu or bar is usually located at the top or side of the website and may be present on every page within the site.
  • Webpages, on the other hand, do not necessarily have a navigation menu or bar. They may have links within the content that allow the user to move to related pages, but there is no consistent navigation structure across webpages.

5. Size

  • Websites can range in size from small, single-page sites to large, complex sites with hundreds or even thousands of pages. The size of a website depends on the purpose and scope of the site.
  • Webpages, on the other hand, are typically smaller than websites since they are designed to provide specific information or allow the user to take a specific action.

You can also checkout this digital marketing institute to learn digital marketing course by enrolling in our course Or Contact us on +91-8949483728

6. Interactivity

  • Websites can be interactive and allow users to interact with the content in various ways. For example, users may be able to fill out forms, leave comments, or share content on social media.
  • Webpages, on the other hand, may not be interactive and may simply provide information without any user interaction.

What is the difference between Website and Webpage with example in Hindi?

To understand the difference between Website and Webpage with example in Hindi kindly checkout the video below:

Conclusion

While the differences between a website and a webpage are significant, it is important to note that the two are interdependent. A website is made up of webpages, and without webpages, there can be no website. Therefore, it is essential to understand how the two work together to create a cohesive online presence.

Websites are typically designed to be user-friendly, visually appealing, and easy to navigate. They are designed to provide a positive user experience and keep users engaged for as long as possible. A good website should be responsive and compatible with various devices, including desktops, laptops, tablets, and smartphones.

Webpages, on the other hand, are designed to be specific and focused. They should provide the user with the information they are looking for quickly and efficiently. This means that webpages should be well-organized, visually appealing, and easy to read. They should also be optimized for search engines, so that they can be easily found by users who are searching for specific information.

One of the key factors in creating a successful website is ensuring that the webpages are interconnected and organized in a logical manner. This means that users should be able to easily navigate from one page to another without getting lost or confused. The navigation menu or bar should be clearly visible and easy to use, and it should provide users with a clear understanding of the structure of the website.

You can also checkout this digital marketing institute to learn digital marketing course by enrolling in our course Or Contact us on +91-8949483728

Another important factor in creating a successful website is ensuring that the content on each webpage is high-quality and relevant. The content should be well-written, engaging, and informative, and it should be optimized for search engines. This means that the content should include relevant keywords and phrases that users are likely to search for when looking for information on a particular topic.

In addition to these factors, websites and webpages should also be optimized for speed and performance. This means that the site should load quickly and smoothly, without any delays or errors. Users are likely to leave a website if it takes too long to load, so it is essential to ensure that the site is optimized for speed.

Another factor to consider when creating a website is security. Websites can be vulnerable to various forms of cyber-attacks, such as hacking, malware, and phishing. It is therefore essential to ensure that the website is secure and protected from these threats. This can be done through various means, such as using strong passwords, regularly updating software and plugins, and using SSL certificates to encrypt data. In conclusion, the main difference between a website and a webpage is that a website is a collection of related web pages that are interlinked and share a common domain name, while a webpage is a single document or file that is displayed in a web browser.

Read Also: How to create a Facebook Page?

Websites are typically larger and more complex than webpages and are designed to achieve specific goals, such as promoting a business or organization. Webpages, on the other hand, are typically smaller and provide specific information or allow the user to take a specific action. Understanding the difference between these two terms is essential for anyone looking to establish an online presence and create a digital platform.While the differences between a website and a webpage are significant, it is essential to understand how the two work together to create a cohesive online presence.

Websites are made up of webpages, and without webpages, there can be no website. Therefore, it is important to ensure that both the website and the webpages are well-designed, user-friendly, and optimized for search engines. This will help to ensure that the site is engaging, informative, and easy to navigate, and that it provides users with a positive experience.