How can you create a responsive design for a WordPress website?

In this article we are going to talk about How can you create a responsive design for a WordPress Website? In today’s mobile-focused world, a responsive design for your WordPress website is crucial. Responsive design ensures that your website adapts seamlessly to various screen sizes and devices, providing an optimal user experience.

How can you create a responsive design for a WordPress website?

In this article, we will delve into the key aspects of creating a responsive design for your WordPress website. From selecting a responsive theme to implementing media queries, flexible grids, and optimizing images, we will cover everything you need to know to make your website look great on any device.

I. Choosing a Responsive Theme

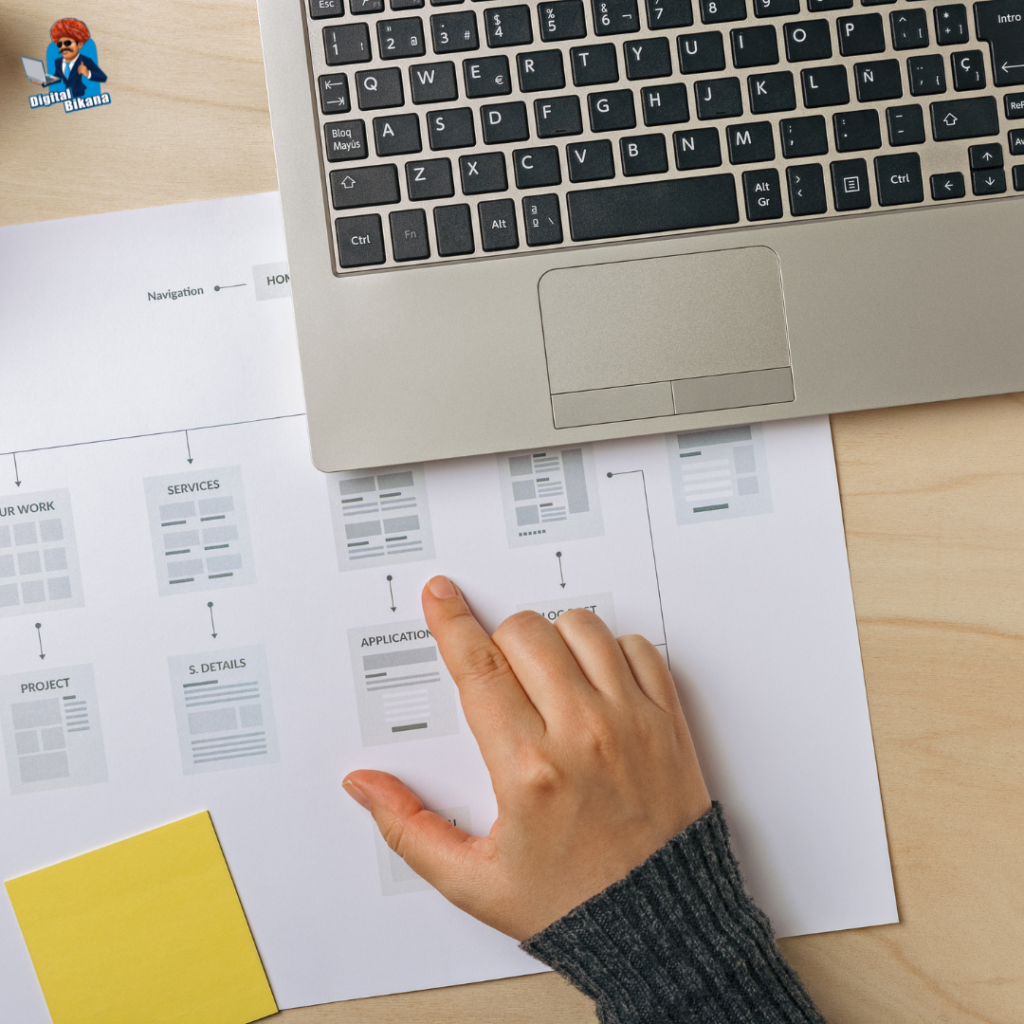
The first step in creating a responsive design for your WordPress website is selecting a responsive theme. A responsive theme is designed to automatically adjust and adapt to different screen sizes, ensuring your website looks good on desktops, tablets, and smartphones. When browsing for themes, look for those labeled as “responsive” or “mobile-friendly.” Take into account factors such as design aesthetics, customization options, and plugin compatibility while choosing a responsive theme that aligns with your website’s goals.

II. Implementing Responsive Design Techniques

1. Fluid Grid System

A fluid grid system is the foundation of a responsive design. It enables your website’s layout to adjust proportionally to different screen sizes. Use CSS frameworks like Bootstrap or Foundation, which offer pre-built grid systems, to create a responsive layout for your WordPress theme. These frameworks provide a grid-based structure that automatically adjusts the placement and sizing of elements based on screen size. By utilizing a fluid grid system, you can ensure that your website’s layout maintains its integrity across various devices.

2. Media Queries

Media queries let you customize CSS styles based on the screen size of the device. By defining breakpoints and applying appropriate styles, you can ensure that your website’s layout, typography, and images adapt to different devices effectively. CSS3 provides excellent support for media queries, making it easy to implement responsive design techniques. Media queries allow you to specify rules for specific screen sizes, such as targeting smaller screens with simplified navigation or adjusting font sizes for better readability. By utilizing media queries effectively, you can create a truly responsive experience for your website visitors.

Read Also: How can you create a contact form on a WordPress website?

3. Flexible Images

Images are important in web design and should adjust to fit different screen sizes. Use CSS techniques such as max-width: 100% to ensure images scale proportionally within their container without overflowing or distorting the layout. Additionally, consider using responsive image solutions like the srcset and sizes attributes or plugins like “WP Responsive Images” to serve appropriately sized images to different devices, reducing load times and improving performance. Responsive images allow your website to deliver the right image size based on the user’s device, ensuring optimal visual experience without compromising performance.

How To Design A Website Using WordPress

4. Mobile-First Design Approach

To ensure a truly responsive design, adopting a mobile-first approach is recommended. This approach means starting with mobile design and gradually improving it for larger screens. By prioritizing mobile design, you can focus on essential content and optimize the user experience for smaller screens. This approach also encourages a streamlined design and faster load times, benefiting both mobile and desktop users.

Read Also: How to optimize the speed and performance of a WordPress website?

III. Testing and Optimization

Once you have implemented the responsive design techniques, thorough testing is crucial to ensure your website performs flawlessly on various devices. Test your website on different browsers, screen sizes, and devices to identify any issues and make necessary adjustments. Emulate different devices using browser developer tools or consider using real devices for testing.

Optimize your website’s performance by minifying CSS and JavaScript files, compressing images, and leveraging caching techniques. Tools like Google PageSpeed Insights can provide insights and recommendations for optimizing your website’s speed and performance. Additionally, prioritize accessibility by ensuring that your website is usable by individuals with disabilities and compliant with accessibility guidelines.

Create A Responsive Design For A WordPress Website

Conclusion

 Creating a responsive design for your WordPress website is essential to deliver a seamless user experience across devices. By selecting a responsive theme, implementing responsive design techniques such as fluid grids, media queries, flexible images, and adopting a mobile-first approach, and conducting thorough testing and optimization, you can ensure your website looks and functions beautifully on any screen size. Embracing responsive design will not only improve user engagement but also contribute to better search engine rankings and increased conversions. Start implementing these techniques today and unlock the full potential of your WordPress website in the mobile era. So, Now I hope you have understood about create a responsive design for a WordPress website.

You can also checkout this website designing institute to learn digital marketing course by enrolling in our course Or Contact Digital Bikana on +91-8949483728

How to optimize the speed and performance of a WordPress website?

In this article we are going to talk about How to optimize the speed and performance of a WordPress website? Website speed and performance are critical factors that greatly impact the success of a WordPress website in today’s fast-paced digital world. Users have increasingly high expectations for fast-loading sites, and search engines also prioritize websites with faster load times.

How to optimize the speed and performance of a WordPress website?

In this article, we will explore some of the best practices for optimizing the speed and performance of a WordPress website to ensure an exceptional user experience and improved search engine rankings.

1. Choose a Reliable Web Hosting Provider

One of the most critical decisions for your WordPress website is selecting a reliable web hosting provider. Opt for a hosting company that offers excellent server performance, high uptime, and fast response times. Shared hosting might be cost-effective, but it can often result in slower site speed due to resource sharing. Consider managed WordPress hosting or a virtual private server (VPS) for better performance.

2. Utilize a Lightweight and Fast Theme

The theme you choose significantly impacts the speed and performance of your WordPress website. Opt for a lightweight theme that is well-coded and optimized for speed. Avoid themes with excessive features and unnecessary plugins, as they can slow down your site. Conduct thorough research, read reviews, and select a reputable theme that suits your design needs while maintaining optimal performance.

Read Also: How to install theme in WordPress Website?

3. Keep your WordPress core, themes, and plugins up to date

Outdated WordPress core, themes, and plugins can pose security risks and negatively impact performance. Developers regularly release updates to address bugs, security vulnerabilities, and enhance performance. Keep your WordPress installation, themes, and plugins up to date to ensure optimal speed and performance. Regularly check for updates and promptly apply them when they are available.

Optimizing The Speed And Performance Of A WordPress Website

4. Optimize Images for Web

Images play a vital role in website engagement, but they can also be a significant factor in slowing down your WordPress site. Large, unoptimized images take longer to load, causing delays in the overall page speed. Before uploading images to your website, compress them using tools like TinyPNG, Imagify, or WP Smush. Additionally, use appropriate image formats (JPEG for photographs, PNG for graphics) and specify image dimensions to reduce page load time.

5. Minify and Combine CSS and JavaScript Files

CSS and JavaScript files are essential for the functionality and appearance of your website. However, multiple CSS and JavaScript files can increase the number of HTTP requests, impacting site speed. Reduce file size and requests to the server by minifying and combining CSS and JavaScript files. You can utilize plugins like Autoptimize or WP Rocket to easily achieve this optimization.

6. Utilize Caching

Caching is a powerful technique that saves dynamically generated HTML pages and serves them to visitors without the need for reprocessing. By caching your WordPress site, you reduce the server load and improve page load times. Use caching plugins like W3 Total Cache, WP Super Cache, or WP Rocket to implement browser caching, object caching, and page caching. This significantly improves overall site performance and response times.

Read Also: What are Permalinks in WordPress and How can you customize them?

7. Enable GZIP Compression

GZIP compression is a technique that reduces the size of your website files by compressing them before they are sent to the visitor’s browser. Enabling GZIP compression significantly reduces the file size and the time it takes to transfer data from the server to the user’s browser. Most modern web servers and caching plugins have built-in options to enable GZIP compression.

8. Implement Lazy Loading for Images and Videos

Lazy loading is a technique that defers the loading of non-visible images and videos until the user scrolls to them. By implementing lazy loading, you can improve the initial page load time by only loading the images and videos that the user needs to see. This technique can be implemented using plugins like Lazy Load by WP Rocket, or there are even themes that offer built-in lazy loading functionality.

9. Optimize Your Database

The WordPress database stores all your website’s content, including posts, pages, settings, and more. Over time, the database can gather unnecessary data like post revisions, spam comments, and transients, which can be safely removed. Optimize your database by removing these unnecessary elements using plugins like WP-Optimize or Advanced Database Cleaner. Regularly cleaning and optimizing your database helps improve site performance by reducing the size and query times.

Read Also: How can you create a contact form on a WordPress website?

10. Monitor and Optimize Website Performance

Continuously monitor your WordPress website’s performance using tools like Google PageSpeed Insights, GTmetrix, or Pingdom. These tools provide detailed reports and recommendations for improving your site’s speed and performance. Pay attention to metrics such as page load time, time to first byte (TTFB), and overall performance scores. Implement the recommended optimizations and monitor the impact they have on your site’s speed.

Best Practice For WordPress Website

Conclusion

Optimizing the speed and performance of a WordPress website is vital to deliver an exceptional user experience and improve search engine rankings. By following the best practices outlined in this article, such as choosing a reliable hosting provider, utilizing a lightweight theme, optimizing images, and implementing caching and compression techniques, you can significantly enhance your website’s speed and performance. Regularly monitoring and optimizing your site’s performance ensures that your WordPress website continues to meet the demands of today’s users and search engine requirements. So, Now I hope you have understood about How to optimize the speed and performance of a WordPress website.

You can also checkout this website designing institute to learn digital marketing course by enrolling in our course Or Contact Digital Bikana on +91-8949483728

How can you create a contact form on a WordPress website?

In this article we are going to talk about How can you create a contact form on a WordPress website? Having a contact form on your WordPress website is essential for effective communication with your audience. It allows visitors to reach out to you easily and provides a convenient way for you to collect inquiries, feedback, or other important information.

How can you create a contact form on a WordPress website?

In this comprehensive guide, we will walk you through the process of creating a contact form on your WordPress website, from selecting the right plugin to customizing form fields and integrating it seamlessly. By following these steps, you can create a professional and user-friendly contact form that enhances engagement and improves communication with your visitors.

1. Choosing a Contact Form Plugin

The first step in creating a contact form on your WordPress website is to select a suitable contact form plugin. There are several popular options available, including Contact Form 7, WPForms, Gravity Forms, Ninja Forms, and Formidable Forms. Consider factors such as ease of use, features, flexibility, support, and compatibility with your theme and other plugins when making your choice.

2. Installing and Activating the Plugin

Once you have chosen a contact form plugin, you need to install and activate it on your WordPress website. To do this, navigate to your WordPress admin dashboard, go to “Plugins,” and click on “Add New.” Search for the chosen plugin, install it, and activate it. This will add the necessary functionality to your website to create and manage contact forms.

3. Creating a Contact Form

After activating the plugin, you can start creating your contact form. Access the plugin settings or dashboard, typically found in the left sidebar of your WordPress admin panel. Look for the option to create a new form and follow the step-by-step process provided by the plugin. Most contact form plugins offer a user-friendly interface with drag-and-drop functionality, making it easy to add and arrange form fields according to your needs.

Create A Contact Form On A WordPress Website Using html And CSS

4. Customizing Form Fields and Settings

To make your contact form more personalized and relevant, you can customize the form fields and settings. Modify the labels, add placeholders, specify required fields, and set up email notifications to receive inquiries directly in your inbox. Take advantage of any additional settings offered by the plugin, such as enabling CAPTCHA or spam protection measures to enhance the security of your contact form.

Read Also: How can you create different types of content in WordPress?

5. Styling the Contact Form

To ensure your contact form aligns with your website’s design and branding, you can style it to match your overall aesthetic. Many contact form plugins provide customization options for colors, fonts, sizes, and layouts. Some plugins even offer pre-designed templates or themes that you can apply with a single click, saving you time and effort in designing your form.

6. Integrating the Contact Form

Once you have customized the form, it’s time to integrate it into your WordPress website. Most contact form plugins offer a shortcode or a block that you can insert into your desired page or post. Simply copy the shortcode provided by the plugin and paste it into the content area of the page or post where you want the contact form to appear. Alternatively, some plugins automatically generate a contact page for you, which you can link to from your website’s menu or footer.

7. Testing and Managing Contact Form Submissions

Before making your contact form live, it’s crucial to test it thoroughly. Submit test inquiries and ensure that all form fields are functioning correctly, and notifications are being sent to the designated email address. Check if the emails are delivered promptly and that the content of the inquiries is displayed correctly. Familiarize yourself with the plugin’s interface for managing contact form submissions, where you can view, reply to, or export messages for further analysis.

Read Also: What are Permalinks in WordPress and How can you customize them?

8. Enhancing Contact Form Functionality

Depending on your specific requirements, you may want to extend the functionality of your contact form. Explore the advanced features offered by your chosen plugin, such as file uploads, conditional logic (show/hide fields based on user input), multi-page forms, integration with CRM tools, or third-party integrations with email marketing services. Assess your needs and consider incorporating these features to enhance the capabilities of your contact form and streamline your communication process.

Create A Contact Form On A WordPress Website

Conclusion

Creating a contact form on your WordPress website is a straightforward process with the right plugin and careful customization. By following the step-by-step guide provided in this article`, you can create a professional and user-friendly contact form that enhances communication with your audience. Regularly test and manage contact form submissions to ensure a seamless experience for users. A well-designed contact form not only facilitates easy communication but also improves user engagement and helps you gather valuable feedback and inquiries from your website visitors. So, Now I hope you have understood about how can we create a contact form on a WordPress website.

You can also checkout this website designing institute to learn digital marketing course by enrolling in our course Or Contact Digital Bikana on +91-8949483728

What are Permalinks in WordPress and How can you customize them?

In this article we are going to talk about What are Permalinks in WordPress and How can you customize them? In the world of WordPress websites, the term “permalinks” holds significant importance. Permalinks refer to the permanent URLs that represent individual pages, posts, and other content on your website. Understanding the concept of permalinks and learning how to customize them is essential for optimizing your website’s search engine visibility, improving user experience, and creating more readable and memorable URLs.

What are Permalinks in WordPress and How can you customize them?

In this comprehensive article, we will delve into the details of permalinks in WordPress, explore their significance, and provide a step-by-step guide on customizing them to suit your needs.

What are Permalinks?

Permalinks, short for permanent links, serve as the unique and unchanging web addresses that point to specific pages, posts, or content on your WordPress website. They are designed to be permanent, allowing users to access your content even after an extended period. By default, WordPress generates permalinks based on a structure that may include post IDs, dates, and post names. However, these default options may not be the most user-friendly or search engine optimized.

Importance of Customizing Permalinks

Customizing permalinks is crucial for several reasons. First and foremost, it improves the readability and usability of your website’s URLs. By creating clean, descriptive, and human-readable permalinks, you make it easier for visitors to understand and remember the address of a particular page or post. Additionally, customizing permalinks can have a positive impact on your search engine optimization (SEO) efforts. Search engines prefer concise and keyword-rich URLs that accurately reflect the content of a page or post. Optimized permalinks can contribute to better search engine rankings and increased organic traffic to your website.

Read Also: What are Custom Fields in WordPress and how can you use them?

Accessing Permalink Settings in WordPress

To customize permalinks in WordPress, navigate to your WordPress admin dashboard and click on “Settings.” From the drop-down menu, select “Permalinks.” This will take you to the Permalink Settings page, where you can make changes to the structure of your website’s URLs.

Choosing a Permalink Structure

WordPress offers several permalink structure options to choose from. These options include Plain, Day and Name, Month and Name, Numeric, and Post Name. While each option has its advantages, the “Post Name” structure is often recommended due to its simplicity and SEO-friendliness. It creates clean URLs that incorporate the post or page title and can improve the visibility of your content in search engine results.

Customize Them In Permalinks In WordPress Website

Customizing Permalink Structure

If none of the predefined permalink structures suit your requirements, WordPress allows you to customize the permalink structure using the “Custom Structure” option. This feature enables you to define your preferred permalink format using specific placeholders or tags. WordPress provides various placeholders that can be included in your custom permalink structure, such as %postname% (post or page slug), %post_id% (unique post or page ID), %category% (post category), and more. You can combine these placeholders to create a permalink structure that best aligns with your content and SEO goals.

Read Also: How can you create different types of content in WordPress?

Best Practices for Customizing Permalinks

When customizing permalinks, it’s essential to adhere to certain best practices. Firstly, ensure that your permalink structure is logical, descriptive, and relevant to the content it represents. Incorporate relevant keywords naturally in your permalinks to enhance their SEO value, but avoid keyword stuffing, which can harm your rankings. Keep permalinks concise and avoid excessive length, as shorter URLs tend to be more user-friendly. Consider the impact of permalink changes on your existing content, as altering permalinks for established pages and posts can result in broken links and loss of traffic. Implementing 301 redirects or using plugins to handle such changes can mitigate these issues.

Updating Existing Content

Customizing permalinks affects new content automatically, but existing content retains their original URLs. To update existing content with the new permalink structure, you can utilize plugins such as “Regenerate Permalinks” or manually update the permalinks for each individual page or post. This step ensures consistency across your website and avoids confusion for users and search engines.

Permalinks In Your WordPress Dashboard

Conclusion

Permalinks play a vital role in shaping the structure and accessibility of your WordPress website’s URLs. Customizing permalinks allows you to create user-friendly, descriptive, and SEO-optimized URLs that improve the visibility of your content and enhance user experience. By following the step-by-step guide provided in this article and adhering to best practices, you can effectively customize permalinks in WordPress and set your website on the path to greater search engine visibility and improved user engagement. Remember, thoughtful permalink customization is an essential aspect of building a successful WordPress website. So, Now I hope you have understood about the What are Permalinks in WordPress and How can we customize them.

You can also checkout this website designing institute to learn digital marketing course by enrolling in our course Or Contact Digital Bikana on +91-8949483728

How can you create different types of content in WordPress?

In this article we are going to talk about How can you create and manage different types of content in WordPress, such as pages and blog post? WordPress is a versatile content management system that allows you to create and manage various types of content, including pages and blog posts. Understanding how to effectively utilize these content types is crucial for building a successful website.

How can you create and manage different types of content in WordPress, such as pages and blog posts?

In this comprehensive guide, we will explore the process of creating and managing different types of content in WordPress. From structuring your website with pages to engaging your audience with blog posts, we will cover everything you need to know to harness the full potential of WordPress as a content management platform.

1. Pages

Creating Structured Content:

Pages in WordPress are used for creating static and hierarchical content that forms the backbone of your website. Here’s how you can create and manage pages effectively:

a. Creating Pages

In the WordPress dashboard, go to “Pages” and select “Add New.” Enter a title for your page and use the content editor to add text, images, and other media. You can also choose page attributes, such as parent pages, templates, and featured images.

b. Organizing Pages

WordPress allows you to create a hierarchical structure by setting parent and child pages. This helps in organizing and categorizing your content, especially for websites with a large number of pages. Rearrange the page order using drag-and-drop functionality.

Read Also: What are widgets and how can you use them in WordPress website designing?

c. Customizing Page Templates

Many WordPress themes provide pre-designed page templates that offer different layouts and functionalities. Selecting an appropriate template can enhance the visual appeal and functionality of your pages.

d. Publishing and Managing Pages

Once you have created a page, you can preview it, save it as a draft, or publish it to make it live on your website. You can also manage pages by editing, updating, or deleting them as needed.

2. Blog Posts

Engaging with Dynamic Content

Blog posts are dynamic content entries that are displayed in reverse chronological order on your website’s blog page. Here’s how you can create and manage blog posts effectively:

a. Creating Blog Posts

In the WordPress dashboard, navigate to the “Posts” section and click on “Add New.” Enter a title for your blog post and use the content editor to add text, images, and other media. You can also categorize and tag your blog posts for easier navigation and organization.

b. Formatting and Styling

Use the content editor to format your blog posts by applying headings, lists, bold or italic text, and other formatting options. You can also add featured images to make your posts visually appealing when displayed in blog feeds.

Read Also: Best practices for designing the header and footer of a WordPress website

c. Publishing and Scheduling

Once you have created a blog post, you can choose to publish it immediately or schedule it for a future date and time. This allows you to plan and automate your content publishing strategy.

d. Managing Blog Posts

WordPress provides various tools to manage your blog posts efficiently. You can edit, update, or delete posts, as well as manage comments and trackbacks for each individual post.

Content In WordPress Such As Pages And Blog Posts

3. Categories and Tags

Organizing Content

Categories and tags are taxonomies that help organize and categorize your content effectively. They allow users to navigate through related content and improve the overall user experience.

a. Categories

Categories provide a broad classification system for grouping similar content. Create categories that align with the main topics or themes of your website. Assign relevant categories to your blog posts to help users find related content easily.

b. Tags

Tags provide a more specific way to describe and label your content. Unlike categories, tags are not hierarchical. Add relevant tags to your blog posts to provide additional context and improve searchability.

4. Content Management Tips

To effectively manage your content in WordPress, consider the following tips:

a. Use a Content Calendar

Plan and organize your content creation and publishing schedule using a content calendar. This helps maintain consistency and avoid content gaps.

b. Maintain a Consistent Writing Style

Develop a consistent tone, writing style, and formatting for your content to create a cohesive brand identity.

c. SEO Optimization

Optimize your content for search engines by incorporating relevant keywords, writing meta descriptions, and optimizing headings and URLs.

d. Use Visual Media

Enhance your content with high-quality images, videos, infographics, or other visual media to make it more engaging and shareable.

5. Plugins for Content Management

WordPress offers a wide range of plugins to enhance your content management capabilities. Here are a few popular plugins:

a. Yoast SEO

This plugin helps optimize your content for search engines by providing suggestions for improving readability, keyword usage, meta tags, and more.

b. Akismet

Akismet is a powerful anti-spam plugin that filters out spam comments on your blog posts, keeping your website’s comments section clean and manageable.

c. Editorial Calendar

This plugin provides a visual calendar interface within WordPress, allowing you to plan, schedule, and manage your content easily.

d. Jetpack

Jetpack offers a suite of features to enhance content management, including site stats, social media sharing, automated social media posting, and more.

How To Create And Manage Different Types Of Content In WordPress

Conclusion:

Creating and managing different types of content in WordPress is a fundamental aspect of building a successful website. Whether you’re structuring your website with pages or engaging your audience with blog posts, understanding the process and utilizing the available tools is essential. Use pages to create static and hierarchical content, and leverage blog posts to engage users with dynamic and timely information.

Organize your content using categories and tags to improve navigation and user experience. Employ content management tips, such as using a content calendar and maintaining a consistent writing style. Additionally, consider using plugins to optimize your content for search engines, manage spam comments, and enhance your content management capabilities. By effectively creating and managing content in WordPress, you can build a compelling and user-friendly website that resonates with your audience. So, Now I hope you have understood about create and manage different types of content in WordPress, such as pages and blog posts?

You can also checkout this website designing institute to learn digital marketing course by enrolling in our course Or Contact Digital Bikana on +91-8949483728

What are Custom Fields in WordPress and how can you use them?

In this article we are going to talk about What are Custom Fields in WordPress and how can you use them? WordPress, being one of the most popular content management systems (CMS) worldwide, offers a wide range of features and customization options. One such powerful feature is custom fields, which allow users to add extra data to posts, pages, and other content types.

What are Custom Fields in WordPress and how can you use them?

In this article, we will explore what custom fields are in WordPress and how they can be effectively utilized to enhance your website’s functionality and content management capabilities.

What are Custom Fields?

Custom fields in WordPress are additional metadata fields that can be attached to various content elements. They provide a way to store and display extra information associated with posts, pages, and other custom post types. By default, WordPress comes with a few basic fields such as title, content, categories, and tags. However, custom fields enable you to extend these default fields and add your own unique data.

Using Custom Fields

Custom fields can be used in numerous ways to enhance the functionality and organization of your WordPress website. Here are some common ways custom fields can be used:

1. Storing Additional Information

Custom fields allow you to store and display supplementary data for your content. For example, if you have a website about movies, you could create custom fields to store details like release date, director, cast, and ratings. This extra information can then be used to build customized templates, filters, or search functionalities.

2. Creating Custom Templates

By utilizing custom fields, you can design unique templates for specific types of content. For instance, you might want to create a different layout for featured articles or display specific data in a particular format. Custom fields enable you to add the necessary metadata and build templates tailored to your requirements.

Read Also: Best practices for designing the header and footer of a WordPress website

3. Building Advanced Search and Filtering

Custom fields play a crucial role in creating advanced search and filtering options on your website. With the help of plugins or custom development, you can enable visitors to filter content based on specific criteria. For example, if you have an e-commerce site, custom fields can help users filter products by price range, color, size, or any other relevant attributes.

Add Custom Fields In WordPress

4. Integration with Plugins and Themes

WordPress provides a vast ecosystem of plugins and themes that can leverage custom fields to enhance functionality. Many plugins allow you to create custom fields effortlessly and use them in conjunction with their features. This integration opens up endless possibilities for extending your website’s capabilities without the need for extensive coding.

Read Also: What are widgets and how can you use them in WordPress website designing?

Implementing Custom Fields

WordPress provides different ways to create and manage custom fields:

1. Custom Fields UI

For beginners, the Custom Fields UI plugin offers a user-friendly interface to create and manage custom fields without any coding knowledge. It simplifies the process by providing an intuitive interface within the WordPress admin dashboard.

2. Advanced Custom Fields (ACF)

The Advanced Custom Fields plugin is a powerful tool for creating complex custom field sets. It offers a wide range of field types, including text, image, select, date, and more. ACF also provides seamless integration with themes and other plugins, making it a popular choice among developers.

3. Manual Coding

For advanced users and developers, custom fields can be created programmatically using functions provided by the WordPress API. This method offers maximum flexibility and control over the custom field implementation.

Custom fields can be implemented by adding a few lines of code to your theme’s template files or by using hooks and filters to modify existing templates. The WordPress API provides functions like get_post_meta() and update_post_meta() to retrieve and update the values of custom fields programmatically.

What Are Custom Fields In WordPress

Conclusion

Custom fields in WordPress are a valuable feature that empowers website owners to extend the default content structure and add unique metadata. They provide enhanced content management capabilities, enable customized templates, and facilitate advanced search and filtering options. By leveraging plugins like Custom Fields UI or Advanced Custom Fields, or through manual coding, you can harness the power of custom fields and unlock new possibilities for your WordPress website.

Experiment with custom fields to tailor your content and enhance your website’s functionality. Whether you’re creating a portfolio, an e-commerce site, or a blog, custom fields can significantly improve the way you manage and present your content. Embrace the flexibility and customization options provided by custom fields, and watch your WordPress website thrive with enhanced user experiences and improved content management. So, Now I hope you have understood about the Custom Fields in WordPress and how can we use them.

You can also checkout this website designing institute to learn digital marketing course by enrolling in our course Or Contact Digital Bikana on +91-8949483728

What are widgets and how can you use them in WordPress website designing?

In this article What are widgets and how can you use them in WordPress website designing? Widgets are powerful tools that allow you to add functionality and customize the layout of your WordPress website without any coding knowledge. They are modular components that can be easily added, rearranged, and configured within designated areas of your website, such as sidebars, footers, and widgetized areas.

What are widgets and how can you use them in WordPress website designing?

In this comprehensive guide, we will explore what widgets are and how you can effectively use them in WordPress website designing. From enhancing user experience to adding dynamic content, widgets provide endless possibilities for creating a visually appealing and functional website.

1. Understanding Widgets

Widgets are small, self-contained modules that perform specific functions and can be added to widgetized areas on your WordPress website. These areas are predefined by your theme and typically include sidebars, header, footer, and other designated widget areas. Widgets can display a wide range of content, such as text, images, menus, social media feeds, calendars, search bars, and more.

2. Accessing and Managing Widgets

To access and manage widgets in WordPress, navigate to the “Appearance” section in the WordPress dashboard and click on “Widgets.” Here, you will find a list of available widgets and the widget areas defined by your theme. You can simply drag and drop widgets into the desired widget areas or click on them to configure their settings.

3. Popular Widget Areas

 a. Sidebar Widgets

Sidebar widgets are commonly used to display additional content alongside the main content of your website. They can include categories, recent posts, popular posts, tags, search bars, and custom menus. Sidebar widgets offer an excellent opportunity to improve navigation and engage users with relevant information.

b. Footer Widgets

Footer widgets appear at the bottom of your website and can be used to display copyright information, contact details, quick links, social media icons, newsletter sign-up forms, or any other content you want to showcase in the footer area.

c. Header Widgets

Some themes provide header widget areas where you can place widgets to display elements such as a call-to-action button, a search bar, contact information, or a custom menu.

d. Widgetized Page Templates

Some themes offer specific page templates that allow you to create unique layouts by adding widgets to predefined areas on individual pages. This flexibility can be particularly useful for creating landing pages or showcasing specific content.

Wordpress Website Designing Course

4. Customizing Widgets

WordPress provides various options to customize widgets and make them blend seamlessly with your website design. When configuring a widget, you can typically customize its title, content, layout, and style to match your branding and overall design aesthetics.

a. Widget Titles

You can modify the title of each widget to make it descriptive or visually appealing. Some themes also offer styling options to change the font size, color, and style of widget titles.

b. Widget Content

Depending on the type of widget, you can customize its content by adding text, images, HTML, or selecting specific options from the widget settings. For example, a text widget allows you to add text or HTML code, while an image widget lets you upload and display an image.

Read Also: How can you create a sitemap for a WordPress website?

c. Widget Layout

WordPress themes often provide layout options for widgets. You can choose from columns, grids, or other predefined layouts to arrange multiple widgets within a widget area.

d. Widget Styling

If you have some CSS knowledge or are using a theme that offers widget styling options, you can further customize the appearance of widgets by applying custom styles. This allows you to match the widget’s design with your overall website branding.

5. Extending Widget Functionality with Plugins

WordPress offers a vast library of plugins that extend the functionality of widgets, allowing you to add more features and flexibility to your website design. Here are a few examples:

a. Widget Visibility

Widget Visibility plugins enable you to control where and when widgets appear on your website. You can set visibility rules based on factors like page/post types, categories, tags, user roles, and more. This allows you to target specific content and personalize the user experience.

b. Social Media Integration

Social media plugins provide widgets that display your social media feeds, follow buttons, share buttons, or social media profile links. These widgets allow visitors to connect with your social media accounts and share your content easily.

c. Advanced Custom Fields

Advanced Custom Fields plugin enhances the functionality of widgets by adding custom fields to the widget settings. This allows you to create more complex and dynamic widgets, such as testimonials, event listings, or product showcases.

Read Also: Best practices for designing the header and footer of a WordPress website

6. Best Practices for Widget Usage

To make the most of widgets in your WordPress website design, consider the following best practices:

a. Keep it Minimal

Avoid cluttering your website with too many widgets. Focus on adding widgets that enhance user experience and provide valuable information.

b. Consistency in Design

Ensure that your widget design and styling align with your overall website design. Consistent use of fonts, colors, and layout will create a cohesive and visually pleasing experience for your visitors.

c. Mobile-Friendly Widgets

Opt for responsive widgets that adapt to different screen sizes and mobile devices. This ensures a smooth experience for users on all devices.

d. Regularly Review and Update

Periodically review your widgets to ensure they are still relevant and functional. Remove any outdated or unnecessary widgets to keep your website streamlined.

Wordpress Website Designing Services

Conclusion:

Widgets are powerful tools that empower you to customize and enhance the design and functionality of your WordPress website. By utilizing widgets effectively in sidebar, header, footer, and other widget areas, you can improve user experience, navigation, and engagement. Take advantage of customization options to match your branding and design aesthetics, and consider plugins to extend widget functionality further. Remember to maintain a minimal and consistent design approach, and regularly review and update your widgets for optimal performance. With the right understanding and utilization of widgets, you can create a visually appealing and functional WordPress website that captivates your audience and delivers a seamless user experience. So, Now I hope you have understood about widgets and how can we use them in WordPress website designing.

You can also checkout this website designing institute to learn digital marketing course by enrolling in our course Or Contact Digital Bikana on +91-8949483728

Best practices for designing the header and footer of a WordPress website

In this article we are going to talk about What are some best practices for designing the header and footer of a WordPress website? When it comes to designing a WordPress website, the header and footer sections play a significant role in providing navigation, branding, and overall user experience. A well-designed header and footer can enhance the aesthetics, functionality, and usability of your website.

What are some best practices for designing the header and footer of a WordPress website?

In this article, we will explore some best practices for designing the header and footer of a WordPress website, focusing on key elements, design considerations, and implementation techniques.

1. Define Clear Navigation

The header serves as the primary navigation area for your website, guiding users to different sections and pages. It’s crucial to design a clear and intuitive navigation menu. Consider organizing menu items logically, using descriptive labels, and employing dropdown menus for complex site structures. Utilize visual cues such as highlighting the active page or section to aid navigation. Responsive design is essential to ensure a seamless experience across different devices.

2. Branding and Logo Placement

The header is an ideal location to showcase your brand identity and logo. Place your logo prominently in the header, preferably in the top-left corner for better visibility and brand recognition. Ensure the logo is of high quality and links back to the homepage. Consider incorporating your brand colors and typography consistently in the header design to reinforce your brand identity.

Read Also: What are some best practices for Organizing and Structuring content in WordPress?

3. Consistent Design and Layout

Maintaining consistency in the design and layout of the header and footer throughout your website is vital. Choose a design that complements your overall website theme and style. Ensure that fonts, colors, and spacing are consistent with the rest of your site. Pay attention to the alignment, balance, and visual hierarchy within the header and footer sections to create a visually appealing and harmonious design.

Best Practices For Designing The Header And Footer Of A WordPress Website

4. Contact Information and Social Media Integration

Including contact information in the header or footer section is a best practice, as it facilitates user engagement and builds trust. Display essential contact details, such as a phone number and email address, prominently to make it easy for visitors to reach you. Integrating social media icons or links in the header or footer can also encourage users to connect with your brand on social platforms, increasing your online presence.

5. Call-to-Action Elements

Strategically placing call-to-action (CTA) elements in the header and footer can drive user engagement and conversions. Consider incorporating CTA buttons or links that lead visitors to important actions, such as signing up for a newsletter, making a purchase, or contacting your business. Use persuasive and concise language to motivate users to take action.

Read Also: How can you create a sitemap for a WordPress website?

6. Footer Design Considerations

The footer of your website should not be neglected. It offers an opportunity to provide additional information, reinforce branding, and improve navigation. Consider including secondary navigation, copyright information, privacy policy links, terms of use, and sitemap links in the footer. You can also add widgets, such as a newsletter signup form, recent posts, or social media feeds, to enhance engagement.

7. Responsive Design and Mobile Optimization

With the increasing use of mobile devices, it’s crucial to design headers and footers that are responsive and optimized for mobile screens. Ensure that the header and footer elements adapt well to different screen sizes and maintain their functionality and visual appeal. Implement responsive design techniques, such as collapsible menus, to ensure a seamless user experience on mobile devices.

8. Testing and Iteration

After designing the header and footer, it’s essential to test their functionality and usability across different browsers and devices. Check for any alignment issues, broken links, or design inconsistencies. Gather feedback from users and make iterative improvements based on their experience and suggestions. Regularly update your header and footer design as your website evolves to meet changing needs and trends.

Header And Footer Of WordPress Website

Conclusion 

Designing the header and footer sections of your WordPress website requires careful consideration and attention to detail. By following the best practices outlined in this article, you can create headers and footers that are visually appealing, user-friendly, and consistent with your brand identity. Remember to prioritize clear navigation, incorporate branding elements, maintain design consistency, include contact information and social media integration, utilize call-to-action elements, and optimize for mobile devices. Regular testing, gathering user feedback, and making iterative improvements will ensure that your header and footer design remains effective and aligned with your website’s goals. By implementing these best practices, you can enhance the overall user experience, improve navigation, and boost engagement on your WordPress website. So, Now I hope you have understood about some best practices for designing the header and footer of a WordPress website.

You can also checkout this website designing institute to learn digital marketing course by enrolling in our course Or Contact Digital Bikana on +91-8949483728

How can you create a sitemap for a WordPress website?

In this article we are going to talk about How can you create a sitemap for a WordPress website? A sitemap is a crucial component of any website, as it provides a hierarchical structure and helps search engines understand the organization and content of your site. Creating a sitemap for your WordPress website is essential for search engine optimization (SEO) and improving overall visibility.

How can you create a sitemap for a WordPress website?

In this comprehensive guide, we will explore the process of creating a sitemap for a WordPress website, covering different methods and popular plugins available.

1. Understanding the Importance of a Sitemap

A sitemap is a file that lists all the pages, posts, and other content on your website in a structured format. It serves as a roadmap for search engines, enabling them to crawl and index your site more effectively. By creating a sitemap, you enhance your website’s discoverability, increase the chances of higher rankings on search engine results pages (SERPs), and ensure that all your content is accessible to both users and search engine bots.

2. Manual Creation of XML Sitemap

a. Analyzing Website Structure

Start by assessing your website’s structure and content organization. Identify the main sections, pages, categories, and tags that should be included in your sitemap.

b. Generating XML Sitemap

Once you have a clear understanding of your website’s structure, you can create an XML sitemap manually. Begin by using a plain text editor or XML editor to create a new file named “sitemap.xml.” Structure the file using XML markup, including the necessary tags such as <url>, <loc>, <lastmod>, and <changefreq>. Manually list each URL of your website, along with its relevant metadata, within the appropriate tags.

Read Also: How can you create and manage a menu in WordPress?

c. Submitting Sitemap to Search Engines

After creating the XML sitemap, you need to submit it to search engines for indexing. Sign in to your Google Search Console account (previously known as Google Webmaster Tools) and add your website. Then, access the “Sitemaps” section and submit your sitemap.xml file.

Sitemap For A WordPress Website

3. Using Sitemap Plugins

a. Installing a Sitemap Plugin

WordPress offers several plugins that can automatically generate and update your sitemap. A popular choice for implementing breadcrumbs is the “Yoast SEO” plugin. Install and activate the plugin from your WordPress admin dashboard by navigating to “Plugins” and selecting “Add New.”

b. Configuring the Plugin

After activating the plugin, go to the plugin settings page. In the Yoast SEO plugin, navigate to the “SEO” tab and select “General.” Click on the “Features” tab and enable the “XML Sitemaps” feature. Save your changes.

c. Generating and Submitting Sitemap

Once the plugin is configured, it will automatically generate a sitemap for your WordPress website. Access the sitemap by appending “/sitemap_index.xml” to your website’s URL (e.g., www.yourwebsite.com/sitemap_index.xml). Copy this URL and submit it to search engines like Google Search Console and Bing Webmaster Tools.

4. Sitemap Best Practices

a. Keep the sitemap up to date

Whenever you add or remove content from your website, update your sitemap accordingly to ensure search engines have the latest information.

b. Include all important pages

Ensure that all critical pages, including posts, pages, categories, tags, and any other relevant content, are included in the sitemap.

c. Limit the number of URLs

Ideally, a sitemap should contain a maximum of 50,000 URLs or 50MB in size. If your website exceeds these limits, split the sitemap into multiple files and create a sitemap index file to reference them.

d. Use priority and frequency tags

Use the <priority>and <changefreq> tags in your XML sitemap to provide search engines with hints about the importance and frequency of updates for each URL.

Read Also: What are some best practices for Organizing and Structuring content in WordPress?

e. Include images and videos

If your website includes multimedia content such as images or videos, consider adding them to your sitemap using the appropriate <image> and <video> tags.

f. Test your sitemap

Regularly check your sitemap for errors or issues using online XML sitemap validators or SEO auditing tools.

How Can You Create A Sitemap For A WordPress Website

Conclusion

Creating a sitemap for your WordPress website is a crucial step in optimizing your site for search engines and improving visibility. Whether you choose to manually create an XML sitemap or utilize a plugin like Yoast SEO, the process is relatively straightforward. By following the best practices outlined in this comprehensive guide, you can ensure that your sitemap accurately represents your website’s structure and content, aiding search engine crawlers and enhancing your SEO efforts. Regularly update and submit your sitemap to search engines, and monitor its performance to ensure optimal indexing and discoverability of your WordPress website. So, Now I hope you have understood about how can we create a sitemap for a WordPress website.

You can also checkout this website designing institute to learn digital marketing course by enrolling in our course Or Contact Digital Bikana on +91-8949483728

What are some best practices for Organizing and Structuring content in WordPress?

In this article we are going to talk about What are some best practices for Organizing and Structuring content in WordPress? Effectively organizing and structuring content is crucial for maintaining a user-friendly and navigable website. In WordPress, there are several powerful tools and best practices that can help you achieve a well-structured and organized content hierarchy.

What are some best practices for Organizing and Structuring content in WordPress?

In this article, we will explore some of the best practices and recommended tools for organizing and structuring content in WordPress.

1. Utilize Categories and Tags

Categories and tags are built-in taxonomies in WordPress that allow you to classify and group content based on specific topics or themes. Here’s how they can be effectively used:

a. Categories

Use categories to create broad sections or topics for your content. For example, if you have a food blog, you can create categories like “Recipes,” “Restaurant Reviews,” and “Cooking Tips.” Assign each post to the relevant category to create a clear content structure.

b. Tags

Tags are more specific descriptors that provide additional information about your content. They can be used to add keywords or highlight important topics. For instance, in a travel blog, you can use tags like “beach destinations,” “adventure travel,” or “budget travel” to categorize your posts further.

By utilizing categories and tags consistently, you can create a logical content hierarchy that enables visitors to navigate and discover related content easily.

2. Implement Hierarchical Pages

WordPress allows you to create hierarchical pages, which are ideal for organizing content with multiple levels of sub-pages. This is particularly useful for websites with complex structures, such as online courses or large documentation sites. By arranging pages hierarchically, you can create a clear and organized site structure that facilitates easy navigation.

To create hierarchical pages, simply create a new page and assign a parent page to it. This way, you can establish parent-child relationships and create a logical hierarchy.

3. Use Custom Post Types

WordPress offers the flexibility to create custom post types, which allows you to define your own content types beyond just posts and pages. Custom post types are ideal for organizing and managing specific types of content. For example:

a. Portfolio

Create a custom post type for showcasing your portfolio items.

b. Testimonials

Use a custom post type to manage customer testimonials.

c. Events

Organize events using a custom post type with fields for date, time, and location.

By utilizing custom post types, you can tailor the content management experience to match your specific needs and ensure a well-structured website.

Best Practice For Organizing And Structure Content In WordPress

4. Employ Page Builders

Page builder plugins, such as Elementor, Divi, or Beaver Builder, provide intuitive drag-and-drop interfaces that allow you to design and structure your content visually. These tools offer pre-designed content blocks and layout options, enabling you to create professional-looking pages without extensive coding knowledge. With page builders, you can easily organize and structure your content by arranging elements and sections in a visually appealing manner.

Read Also: How can you create and manage a menu in WordPress?

5. Implement Content Organization Plugins

WordPress offers a variety of plugins designed specifically to assist with content organization and structure. Some popular plugins include “WP Content Copy Protection & No Right Click,” “Content Views,” and “Simple Content Ordering.” These plugins provide features like content protection, customizable content displays, and the ability to reorder posts or pages. Evaluate your specific content organization needs and explore these plugins to find one that suits your requirements.

6. Create a Clear and Consistent Navigation Menu

A well-organized navigation menu is crucial for helping users navigate your website. Create a menu structure that aligns with your content hierarchy. Consider using dropdown menus to provide a deeper level of navigation for subcategories or related content. Make sure the menu is easily accessible and consistently placed across your website’s pages.

7. Optimize Search Functionality

Implementing an efficient search function on your website helps users find relevant content quickly. WordPress has a built-in search widget that you can add to your website’s sidebar or footer. Additionally, there are advanced search plugins available that offer enhanced search capabilities, such as filtering by categories or custom taxonomies.

Read Also: How can you add a search bar to a WordPress website?

8. Utilize Widgets and Sidebars

Widgets are a powerful tool in WordPress for organizing and displaying content in sidebars or widget areas. Utilize widgets to showcase recent posts, popular content, related content, or any other dynamic information that adds value to your users’ experience. Customize your sidebars to align with your content structure and guide users to relevant sections of your website.

How To Edit Content In WordPress

Conclusion

Organizing and structuring content in WordPress is essential for maintaining a user-friendly website and ensuring easy navigation for visitors. By utilizing categories, tags, hierarchical pages, custom post types, page builders, content organization plugins, optimizing navigation menus, implementing search functionality, and utilizing widgets and sidebars, you can establish a well-structured content hierarchy that enhances the user experience. Embrace these best practices and tools to effectively organize and structure your content in WordPress, ultimately creating a more engaging and user-friendly website. So, Now I hope you have understood about some best practices for Organizing and Structuring content in WordPress.

You can also checkout this website designing institute to learn digital marketing course by enrolling in our course Or Contact Digital Bikana on +91-8949483728