How do you add and manage images in WordPress?

In this article we are going to talk about How do you add and manage images in WordPress. WordPress is a user-friendly and widely used content management system (CMS) that enables effortless website creation and management for users of all levels of expertise.

One of the essential elements of any website is images. They enhance the visual appeal of your content and make it more engaging for visitors.

How do you add and manage images in WordPress?

In this article, we will guide you through the process of adding and managing images in WordPress.

1. Adding Images to the Media Library

The first step in managing images on your WordPress website is to upload them to the Media Library. To do this, log in to your WordPress dashboard and navigate to the “Media” tab. Simply click on “Add New” to easily upload new images from your computer.

You can either drag and drop the images or select them from your files manually. Once the upload is complete, the images will appear in your Media Library.

2. Inserting Images into Posts or Pages

Now that your images are in the Media Library, you can easily insert them into your posts or pages. While creating or editing a post or page, place your cursor where you want the image to appear and click on the “Add Media” button located above the editor. This will open the Media Library, where you can select the desired image. After selecting the image, you can customize its settings, such as alignment, size, and caption. Once you’re satisfied with the settings, click on the “Insert into post” button to add the image to your content.

Read Also: How can you create different types of content in WordPress?

3. Editing Images in WordPress

WordPress provides basic image editing capabilities to enhance your images without the need for external software. When you insert an image into a post or page, you can click on it to reveal the editing options. These options include rotating, cropping, scaling, and flipping the image. You can also adjust the image’s alignment and add alternative text (alt text) for accessibility purposes. WordPress saves the edited image as a separate file, ensuring that your original image remains intact.

canonical tags in digital marketing

4. Organizing Images with Media Library

As your website grows, you’ll accumulate a significant number of images. To keep them organized, WordPress offers several features within the Media Library. You can add tags, titles, and descriptions to each image, making it easier to search for specific images later. Additionally, you can create folders, called “Media Categories” or “Media Tags,” to categorize your images further. These features help you maintain a well-structured media library, saving you time when searching for images in the future.

5. Optimizing Images for Web

Images that are not optimized for the web can significantly impact your website’s performance. Large image file sizes can slow down your site’s loading speed, leading to a poor user experience. To optimize your images, WordPress provides a feature called “Image Compression.” It automatically reduces the file size of your images without compromising their quality. Alternatively, you can use third-party plugins like “Smush” or “EWWW Image Optimizer” to optimize images in bulk.

Read Also: How to improve your website’s loading speed for better SEO?

6. Displaying Images in Galleries

If you have multiple images that you want to showcase in an organized manner, WordPress offers built-in gallery functionality. When adding or editing a post or page, click on the “Add Media” button, select the images you want to include, and click on the “Create Gallery” option. You can arrange the images, set the number of columns, and choose between a thumbnail grid or a slideshow format. This feature allows you to create visually appealing galleries without any coding knowledge.

7. Using Featured Images

Another powerful feature in WordPress is the ability to set a featured image for each post or page. The featured image represents the content and is often displayed prominently, such as in a blog post’s header or on the homepage. To set a featured image, edit the post or page, locate the “Featured Image” panel on the right-hand side, and click on the “Set featured image” link. You can either select an image from your Media Library or upload a new one, then simply click on the “Set featured image” button.

Read Also: What is a Featured Image in WordPress and how can you set it for your posts?

9. Enhancing Images with Plugins

WordPress offers a vast repository of plugins that extend its functionality. Several plugins are specifically designed to enhance the image management experience. For example, the “Envira Gallery” plugin allows you to create stunning image galleries with advanced features. The “Regenerate Thumbnails” plugin helps you regenerate thumbnail sizes for existing images after changing your theme or thumbnail settings. Explore the plugin directory to find image-related plugins that suit your needs.
Manage Images In WordPress Website

Conclusion:

WordPress provides a user-friendly interface for adding and managing images on your website. By following the steps outlined in this article, you can efficiently upload, insert, edit, organize, optimize, and display images in your WordPress posts and pages. Utilize the features offered by WordPress and consider using plugins to enhance your image management capabilities, ensuring that your website stands out visually and engages your audience effectively. So, Now I Hope you have understood about add and manage images in WordPress.

You can also checkout this website designing institute to learn digital marketing course by enrolling in our course Or Contact Digital Bikana on +91-8949483728

How can you optimize the typography and font choices in a WordPress website?

In this article we are going to talk about How can you optimize the typography and font choices in a WordPress website? Typography plays a vital role in web design, influencing the overall look, readability, and user experience of a website. When it comes to WordPress websites, optimizing typography and font choices is essential to create visually appealing and engaging content. In this article, we will explore effective strategies and techniques to optimize typography in a WordPress website.

How can you optimize the typography and font choices in a WordPress website?

In this article, we will explore effective strategies and techniques to optimize typography in a WordPress website.

Importance of Typography Optimization

Typography optimization goes beyond choosing attractive fonts. It involves careful consideration of various factors that impact the readability and aesthetics of your website. Here’s why typography optimization is crucial:

a. Readability

Well-optimized typography enhances readability, ensuring that visitors can easily consume and understand your content. Proper font choices, font sizes, line spacing, and contrast contribute to a comfortable reading experience.

b. Visual Hierarchy

Effective typography helps establish a clear visual hierarchy on your website. It guides users’ attention, highlighting important elements and guiding them through the content flow. This improves user engagement and interaction.

c. Brand Consistency

Typography plays a significant role in brand identity. By choosing fonts that align with your brand’s personality and values, you can maintain consistency across your website, reinforcing brand recognition and establishing a cohesive visual identity.

Now let’s dive into the techniques to optimize typography and font choices in a WordPress website.

1. Selecting Appropriate Fonts

The choice of fonts significantly impacts the overall design and user experience of your website. When choosing fonts, keep the following tips in mind:

a. Readability

Prioritize readability over fancy or decorative fonts. Opt for fonts that are easy to read, especially for body text. Sans-serif fonts like Arial, Helvetica, or Open Sans are commonly used for online content due to their simplicity and legibility.

b. Brand Consistency

Align the font choices with your brand identity. If you have established brand guidelines, select fonts that complement your existing visual identity. For a professional and authoritative look, consider serif fonts like Times New Roman or Georgia. For a modern and minimalistic feel, opt for clean and sleek sans-serif fonts.

c. Font Pairing

Choose fonts that pair well together. Combine a primary font for headings and titles with a secondary font for body text. Aim for contrast, ensuring the fonts complement each other and create visual harmony.

2. Font Size and Line Spacing

Proper font sizing and line spacing are essential for readability. Follow these guidelines:

a. Font Size

Set an appropriate font size for different elements of your website. For body text, a font size between 16px and 20px is recommended. Adjust the font size based on the font family and overall design.

b. Headings and Subheadings

Use larger font sizes for headings and subheadings to create visual hierarchy. The font size for headings can range from 24px to 48px, depending on the importance and prominence of the heading.

c. Line Spacing

Adequate line spacing improves readability and prevents text from appearing cramped. Aim for a line spacing of around 1.5 to 1.8 times the font size. Try out different line spacing values to find the best balance for readability.

Read Also: How can you integrate social media into a WordPress website?

3. Contrast and Color

Contrast is crucial for legibility and accessibility. Make sure there is enough contrast between the text and background colors to ensure readability.

a. Text Color

Choose text colors that contrast well with the background color. Dark text on a light background or vice versa tends to be more readable. Avoid using color combinations with low contrast that strain the eyes.

b. Background Color

Consider the overall design and aesthetics of your website when selecting background colors. Ensure that the background color doesn’t interfere with text legibility.

c. Accessibility

Pay attention to accessibility guidelines, such as WCAG (Web Content Accessibility Guidelines). These guidelines provide recommendations on color contrast ratios to ensure that your website is accessible to users with visual impairments.

How Can You Optimize The Typography In WordPress Website

4. Typography Plugins and Themes

WordPress offers a wide range of typography plugins and themes that can help optimize typography in your website:

a. Typography Plugins

Plugins like “Easy Google Fonts” or “Use Any Font” allow you to easily integrate custom fonts into your WordPress website. These plugins provide options to customize font styles, sizes, and other typography settings.

b. Theme Selection

Choose a WordPress theme that offers built-in typography options and customization settings. Premium themes often provide extensive typography controls, allowing you to fine-tune various typography elements without the need for additional plugins.

Read Also: How can you create a multilingual website using WordPress?

5. Testing and Refinement

After implementing typography optimizations, it’s crucial to test and refine your choices:

a. Cross-Device Testing

Ensure your typography choices look good and are readable across different devices and screen sizes. Test your website on desktops, laptops, tablets, and mobile devices to verify responsiveness and font rendering.

b. User Feedback

Consider gathering feedback from your website visitors regarding the typography. Pay attention to user comments, suggestions, and any issues they may raise. Use the feedback you receive to make the necessary adjustments and improve your website.

Typography And Font Choices In A WordPress Website

Conclusion

Optimizing typography and font choices in a WordPress website is essential for enhancing readability, creating visual appeal, and reinforcing brand identity. By carefully selecting fonts, adjusting font sizes and line spacing, considering contrast and color, and utilizing the available typography plugins and themes, you can achieve a visually pleasing and engaging typography design. Regular testing, refinement, and listening to user feedback will help you continually improve and optimize typography on your WordPress website, resulting in an exceptional user experience. So, Now I hope you have understood about optimize the typography and font choices in a WordPress website.

You can also checkout this website designing institute to learn digital marketing course by enrolling in our course Or Contact Digital Bikana on +91-8949483728

How can you create a multilingual website using WordPress?

In this article we are going to talk about How can you create a multilingual website using WordPress? In today’s globalized world, reaching a diverse audience is crucial for many website owners. One effective way to expand your website’s reach is by creating a multilingual website that caters to users in different languages. Fortunately, WordPress, the popular content management system (CMS), provides robust tools and plugins that make it relatively easy to create a multilingual website.

How can you create a multilingual website using WordPress?

In this article, we will explore how you can achieve this goal using WordPress.

Why Create a Multilingual Website?

Before diving into the process, it’s essential to understand the benefits of having a multilingual website:

1. Expanded Audience

By offering your website content in multiple languages, you can reach a broader audience worldwide. This opens up new markets and increases your chances of engaging with potential customers or readers who prefer browsing the web in their native language.

2. Improved User Experience

Providing content in users’ preferred languages enhances their browsing experience. Visitors are more likely to stay on your website, navigate through the pages, and understand your offerings or message when it’s presented in a language they are comfortable with.

Read Also: What are Breadcrumbs and How can you implement them in a WordPress Website?

3. Enhanced SEO

A multilingual website can significantly boost your search engine optimization (SEO) efforts. By targeting keywords in different languages, you increase the chances of ranking higher in search results for those specific language queries.

Step-by-Step Guide to Creating a Multilingual Website:

Now let’s delve into the process of creating a multilingual website using WordPress:

1. Choose a Translation Plugin

WordPress offers several translation plugins that simplify the process of creating a multilingual website. Two popular options are:

a. WPML (WordPress Multilingual Plugin)

WPML is a comprehensive and feature-rich translation plugin. It allows you to create multiple language versions of your website, translate posts and pages, manage language switchers, and more.

b. Polylang

Polylang is another powerful translation plugin that provides an intuitive interface for managing multilingual content. It supports both manual and automatic translations, enables language switching, and offers compatibility with various themes and plugins.

Research these plugins and choose the one that best fits your needs and budget.

2. Install and Activate the Translation Plugin

Once you’ve selected a translation plugin, install and activate it on your WordPress website. You can do this by navigating to the “Plugins” section in your WordPress dashboard, clicking on “Add New,” and searching for the chosen plugin. Install and activate it from the search results.

How To Create A Multilingual Website

3. Configure the Translation Plugin

After activating the translation plugin, you’ll need to configure its settings. Typically, you’ll be prompted to choose the default language for your website and add additional languages.

You’ll also set up language switchers, which allow users to switch between languages on your website. Language switchers can be displayed as flags, dropdown menus, or other visual elements. Configure the switcher options based on your preferences.

Read Also: What are Shortcodes in WordPress and how can you use them?

4. Translate Your Website Content

With the translation plugin configured, it’s time to start translating your website content. This includes posts, pages, menus, widgets, and other elements.

Using the translation plugin’s interface, you can create translations for each piece of content. Some plugins provide manual translation options where you can enter the translated text manually. Others offer automatic translation integration with popular translation services like Google Translate. However, it’s important to note that automatic translations may not always be accurate, so manual review and editing are recommended.

Remember to translate all essential elements, such as headings, titles, meta descriptions, and image alt tags, to ensure a fully localized experience for your multilingual audience.

5. Customize Language Switchers

Language switchers play a crucial role in allowing users to switch between languages on your website. Customize the appearance and placement of the language switcher to align with your website’s design and user experience. Most translation plugins provide options to control the style, position, and behavior of the language switchers.

Read Also: How can you integrate social media into a WordPress website?

6. Test and Optimize

Before launching your multilingual website, thoroughly test all the language versions to ensure translations are accurate and the user experience is seamless. Make sure to check for any problems with how your website looks, any links that don’t work, or any missing translations. Also, pay attention to SEO optimization for each language by utilizing language-specific keywords and meta tags.

Monitor your website’s performance and user feedback after the launch. Continuously optimize and refine your multilingual website based on user behavior and preferences.

Multilingual Website Using WordPress

Conclusion

Expanding your website’s reach by creating a multilingual version is an effective way to connect with a global audience and improve the user experience. With WordPress and the right translation plugin, you can easily create and manage a multilingual website. By following the step-by-step guide provided in this article, you can effectively translate your content, customize language switchers, and optimize your multilingual website for success. Embrace the power of multilingualism and watch your website thrive in the global market. So, Now I hope you have understood about Create a multilingual website using WordPress.

You can also checkout this website designing institute to learn digital marketing course by enrolling in our course Or Contact Digital Bikana on +91-8949483728
How can you integrate social media into a WordPress website?

In this article we are going to talk about How can you integrate social media into a WordPress website? Social media has become an integral part of our online lives, and integrating it into your WordPress website can significantly enhance your online presence, increase engagement, and expand your reach.

How can you integrate social media into a WordPress website?

This article aims to provide a comprehensive guide on how to seamlessly integrate social media into your WordPress website. We will explore various methods, plugins, and best practices to help you leverage the power of social media and create a vibrant online community.

Why Integrate Social Media?

Integrating social media into your WordPress website offers several benefits, including:

1. Increased Visibility

By connecting your website with social media platforms, you can tap into a wider audience and amplify your online visibility.

2. Enhanced Engagement

Social media integration allows users to interact with your website’s content easily, share it with others, and provide instant feedback, fostering a sense of community.

3. Expanded Reach

Social media integration enables visitors to share your content with their social networks, potentially reaching a larger audience and driving more traffic to your website.

Methods for Social Media Integration

1. Social Media Share Buttons

Add social media share buttons to your website, allowing visitors to quickly share your content on platforms like Facebook, Twitter, LinkedIn, Pinterest, and more. These buttons can be placed on blog posts, pages, and other relevant areas.

2. Social Media Feeds

Display live feeds from your social media accounts directly on your website. This feature keeps your website content fresh and encourages visitors to follow and engage with your social media profiles.

3. Social Media Login

Enable visitors to log in or register on your website using their social media accounts. This streamlines the registration process and eliminates the need for visitors to create a new account.

4. Social Media Embeds

Embed social media posts, such as tweets, Instagram photos, or Facebook updates, directly into your website’s content. This helps to showcase your social media activity and encourages visitors to follow and engage with your profiles.

Read Also: What are Breadcrumbs and How can you implement them in a WordPress Website?

Popular Social Media Plugins for WordPress

1. Jetpack

Jetpack offers a suite of features, including social media sharing buttons, social media widgets, and the ability to display social media icons on your website.

2. Social Warfare

Social Warfare provides attractive and customizable social media share buttons. It also allows you to display share counts, optimize sharing for specific platforms, and customize the appearance of social media buttons.

3. MashShare

MashShare is a lightweight plugin that offers responsive social media share buttons. It includes features such as share count recovery, caching options, and the ability to customize button styles.

How Can You Integrate Social Media Into Website

4. Easy Social Share Buttons

Easy Social Share Buttons is a comprehensive plugin with a wide range of social media sharing options. It offers multiple display positions, share count recovery, social media follow buttons, and analytics.

Best Practices for Social Media Integration

1. Strategic Placement

Position social media buttons or widgets in prominent locations, such as the top or bottom of your blog posts or in the website’s header or sidebar. This encourages users to engage and share your content.

2. Optimize for Mobile

Ensure that your social media integration is mobile-friendly and responsive, allowing users to easily share your content from their mobile devices.

Read Also: What are Shortcodes in WordPress and how can you use them?

3. Consistent Branding

Customize the appearance of social media buttons and widgets to match your website’s branding. This helps create a consistent and visually appealing experience for users.

4. Monitor and Engage

Regularly monitor your social media accounts and engage with your audience by responding to comments, messages, and mentions. This helps build relationships and encourages ongoing engagement.

Social Media Marketing Website In India

Conclusion

Integrating social media into your WordPress website is a powerful way to boost your online presence, increase engagement, and extend your reach. By incorporating social media share buttons, feeds, logins, and embeds, you can create a vibrant online community and enhance user interaction. Choose the appropriate methods and plugins based on your specific needs and goals. Embrace the potential of social media integration to take your WordPress website to new heights of success. So, Now I hope you have understood about how can we integrate social media into a WordPress website.

You can also checkout this website designing institute to learn digital marketing course by enrolling in our course Or Contact Digital Bikana on +91-8949483728

What is the Gutenberg editor in WordPress and how can you use it?

In this article we are going to talk about What is the Gutenberg editor in WordPress and how can you use it for content creation? WordPress has long been a popular platform for website development and content creation, offering users a versatile and user-friendly environment. In an effort to enhance the content creation experience, WordPress introduced the Gutenberg editor. Gutenberg is a tool for WordPress websites that makes it easier to create and manage content. It’s named after Johannes Gutenberg, the inventor of the printing press, and it brings a revolutionary approach to content creation.

What is the Gutenberg editor in WordPress and how can you use it for content creation?

In this article, we will explore the Gutenberg editor, its features, and how it empowers users to create compelling content.

Getting to Know the Gutenberg Editor

The Gutenberg editor was introduced with WordPress version 5.0 as a replacement for the Classic Editor. It introduces a block-based approach to content creation, simplifying the process and making it more intuitive for users. Instead of dealing with a single text field, Gutenberg breaks down content into modular blocks, each serving a specific purpose.

Key Features of the Gutenberg Editor

1. Block-Based Structure

The fundamental concept of Gutenberg is the use of blocks. Every element of content, such as paragraphs, headings, images, videos, and widgets, is encapsulated within its own block. This block-based structure offers greater flexibility in designing and arranging content.

2. Drag-and-Drop Functionality

Gutenberg provides a user-friendly interface that makes content creation a breeze. Users can easily manipulate and arrange blocks using simple drag-and-drop functionality. This eliminates the need for complex coding or manual adjustments.

3. Rich Text Formatting

Gutenberg offers a wide range of formatting options for text. Users can easily modify font size, alignment, color, and emphasis within individual blocks. The formatting options are intuitive and accessible, even for users without extensive technical knowledge.

What Is The Gutenberg Editor In WordPress

4. Media Integration

Adding media files, such as images, videos, and audio, is seamless with Gutenberg. Users can upload files directly from their devices or select from the media library. Gutenberg also allows for easy customization of media settings, such as alignment, size, and caption placement.

5. Block Customization

Gutenberg provides extensive customization options for blocks. Users can adjust block settings, change background colors, add drop shadows, adjust padding, and define block-specific styles. This level of customization empowers users to create visually appealing and engaging content.

6. Reusable Blocks

Gutenberg allows users to save blocks as reusable templates. This feature is particularly useful for elements that are commonly used across multiple pages or posts, such as call-to-action sections or testimonials. Users can create a reusable block once and easily add it to any page with a few clicks.

7. Full-Site Editing

One of the notable features of Gutenberg is Full-Site Editing. With this feature, users can customize not just individual posts or pages but also entire websites. Gutenberg enables users to design headers, footers, sidebars, and other global elements directly within the editor.

Read Also: How can you create a responsive design for a WordPress website?

Utilizing Gutenberg for Content Creation

1. Creating a New Post/Page

To start using Gutenberg, navigate to your WordPress dashboard and click on “Posts” or “Pages” to create a new post or page. Gutenberg is the default editor in WordPress since version 5.0, so you will be working with it automatically.

2. Adding Blocks

Inside the editor, you can add blocks by clicking on the “+” icon or by typing “/”. Gutenberg offers a wide variety of block types, including paragraphs, headings, images, galleries, quotes, embeds, and more. Simply select the desired block and start adding content.

3 Editing Blocks

Each block can be individually edited by selecting it and accessing the block toolbar. The toolbar provides options for formatting, alignment, styling, and block-specific settings. Users can also rearrange blocks by dragging and dropping them to the desired position.

4. Block Customization

For further customization, users can access the “Block” tab in the right sidebar. Here, you can modify block settings, adjust colors, and define custom styles to suit your preferences and branding.

Read Also: How can you optimize your WordPress website for search engines (SEO)?

5. Reusable Blocks

To create a reusable block, select the desired content block, click on the three-dot menu, and choose “Add to Reusable Blocks.” This saves the block as a template that can be easily accessed and added to any page or post, saving you time and effort in recreating common elements.

Benefits of Using the Gutenberg Editor

1. Streamlined Content Creation

Gutenberg simplifies the content creation process by providing an intuitive and visual interface. The block-based structure allows for easy organization and manipulation of content, resulting in a streamlined workflow.

2. Improved Productivity

With drag-and-drop functionality and the ability to create reusable blocks, Gutenberg significantly boosts productivity. Users can save time by reusing pre-designed blocks and focusing on the creation of high-quality content.

3. Consistency in Design

Gutenberg’s block-based approach ensures consistency in design and layout across a website. Users can easily replicate and reuse blocks, maintaining a cohesive visual identity throughout their content.

Read Also: How can you add a Slideshow or Carousel to a WordPress Website?

4. Media Management Made Easy

Gutenberg simplifies media integration, enabling users to effortlessly add and manage images, videos, and other media files. The ability to customize media settings within individual blocks adds further flexibility and control.

5. Future-Proofing

Gutenberg represents the future of WordPress, with ongoing development and improvements. Embracing Gutenberg ensures compatibility with future updates and ensures that your website remains up-to-date and optimized for new features.

How Can You Use It For Content Creation

Conclusion

The Gutenberg editor in WordPress offers users a powerful and intuitive platform for content creation. Its block-based structure, drag-and-drop functionality, rich text formatting options, and extensive customization capabilities make it an indispensable tool for website owners and content creators. By leveraging Gutenberg’s features, users can create visually appealing and engaging content while enjoying a streamlined workflow. With its continuous development and the promise of future enhancements, Gutenberg stands as a cornerstone for WordPress content creation, providing users with a platform that empowers creativity and efficiency. So, Now I hope you have understood about the Gutenberg editor in WordPress and how can we use it for content creation.

You can also checkout this website designing institute to learn digital marketing course by enrolling in our course Or Contact Digital Bikana on +91-8949483728

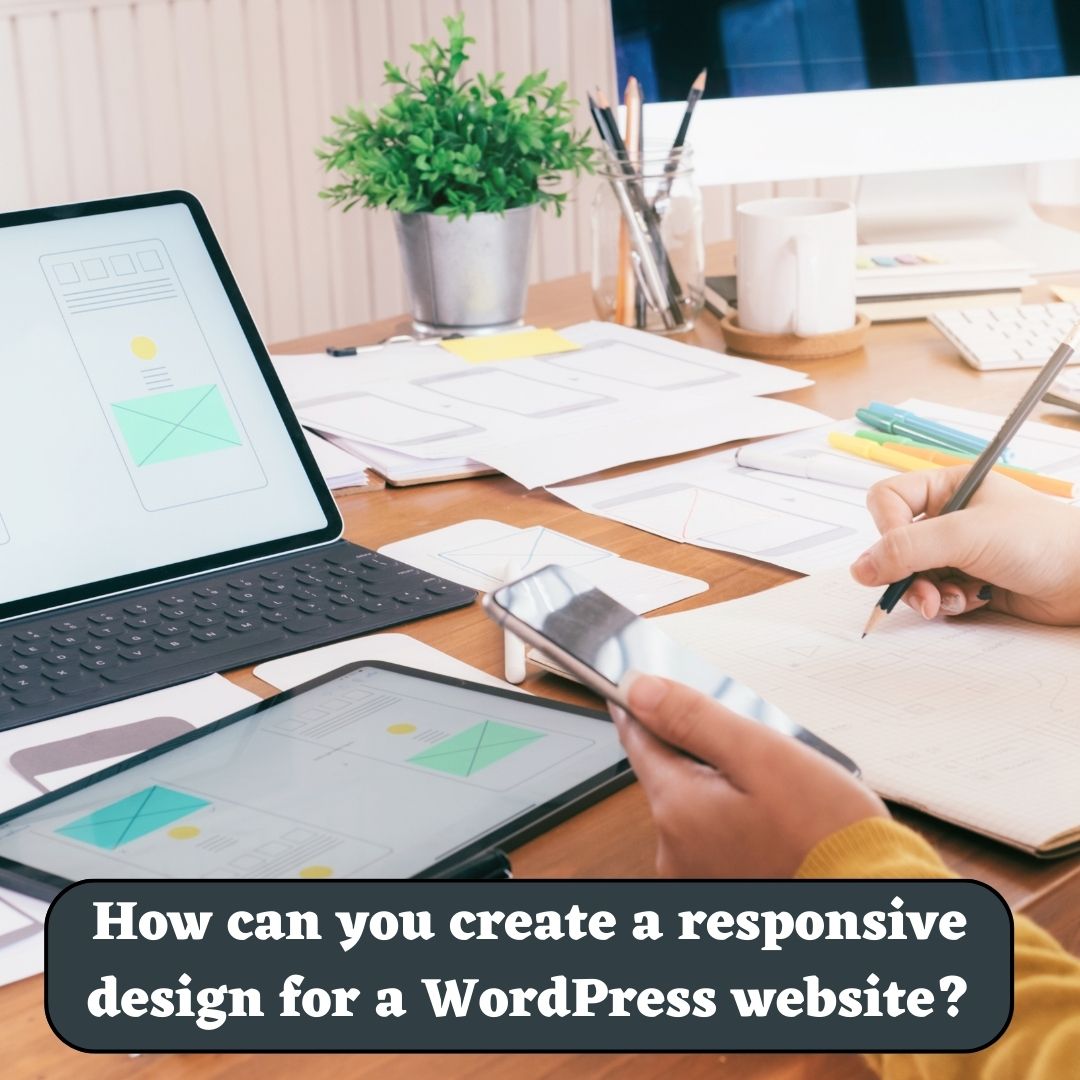
How can you create a responsive design for a WordPress website?

In this article we are going to talk about How can you create a responsive design for a WordPress Website? In today’s mobile-focused world, a responsive design for your WordPress website is crucial. Responsive design ensures that your website adapts seamlessly to various screen sizes and devices, providing an optimal user experience.

How can you create a responsive design for a WordPress website?

In this article, we will delve into the key aspects of creating a responsive design for your WordPress website. From selecting a responsive theme to implementing media queries, flexible grids, and optimizing images, we will cover everything you need to know to make your website look great on any device.

I. Choosing a Responsive Theme

The first step in creating a responsive design for your WordPress website is selecting a responsive theme. A responsive theme is designed to automatically adjust and adapt to different screen sizes, ensuring your website looks good on desktops, tablets, and smartphones. When browsing for themes, look for those labeled as “responsive” or “mobile-friendly.” Take into account factors such as design aesthetics, customization options, and plugin compatibility while choosing a responsive theme that aligns with your website’s goals.

II. Implementing Responsive Design Techniques

1. Fluid Grid System

A fluid grid system is the foundation of a responsive design. It enables your website’s layout to adjust proportionally to different screen sizes. Use CSS frameworks like Bootstrap or Foundation, which offer pre-built grid systems, to create a responsive layout for your WordPress theme. These frameworks provide a grid-based structure that automatically adjusts the placement and sizing of elements based on screen size. By utilizing a fluid grid system, you can ensure that your website’s layout maintains its integrity across various devices.

2. Media Queries

Media queries let you customize CSS styles based on the screen size of the device. By defining breakpoints and applying appropriate styles, you can ensure that your website’s layout, typography, and images adapt to different devices effectively. CSS3 provides excellent support for media queries, making it easy to implement responsive design techniques. Media queries allow you to specify rules for specific screen sizes, such as targeting smaller screens with simplified navigation or adjusting font sizes for better readability. By utilizing media queries effectively, you can create a truly responsive experience for your website visitors.

Read Also: How can you create a contact form on a WordPress website?

3. Flexible Images

Images are important in web design and should adjust to fit different screen sizes. Use CSS techniques such as max-width: 100% to ensure images scale proportionally within their container without overflowing or distorting the layout. Additionally, consider using responsive image solutions like the srcset and sizes attributes or plugins like “WP Responsive Images” to serve appropriately sized images to different devices, reducing load times and improving performance. Responsive images allow your website to deliver the right image size based on the user’s device, ensuring optimal visual experience without compromising performance.

How To Design A Website Using WordPress

4. Mobile-First Design Approach

To ensure a truly responsive design, adopting a mobile-first approach is recommended. This approach means starting with mobile design and gradually improving it for larger screens. By prioritizing mobile design, you can focus on essential content and optimize the user experience for smaller screens. This approach also encourages a streamlined design and faster load times, benefiting both mobile and desktop users.

Read Also: How to optimize the speed and performance of a WordPress website?

III. Testing and Optimization

Once you have implemented the responsive design techniques, thorough testing is crucial to ensure your website performs flawlessly on various devices. Test your website on different browsers, screen sizes, and devices to identify any issues and make necessary adjustments. Emulate different devices using browser developer tools or consider using real devices for testing.

Optimize your website’s performance by minifying CSS and JavaScript files, compressing images, and leveraging caching techniques. Tools like Google PageSpeed Insights can provide insights and recommendations for optimizing your website’s speed and performance. Additionally, prioritize accessibility by ensuring that your website is usable by individuals with disabilities and compliant with accessibility guidelines.

Create A Responsive Design For A WordPress Website

Conclusion

 Creating a responsive design for your WordPress website is essential to deliver a seamless user experience across devices. By selecting a responsive theme, implementing responsive design techniques such as fluid grids, media queries, flexible images, and adopting a mobile-first approach, and conducting thorough testing and optimization, you can ensure your website looks and functions beautifully on any screen size. Embracing responsive design will not only improve user engagement but also contribute to better search engine rankings and increased conversions. Start implementing these techniques today and unlock the full potential of your WordPress website in the mobile era. So, Now I hope you have understood about create a responsive design for a WordPress website.

You can also checkout this website designing institute to learn digital marketing course by enrolling in our course Or Contact Digital Bikana on +91-8949483728
How can you create a contact form on a WordPress website?

In this article we are going to talk about How can you create a contact form on a WordPress website? Having a contact form on your WordPress website is essential for effective communication with your audience. It allows visitors to reach out to you easily and provides a convenient way for you to collect inquiries, feedback, or other important information.

How can you create a contact form on a WordPress website?

In this comprehensive guide, we will walk you through the process of creating a contact form on your WordPress website, from selecting the right plugin to customizing form fields and integrating it seamlessly. By following these steps, you can create a professional and user-friendly contact form that enhances engagement and improves communication with your visitors.

1. Choosing a Contact Form Plugin

The first step in creating a contact form on your WordPress website is to select a suitable contact form plugin. There are several popular options available, including Contact Form 7, WPForms, Gravity Forms, Ninja Forms, and Formidable Forms. Consider factors such as ease of use, features, flexibility, support, and compatibility with your theme and other plugins when making your choice.

2. Installing and Activating the Plugin

Once you have chosen a contact form plugin, you need to install and activate it on your WordPress website. To do this, navigate to your WordPress admin dashboard, go to “Plugins,” and click on “Add New.” Search for the chosen plugin, install it, and activate it. This will add the necessary functionality to your website to create and manage contact forms.

3. Creating a Contact Form

After activating the plugin, you can start creating your contact form. Access the plugin settings or dashboard, typically found in the left sidebar of your WordPress admin panel. Look for the option to create a new form and follow the step-by-step process provided by the plugin. Most contact form plugins offer a user-friendly interface with drag-and-drop functionality, making it easy to add and arrange form fields according to your needs.

Create A Contact Form On A WordPress Website Using html And CSS

4. Customizing Form Fields and Settings

To make your contact form more personalized and relevant, you can customize the form fields and settings. Modify the labels, add placeholders, specify required fields, and set up email notifications to receive inquiries directly in your inbox. Take advantage of any additional settings offered by the plugin, such as enabling CAPTCHA or spam protection measures to enhance the security of your contact form.

Read Also: How can you create different types of content in WordPress?

5. Styling the Contact Form

To ensure your contact form aligns with your website’s design and branding, you can style it to match your overall aesthetic. Many contact form plugins provide customization options for colors, fonts, sizes, and layouts. Some plugins even offer pre-designed templates or themes that you can apply with a single click, saving you time and effort in designing your form.

6. Integrating the Contact Form

Once you have customized the form, it’s time to integrate it into your WordPress website. Most contact form plugins offer a shortcode or a block that you can insert into your desired page or post. Simply copy the shortcode provided by the plugin and paste it into the content area of the page or post where you want the contact form to appear. Alternatively, some plugins automatically generate a contact page for you, which you can link to from your website’s menu or footer.

7. Testing and Managing Contact Form Submissions

Before making your contact form live, it’s crucial to test it thoroughly. Submit test inquiries and ensure that all form fields are functioning correctly, and notifications are being sent to the designated email address. Check if the emails are delivered promptly and that the content of the inquiries is displayed correctly. Familiarize yourself with the plugin’s interface for managing contact form submissions, where you can view, reply to, or export messages for further analysis.

Read Also: What are Permalinks in WordPress and How can you customize them?

8. Enhancing Contact Form Functionality

Depending on your specific requirements, you may want to extend the functionality of your contact form. Explore the advanced features offered by your chosen plugin, such as file uploads, conditional logic (show/hide fields based on user input), multi-page forms, integration with CRM tools, or third-party integrations with email marketing services. Assess your needs and consider incorporating these features to enhance the capabilities of your contact form and streamline your communication process.

Create A Contact Form On A WordPress Website

Conclusion

Creating a contact form on your WordPress website is a straightforward process with the right plugin and careful customization. By following the step-by-step guide provided in this article`, you can create a professional and user-friendly contact form that enhances communication with your audience. Regularly test and manage contact form submissions to ensure a seamless experience for users. A well-designed contact form not only facilitates easy communication but also improves user engagement and helps you gather valuable feedback and inquiries from your website visitors. So, Now I hope you have understood about how can we create a contact form on a WordPress website.

You can also checkout this website designing institute to learn digital marketing course by enrolling in our course Or Contact Digital Bikana on +91-8949483728

What are Permalinks in WordPress and How can you customize them?

In this article we are going to talk about What are Permalinks in WordPress and How can you customize them? In the world of WordPress websites, the term “permalinks” holds significant importance. Permalinks refer to the permanent URLs that represent individual pages, posts, and other content on your website. Understanding the concept of permalinks and learning how to customize them is essential for optimizing your website’s search engine visibility, improving user experience, and creating more readable and memorable URLs.

What are Permalinks in WordPress and How can you customize them?

In this comprehensive article, we will delve into the details of permalinks in WordPress, explore their significance, and provide a step-by-step guide on customizing them to suit your needs.

What are Permalinks?

Permalinks, short for permanent links, serve as the unique and unchanging web addresses that point to specific pages, posts, or content on your WordPress website. They are designed to be permanent, allowing users to access your content even after an extended period. By default, WordPress generates permalinks based on a structure that may include post IDs, dates, and post names. However, these default options may not be the most user-friendly or search engine optimized.

Importance of Customizing Permalinks

Customizing permalinks is crucial for several reasons. First and foremost, it improves the readability and usability of your website’s URLs. By creating clean, descriptive, and human-readable permalinks, you make it easier for visitors to understand and remember the address of a particular page or post. Additionally, customizing permalinks can have a positive impact on your search engine optimization (SEO) efforts. Search engines prefer concise and keyword-rich URLs that accurately reflect the content of a page or post. Optimized permalinks can contribute to better search engine rankings and increased organic traffic to your website.

Read Also: What are Custom Fields in WordPress and how can you use them?

Accessing Permalink Settings in WordPress

To customize permalinks in WordPress, navigate to your WordPress admin dashboard and click on “Settings.” From the drop-down menu, select “Permalinks.” This will take you to the Permalink Settings page, where you can make changes to the structure of your website’s URLs.

Choosing a Permalink Structure

WordPress offers several permalink structure options to choose from. These options include Plain, Day and Name, Month and Name, Numeric, and Post Name. While each option has its advantages, the “Post Name” structure is often recommended due to its simplicity and SEO-friendliness. It creates clean URLs that incorporate the post or page title and can improve the visibility of your content in search engine results.

Customize Them In Permalinks In WordPress Website

Customizing Permalink Structure

If none of the predefined permalink structures suit your requirements, WordPress allows you to customize the permalink structure using the “Custom Structure” option. This feature enables you to define your preferred permalink format using specific placeholders or tags. WordPress provides various placeholders that can be included in your custom permalink structure, such as %postname% (post or page slug), %post_id% (unique post or page ID), %category% (post category), and more. You can combine these placeholders to create a permalink structure that best aligns with your content and SEO goals.

Read Also: How can you create different types of content in WordPress?

Best Practices for Customizing Permalinks

When customizing permalinks, it’s essential to adhere to certain best practices. Firstly, ensure that your permalink structure is logical, descriptive, and relevant to the content it represents. Incorporate relevant keywords naturally in your permalinks to enhance their SEO value, but avoid keyword stuffing, which can harm your rankings. Keep permalinks concise and avoid excessive length, as shorter URLs tend to be more user-friendly. Consider the impact of permalink changes on your existing content, as altering permalinks for established pages and posts can result in broken links and loss of traffic. Implementing 301 redirects or using plugins to handle such changes can mitigate these issues.

Updating Existing Content

Customizing permalinks affects new content automatically, but existing content retains their original URLs. To update existing content with the new permalink structure, you can utilize plugins such as “Regenerate Permalinks” or manually update the permalinks for each individual page or post. This step ensures consistency across your website and avoids confusion for users and search engines.

Permalinks In Your WordPress Dashboard

Conclusion

Permalinks play a vital role in shaping the structure and accessibility of your WordPress website’s URLs. Customizing permalinks allows you to create user-friendly, descriptive, and SEO-optimized URLs that improve the visibility of your content and enhance user experience. By following the step-by-step guide provided in this article and adhering to best practices, you can effectively customize permalinks in WordPress and set your website on the path to greater search engine visibility and improved user engagement. Remember, thoughtful permalink customization is an essential aspect of building a successful WordPress website. So, Now I hope you have understood about the What are Permalinks in WordPress and How can we customize them.

You can also checkout this website designing institute to learn digital marketing course by enrolling in our course Or Contact Digital Bikana on +91-8949483728

How can you create different types of content in WordPress?

In this article we are going to talk about How can you create and manage different types of content in WordPress, such as pages and blog post? WordPress is a versatile content management system that allows you to create and manage various types of content, including pages and blog posts. Understanding how to effectively utilize these content types is crucial for building a successful website.

How can you create and manage different types of content in WordPress, such as pages and blog posts?

In this comprehensive guide, we will explore the process of creating and managing different types of content in WordPress. From structuring your website with pages to engaging your audience with blog posts, we will cover everything you need to know to harness the full potential of WordPress as a content management platform.

1. Pages

Creating Structured Content:

Pages in WordPress are used for creating static and hierarchical content that forms the backbone of your website. Here’s how you can create and manage pages effectively:

a. Creating Pages

In the WordPress dashboard, go to “Pages” and select “Add New.” Enter a title for your page and use the content editor to add text, images, and other media. You can also choose page attributes, such as parent pages, templates, and featured images.

b. Organizing Pages

WordPress allows you to create a hierarchical structure by setting parent and child pages. This helps in organizing and categorizing your content, especially for websites with a large number of pages. Rearrange the page order using drag-and-drop functionality.

Read Also: What are widgets and how can you use them in WordPress website designing?

c. Customizing Page Templates

Many WordPress themes provide pre-designed page templates that offer different layouts and functionalities. Selecting an appropriate template can enhance the visual appeal and functionality of your pages.

d. Publishing and Managing Pages

Once you have created a page, you can preview it, save it as a draft, or publish it to make it live on your website. You can also manage pages by editing, updating, or deleting them as needed.

2. Blog Posts

Engaging with Dynamic Content

Blog posts are dynamic content entries that are displayed in reverse chronological order on your website’s blog page. Here’s how you can create and manage blog posts effectively:

a. Creating Blog Posts

In the WordPress dashboard, navigate to the “Posts” section and click on “Add New.” Enter a title for your blog post and use the content editor to add text, images, and other media. You can also categorize and tag your blog posts for easier navigation and organization.

b. Formatting and Styling

Use the content editor to format your blog posts by applying headings, lists, bold or italic text, and other formatting options. You can also add featured images to make your posts visually appealing when displayed in blog feeds.

Read Also: Best practices for designing the header and footer of a WordPress website

c. Publishing and Scheduling

Once you have created a blog post, you can choose to publish it immediately or schedule it for a future date and time. This allows you to plan and automate your content publishing strategy.

d. Managing Blog Posts

WordPress provides various tools to manage your blog posts efficiently. You can edit, update, or delete posts, as well as manage comments and trackbacks for each individual post.

Content In WordPress Such As Pages And Blog Posts

3. Categories and Tags

Organizing Content

Categories and tags are taxonomies that help organize and categorize your content effectively. They allow users to navigate through related content and improve the overall user experience.

a. Categories

Categories provide a broad classification system for grouping similar content. Create categories that align with the main topics or themes of your website. Assign relevant categories to your blog posts to help users find related content easily.

b. Tags

Tags provide a more specific way to describe and label your content. Unlike categories, tags are not hierarchical. Add relevant tags to your blog posts to provide additional context and improve searchability.

4. Content Management Tips

To effectively manage your content in WordPress, consider the following tips:

a. Use a Content Calendar

Plan and organize your content creation and publishing schedule using a content calendar. This helps maintain consistency and avoid content gaps.

b. Maintain a Consistent Writing Style

Develop a consistent tone, writing style, and formatting for your content to create a cohesive brand identity.

c. SEO Optimization

Optimize your content for search engines by incorporating relevant keywords, writing meta descriptions, and optimizing headings and URLs.

d. Use Visual Media

Enhance your content with high-quality images, videos, infographics, or other visual media to make it more engaging and shareable.

5. Plugins for Content Management

WordPress offers a wide range of plugins to enhance your content management capabilities. Here are a few popular plugins:

a. Yoast SEO

This plugin helps optimize your content for search engines by providing suggestions for improving readability, keyword usage, meta tags, and more.

b. Akismet

Akismet is a powerful anti-spam plugin that filters out spam comments on your blog posts, keeping your website’s comments section clean and manageable.

c. Editorial Calendar

This plugin provides a visual calendar interface within WordPress, allowing you to plan, schedule, and manage your content easily.

d. Jetpack

Jetpack offers a suite of features to enhance content management, including site stats, social media sharing, automated social media posting, and more.

How To Create And Manage Different Types Of Content In WordPress

Conclusion:

Creating and managing different types of content in WordPress is a fundamental aspect of building a successful website. Whether you’re structuring your website with pages or engaging your audience with blog posts, understanding the process and utilizing the available tools is essential. Use pages to create static and hierarchical content, and leverage blog posts to engage users with dynamic and timely information.

Organize your content using categories and tags to improve navigation and user experience. Employ content management tips, such as using a content calendar and maintaining a consistent writing style. Additionally, consider using plugins to optimize your content for search engines, manage spam comments, and enhance your content management capabilities. By effectively creating and managing content in WordPress, you can build a compelling and user-friendly website that resonates with your audience. So, Now I hope you have understood about create and manage different types of content in WordPress, such as pages and blog posts?

You can also checkout this website designing institute to learn digital marketing course by enrolling in our course Or Contact Digital Bikana on +91-8949483728

How can you create a sitemap for a WordPress website?

In this article we are going to talk about How can you create a sitemap for a WordPress website? A sitemap is a crucial component of any website, as it provides a hierarchical structure and helps search engines understand the organization and content of your site. Creating a sitemap for your WordPress website is essential for search engine optimization (SEO) and improving overall visibility.

How can you create a sitemap for a WordPress website?

In this comprehensive guide, we will explore the process of creating a sitemap for a WordPress website, covering different methods and popular plugins available.

1. Understanding the Importance of a Sitemap

A sitemap is a file that lists all the pages, posts, and other content on your website in a structured format. It serves as a roadmap for search engines, enabling them to crawl and index your site more effectively. By creating a sitemap, you enhance your website’s discoverability, increase the chances of higher rankings on search engine results pages (SERPs), and ensure that all your content is accessible to both users and search engine bots.

2. Manual Creation of XML Sitemap

a. Analyzing Website Structure

Start by assessing your website’s structure and content organization. Identify the main sections, pages, categories, and tags that should be included in your sitemap.

b. Generating XML Sitemap

Once you have a clear understanding of your website’s structure, you can create an XML sitemap manually. Begin by using a plain text editor or XML editor to create a new file named “sitemap.xml.” Structure the file using XML markup, including the necessary tags such as <url>, <loc>, <lastmod>, and <changefreq>. Manually list each URL of your website, along with its relevant metadata, within the appropriate tags.

Read Also: How can you create and manage a menu in WordPress?

c. Submitting Sitemap to Search Engines

After creating the XML sitemap, you need to submit it to search engines for indexing. Sign in to your Google Search Console account (previously known as Google Webmaster Tools) and add your website. Then, access the “Sitemaps” section and submit your sitemap.xml file.

Sitemap For A WordPress Website

3. Using Sitemap Plugins

a. Installing a Sitemap Plugin

WordPress offers several plugins that can automatically generate and update your sitemap. A popular choice for implementing breadcrumbs is the “Yoast SEO” plugin. Install and activate the plugin from your WordPress admin dashboard by navigating to “Plugins” and selecting “Add New.”

b. Configuring the Plugin

After activating the plugin, go to the plugin settings page. In the Yoast SEO plugin, navigate to the “SEO” tab and select “General.” Click on the “Features” tab and enable the “XML Sitemaps” feature. Save your changes.

c. Generating and Submitting Sitemap

Once the plugin is configured, it will automatically generate a sitemap for your WordPress website. Access the sitemap by appending “/sitemap_index.xml” to your website’s URL (e.g., www.yourwebsite.com/sitemap_index.xml). Copy this URL and submit it to search engines like Google Search Console and Bing Webmaster Tools.

4. Sitemap Best Practices

a. Keep the sitemap up to date

Whenever you add or remove content from your website, update your sitemap accordingly to ensure search engines have the latest information.

b. Include all important pages

Ensure that all critical pages, including posts, pages, categories, tags, and any other relevant content, are included in the sitemap.

c. Limit the number of URLs

Ideally, a sitemap should contain a maximum of 50,000 URLs or 50MB in size. If your website exceeds these limits, split the sitemap into multiple files and create a sitemap index file to reference them.

d. Use priority and frequency tags

Use the <priority>and <changefreq> tags in your XML sitemap to provide search engines with hints about the importance and frequency of updates for each URL.

Read Also: What are some best practices for Organizing and Structuring content in WordPress?

e. Include images and videos

If your website includes multimedia content such as images or videos, consider adding them to your sitemap using the appropriate <image> and <video> tags.

f. Test your sitemap

Regularly check your sitemap for errors or issues using online XML sitemap validators or SEO auditing tools.

How Can You Create A Sitemap For A WordPress Website

Conclusion

Creating a sitemap for your WordPress website is a crucial step in optimizing your site for search engines and improving visibility. Whether you choose to manually create an XML sitemap or utilize a plugin like Yoast SEO, the process is relatively straightforward. By following the best practices outlined in this comprehensive guide, you can ensure that your sitemap accurately represents your website’s structure and content, aiding search engine crawlers and enhancing your SEO efforts. Regularly update and submit your sitemap to search engines, and monitor its performance to ensure optimal indexing and discoverability of your WordPress website. So, Now I hope you have understood about how can we create a sitemap for a WordPress website.

You can also checkout this website designing institute to learn digital marketing course by enrolling in our course Or Contact Digital Bikana on +91-8949483728